
Add Meta Pixel to Google Tag Manager
Google Tag Manager is a free service provided by Google that organizes tracking codes and other tags in a single container. This allows you to place the container code on your website once and maintain its contents from a Google dashboard.
In this article, you will learn how to create a Google Tag Manager account, add a Meta Pixel code to it, and publish the Tag container.
Create a Tag Manager Account
Follow the instructions from Google Support documentation to create a Tag Manager account and a container for your webinar pages.
- Read: Set up and install Tag Manager (Google Support)
- Choose the container type Web and AMP
When the setup is complete, Tag Manager provides you with two code snippets. (See the following example)
![]()
Close the Install window with no further action.
Create a Trigger

- In the Tag Manager workspace, go to Triggers > New
- Click anywhere in the configuration module to edit the trigger
- Choose trigger type. For this tutorial, select Page View> Page View.
Configure Page URL Event

- Select This trigger fires on Some Page Views
- Select Page URL > contains from the trigger conditions drop-down fields
- Enter https://event.webinarjam.com/registration/thank-you/ in the final condition field
- Click the plus icon on the right to add a second rule
Important: The URL specified is correct for both WebinarJam and EverWebinar events. Both applications generate page links at event.webinarjam.com.
Configure Referrer Event
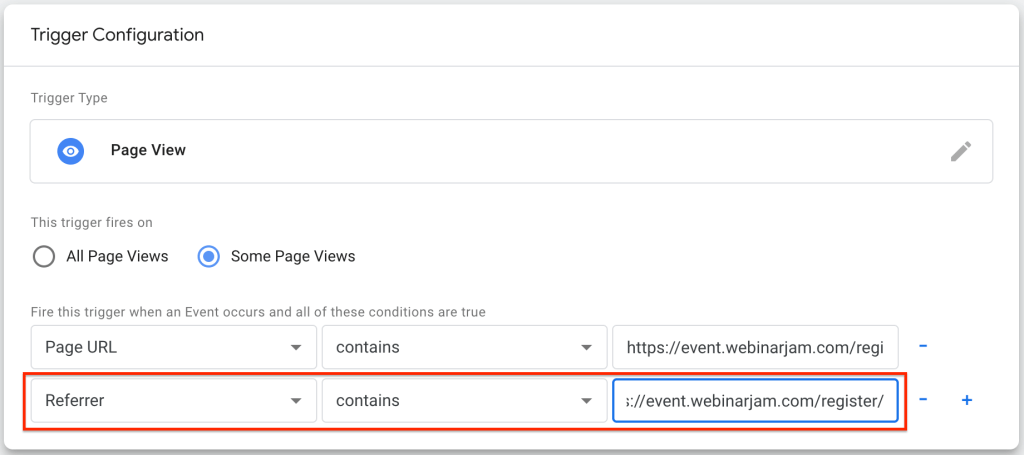
Add a second event in the same Trigger Configuration window:
- Select Referrer > contains from the trigger conditions drop-down fields
- Enter https://event.webinarjam.com/register/ in the final condition field
- Name and save the trigger
Important: The URL specified is correct for both WebinarJam and EverWebinar events. Both applications generate page links at event.webinarjam.com.
Add a Tag to the Container
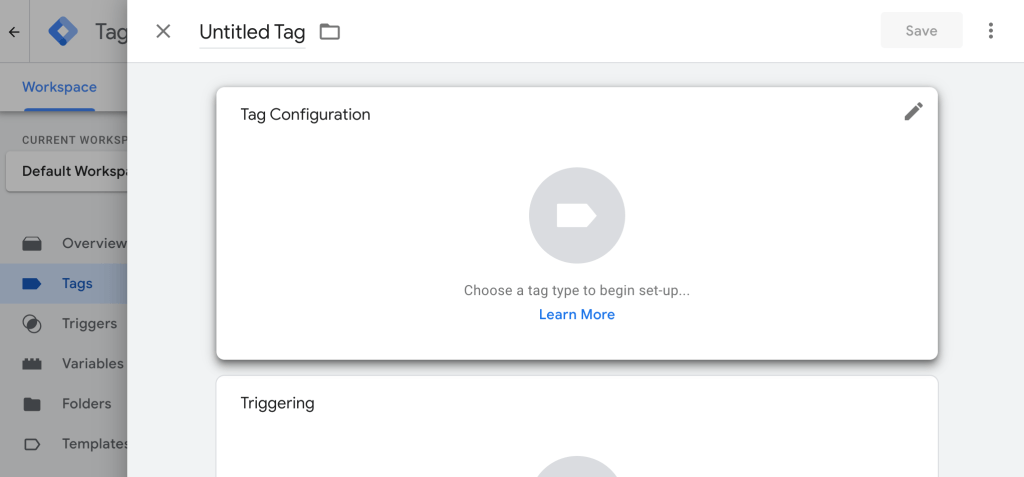
In the Tag Manager workspace, go to Tags > New
Click anywhere in the Tag Configuration box to edit the tag
![]()
- Choose Custom HTML as the tag type
- Paste a Meta Pixel or other tracking code into the HTML frame
- Pro tip: Meta Pixel code is used in this example, but this process is the same to add any other tag or custom HTML you wish to manage in the Google Tag Manager.
- In the same Custom HTML window, click Advanced Settings
- From the Tag firing options drop-down, select Once per page
Click anywhere in the Triggering box to select a trigger
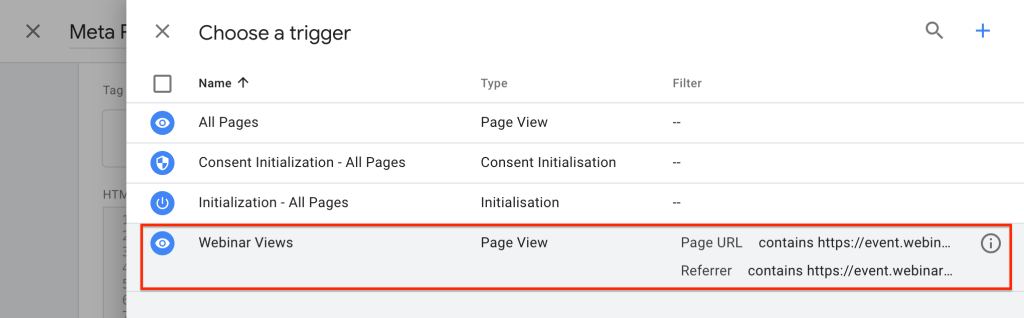
- Choose the Page View trigger created earlier in this tutorial
- Name and save the trigger
Publish Container
To complete the setup and publish your changes, click Submit in the upper right corner of the Google Workspace
- Add a version name and description (Optional)
- Click Publish