
Registration embed code
This article is for WebinarJam and EverWebinar.
Use a code snippet to embed your webinar registration form on an external web page. The embed code lets you turn any page into a custom registration page.
Embedded code requires basic HTML and CSS coding skills and access to the source code of the page where you want to put it.
Get Embed Code
In WebinarJam or EverWebinar:
- Look for the webinar you want to start promoting registration for
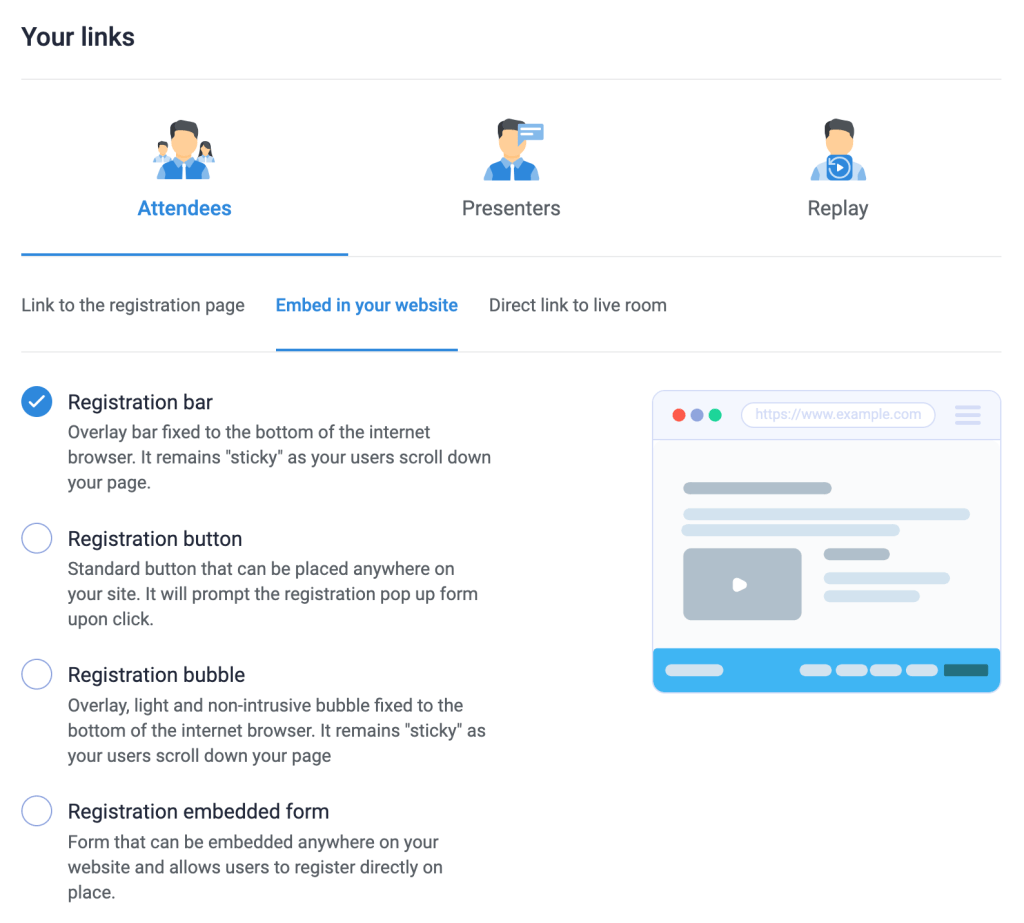
- Click Your links
- Under Attendees, click Embed in your website
- Choose a format for the embedded element:
- Floating bar with pop-up form
- Static button with pop-up form
- Floating bubble pop-over with pop-up form
- Static in-line form
- Copy the code snippet below the customization options for each element type to get the embed code
IMPORTANT: Embed only one registration code in your external page. Multiple snippets in the same page can cause a conflict in the code.
Customize Embed Elements
Registration bar
The registration bar is a floating page footer with a countdown timer. The form to collect a registrant’s information is triggered with a button click. The bar stays sticky at the bottom of your page even as it scrolls.
- Customize the description and button text, the bar and button color, and the style of the pop-up registration form.
The registration button triggers a registration form pop-up on click. Insert the button code anywhere in the page content where you what to prompt a prospect to sign up.
- Customize the button text, color, size, shape, border, and shadow. Select a style for the pop-up registration form.
Registration bubble
The registration bubble is a floating icon and pop-over window that appear in the bottom corner of the page that can be closed and reopened. The pop-over contains information about the webinar and a button to register. Clicking the button opens the registration form.
The registration bubble code contains parameters that can be used to customize the appearance of the pop-over.
Custom Style Parameters
Style parameters are separated in the embed code by an ampersand (&) character. For example:

Modify the code to edit each parameter according to your preferred styling.
| Style Element | Parameter | Default Value | Custom Value Guide |
| Button Text | buttonText | Register | Text |
| Button Color | buttonBgColor | #29b6f6 | Hex code for preferred color, URL-encoded |
| Button Opacity | buttonBgOpacity | 0.95 (95%) | Decimal value between 0 and 1 to set opacity percentage |
| Bar Color | barBgColor | #ffffff | Hex code for preferred color, URL-encoded |
| Bar Opacity | barBgOpacity | 1 (100%) | Decimal value between 0 and 1 to set opacity percentage |
| Pop-up Form Style | formTemplate | 2 | Template ID. Enter a template ID: 2, 4, 6, 8 |
| Pop-up Form Color | formColor | 1 | Color variation ID. Enter a variation ID: 1, 2, 3, 4, 5, 6 |
Registration embedded form
The registration form is a simple opt-in form that appears directly in the page without a pop-up.
Customize the style of the embedded registration form with parameters:
| Style Element | Parameter | Default Value | Custom Value Guide |
| Button Text | formButtonText | Register | Text |
| Accent Color (Button and “Convert to another timezone” text) | formAccentColor | #29b6f6 | Hex code for preferred color, URL-encoded |
| Accent Opacity(Button and “Convert to another timezone” text) | formAccentOpacity | 0.95 (95%) | Decimal value between 0 and 1 to set opacity percentage |
| Background Color | formBgColor | #ffffff | Hex code for preferred color, URL-encoded |
| Background Opacity | formBgOpacity | 1 (100%) | Decimal value between 0 and 1 to set opacity percentage |
Style Parameter Notes
-
All text, spaces and “#” symbols must be URL-encoded. For example, the
#symbol is%23, a blank space is+, etc.