WebinarJam and EverWebinar User Documentation Webinars for everyone!

Zapier

This article is for WebinarJam and EverWebinar.

Before Getting Started

  • An API key is required to allow Zapier to communicate with your account. If you are not already approved to use the WebinarJam / EverWebinar API, apply for a key.
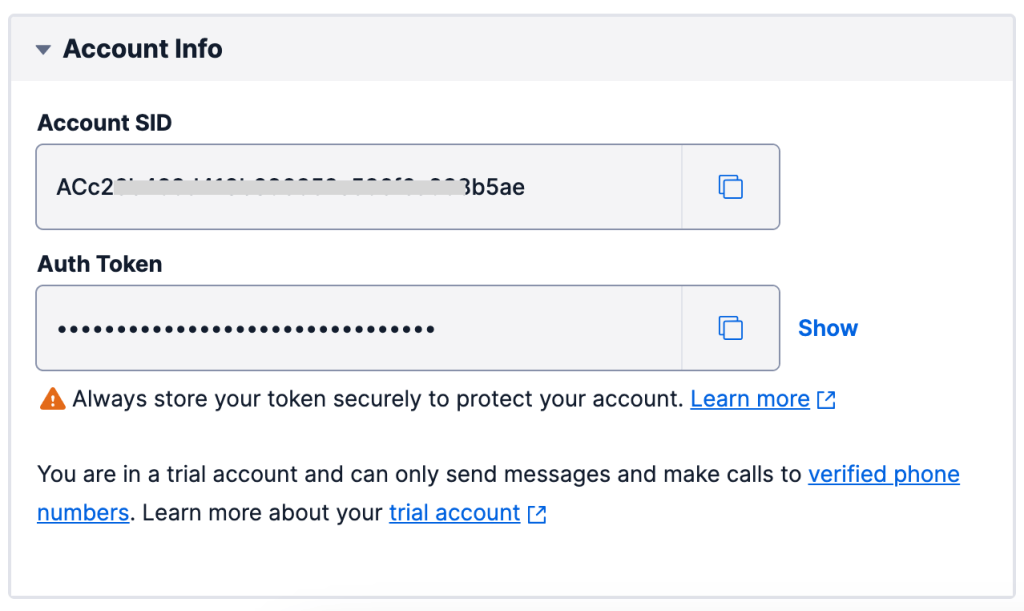
  • Access to the API is not available for trial accounts. To access an API key for use with Zapier, upgrade to a paid plan if needed.

Overview

Zapier is a tool that lets you automate workflows between web applications that are otherwise unrelated. This article describes the process of creating automation between WebinarJam or EverWebinar and many third-party applications using Zapier.

Popular automations to try:

  • Send registrants to an autoresponder not in our integration list
  • Tag registrants in an autoresponder not in our integration list
  • Add new registrants to a Google Sheets Spreadsheet
  • Send yourself a notification when someone registers
  • Send registrants a survey or form for additional information
  • Add registrants to an SMS service for additional messaging
  • Create Trello boards for follow-up services
  • Create tasks with Project Management Programs
  • Create a purchase (for sending a free follow-up file)

Zapier Resources

Zapier is a third-party program and cannot be supported in-depth by the WebinarJam team. For detailed information about Zapier and how to set up your Zaps, refer to the Zapier knowledge base:


Start a Zap and Connect WebinarJam / EverWebinar

Before starting, review some basic concepts:

ONE TIME: Zapier does not have a mechanism to keep items in sync after the first time they run through a Zap. Think of Zapier like a one-way, one-time pipeline.

ONE TRIGGER: Zaps are triggered by a single event. If you want the same action to happen based on multiple triggers, create a separate Zap for each unique trigger.

NEW DATA ONLY: Zaps cannot see data that was created before your Zap was turned on. Zaps are triggered by events that happen after the Zap is turned on – in other words, by data that is newly added. To force Zapier to process data that existed before your Zap, refer to this article on bulk importing existing data into zaps.

Create a Zap

Log in to the Zapier dashboard and select your preferred creation method. This article describes the Classic process.

If not already selected, click Classic view in the dashboard to follow this article.

Zapier dashboard classic view

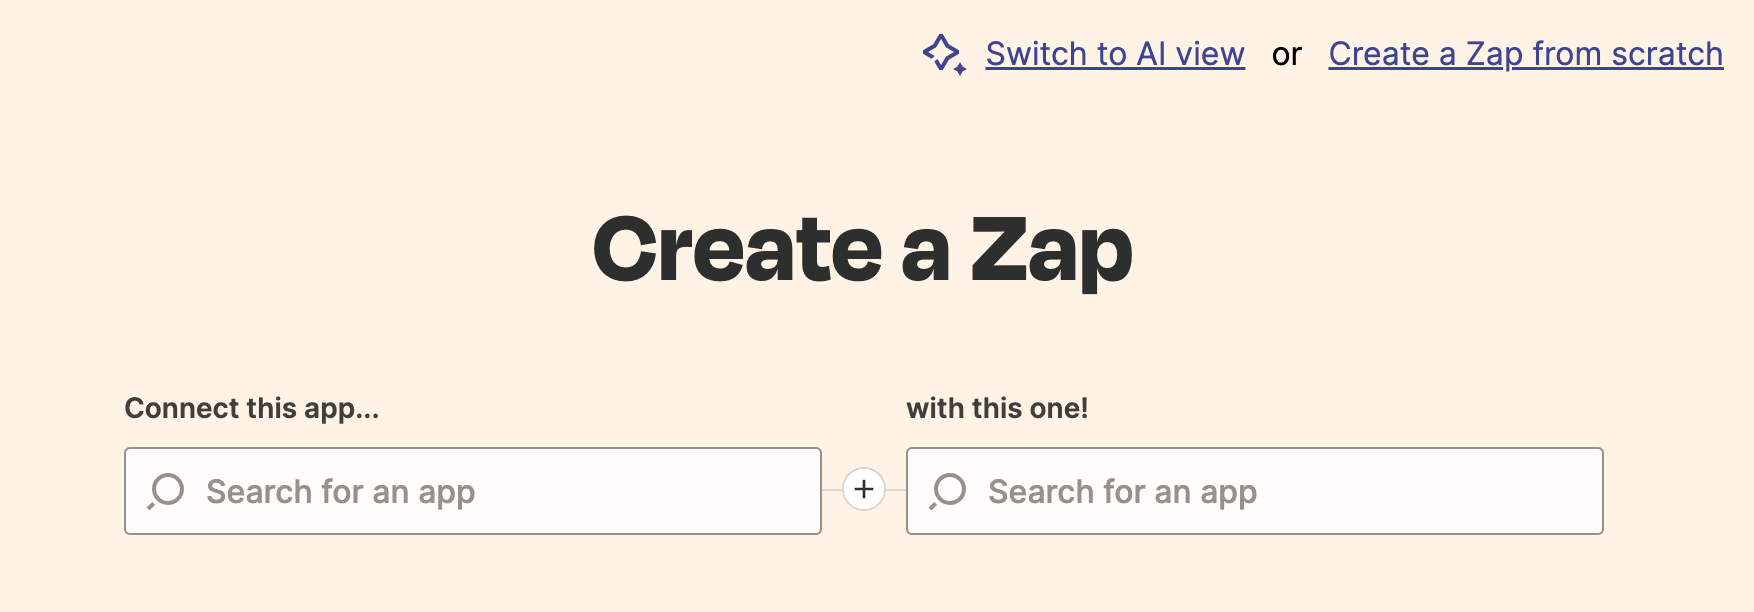
To set up a Zap, four parameters are defined:

1) Connect this app → 2) with this one!

3) When this happens → 4) then do this!

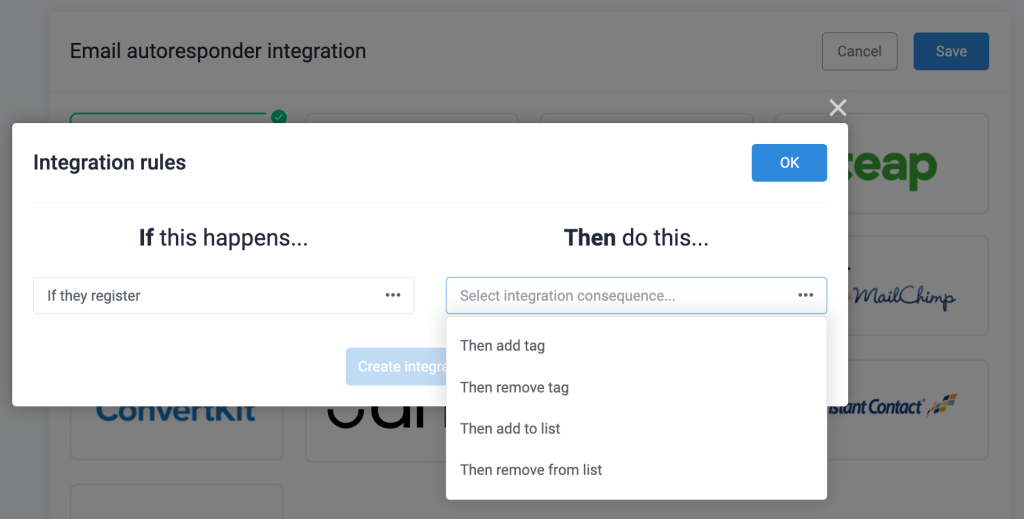
Zaps are IF/THEN automation rules. They create automatic processes that trigger when one event happens (IF) and initiate a follow-up action in response (THEN)

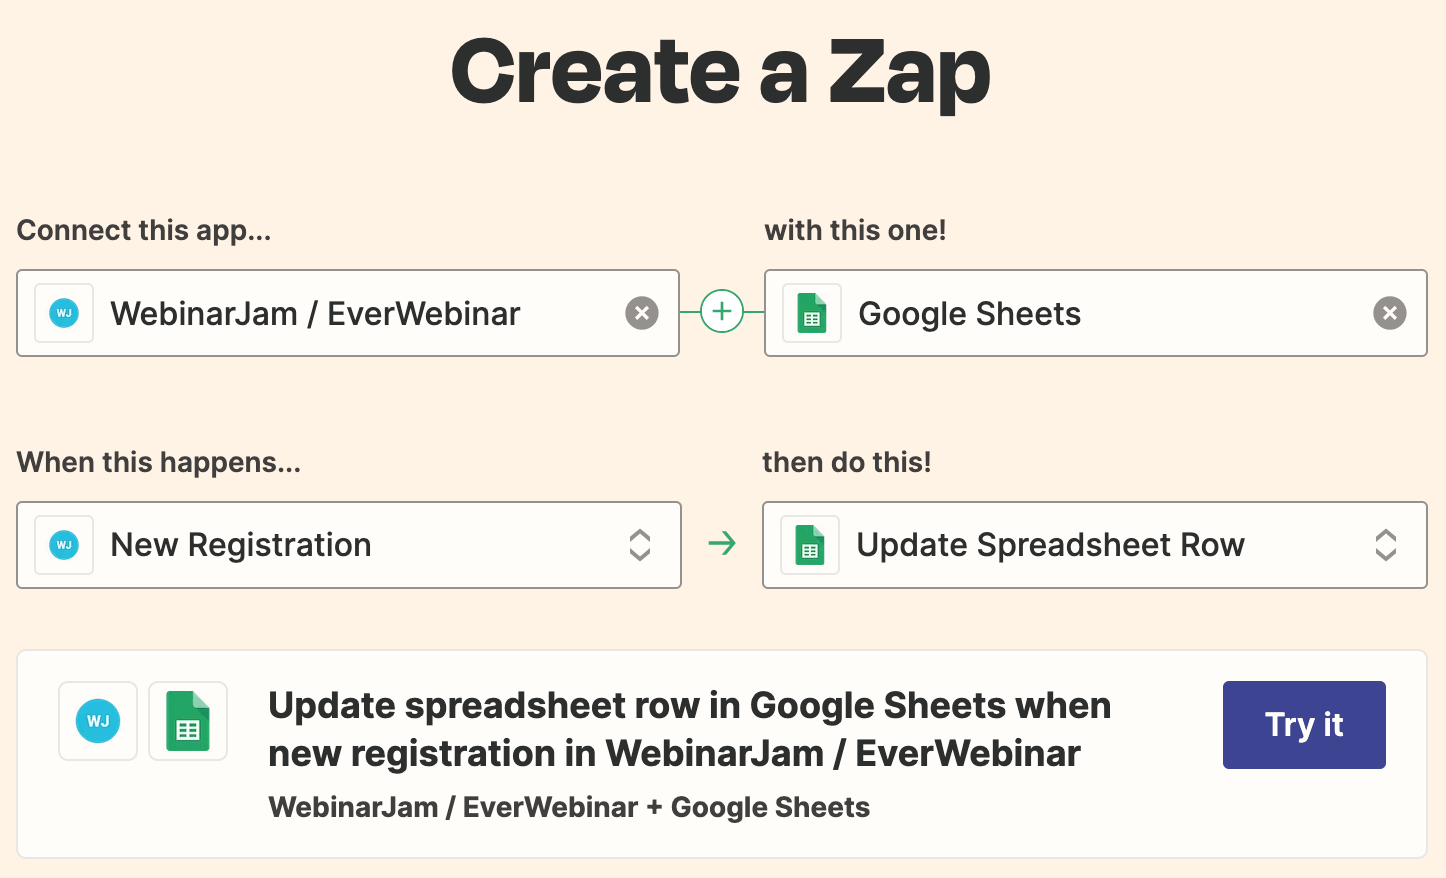
  1. Under Connect this app… search for WebinarJam / EverWebinar
  2. Under with this one! Search for the app where you want to send information
  3. Under When this happens… select a WebinarJam or EverWebinar event to trigger the Zap
  4. Under then do this! Select an action to occur in the destination app you selected

WebinarJam / EverWebinar Triggers

Available WebinarJam / EverWebinar triggers include:

Trigger Timing Description
New Live Attendee Immediate Triggers when a registrant joins a live webinar.
Registrant Joins Webinar After After session Triggers if a registrant was late for a live webinar.
Registrant Misses Webinar After session Triggers if a registrant missed the live webinar.
New Registration Immediate Triggers when a user registers for a webinar.
Registrant Attends Replay Immediate Triggers when a registrant joins the webinar replay.
Registrant Leaves Before After session Triggers if a registrant left the live webinar before a specific timestamp.
Registrant Purchases Immediate Triggers when a registrant buys a product during the live webinar. Dependent on active sales goal tracking.
Registrants Stays Until After session Triggers if a registrant stayed in a live webinar past a specific timestamp.


Go to Zapier’s app catalog for the most up-to-date list of available WebinarJam / EverWebinar triggers.

Important:

  • Certain triggers fire when the webinar session is over. If you want to trigger a zap before or during the event, use triggers that fire immediately instead.
  • Zaps are triggered by a single event. If you want the same follow-up action to happen based on multiple triggers, create a separate Zap for each unique trigger.
Zap example showing spreadsheet update when a new registration happens in WebinarJam
The example in the preceding image shows a Zap that connects WebinarJam or EverWebinar to Google Sheets

After defining the trigger and action for your new Zap, click Try It to enter the editor and complete the configuration.

Connect with WebinarJam

WebinarJam API key

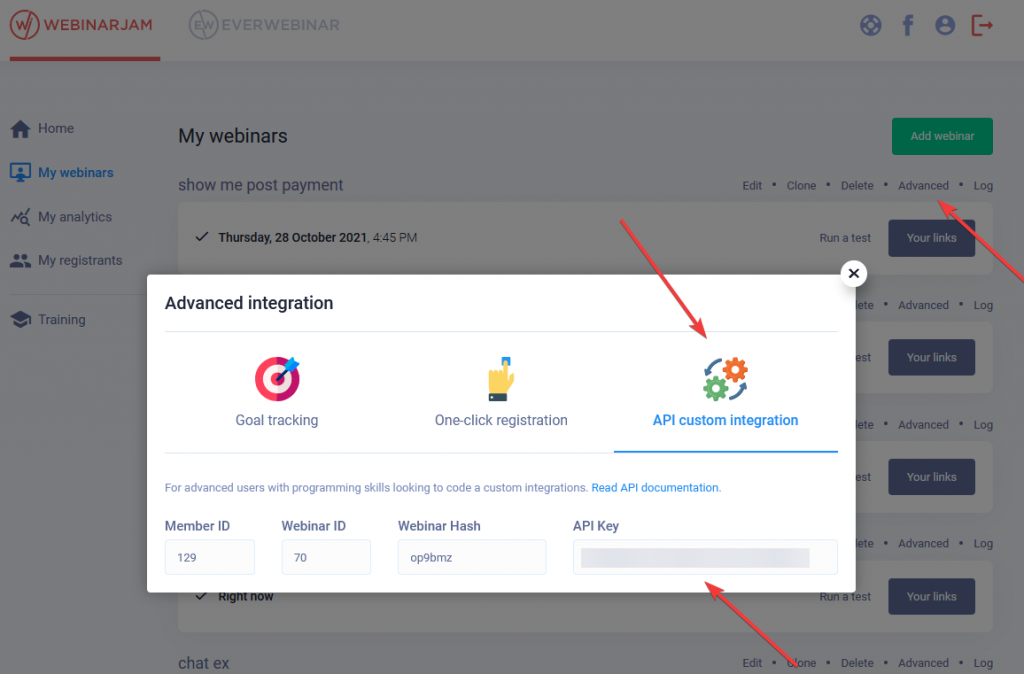
A WebinarJam API key is required to connect your WebinarJam and Zapier accounts. If you are not already approved to use the WebinarJam / EverWebinar API, apply for a key. The key is found in your main webinar dashboard, under the Advanced link for any webinar. The API key is a global value, so it is the same for every event in your account.

Copy the API key from your WebinarJam profile

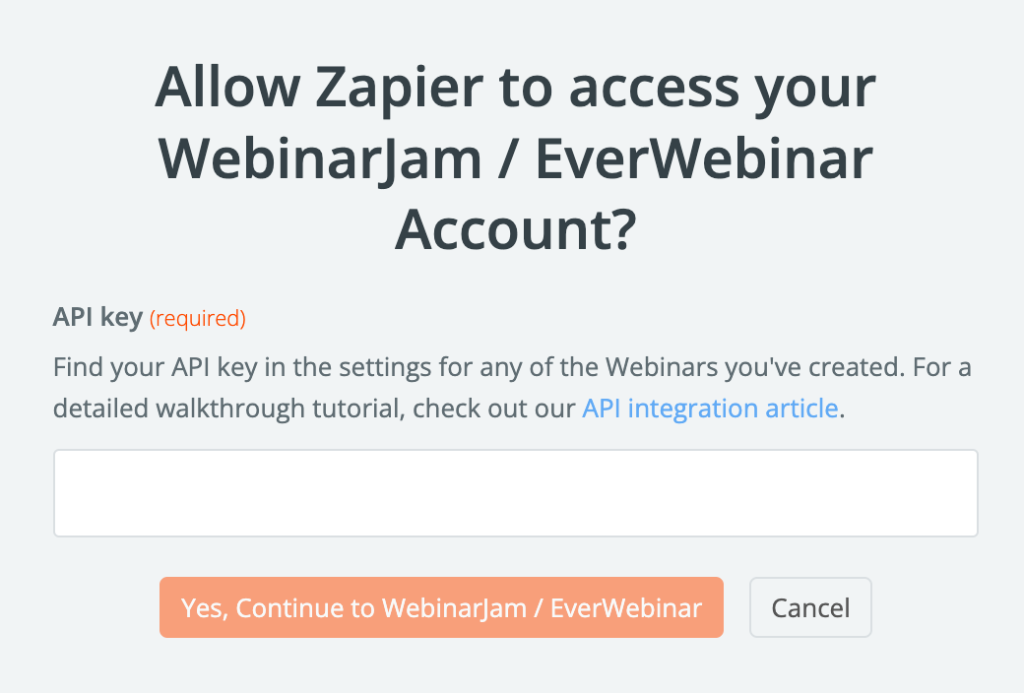
The editor will prompt you to sign in to connect a WebinarJam / EverWebinar account, or select one that is already connected.

If you select Sign In, a popup appears to authorize the access request. Enter your WebinarJam API key in the field to authorize access.

API key to authorize access

Complete the Zap

Use Zapier’s editor to finish setting up and testing the Zap.

The API connection gives Zapier access to your WebinarJam / EverWebinar account so the editor can display your webinars in the configuration process. Choose the webinar you want the Zap to trigger from and configure the actions for the destination application as desired.

When the setup is complete, turn the Zap ON by using the toggle in the editor or your Zapier dashboard.

Toggle Zap on or off


Test the Integration

As with any complex configuration, it is best to test your Zap with a demo webinar to make sure it works as expected before a live event.

YouTube Live

This article is for WebinarJam only.

Configuration step of the setup wizard

Choose YouTube Live as the streaming service for a live webinar to broadcast directly to a YouTube channel.

YouTube live broadcast streaming

Important Notes:

  • You must apply for live streaming in YouTube and wait 24 hours for the application to be approved before you can connect YouTube as an integrated streaming service in your webinar settings. If you are not approved for live streaming, the connection in WebinarJam will fail.
  • Webinars set to stream through YouTube Live are automatically posted in the connected YouTube channel. To restrict viewing permissions to only subscribers and those with a direct link, follow the instructions in this article to post live uploads as “Unlisted.”
  • Elements configured at the Live step of the webinar wizard are exclusive to the WebinarJam live room. Attendees who watch the webinar from your YouTube channel will not see any deployed polls, offers, etc.

Configure YouTube Settings

Login to the YouTube account where you want to run your live stream. Double-check to make sure you are not logged into any other Google services that could confuse the setup.

Set channel features

  1. Go to YouTube > Settings
  2. Click Channel and Feature eligibility
  3. Enable Standard features and Intermediate features

Enable YouTube settings for live streaming

Set upload defaults

Live webinars broadcasted using YouTube Live are automatically published to your YouTube channel. As soon as the event begins, it is listed in your YouTube channel and can be watched live. When it ends, the video is saved as recorded content in the channel.

Change the default upload visibility to restrict the availability of live streams:

  1. In Settings, go to Upload defaults
  2. Select Unlisted in the Visibility drop-down to prevent all video uploads (recorded and live) from being listed in YouTube search or suggested content.
    • This setting impacts the default only. Visibility can be customized for each individual upload as well, letting you post public and restricted content.

Request live streaming access

  1. Go to YouTube
  2. From the top right, click Create and then Go live
    Go live in your YouTube channel
  3. If you haven’t already, follow the steps to verify your channel
    • Starting your first live stream may take up to 24 hours

Wait for live streaming approval to complete

Learn more about getting started with live streaming.


Connect WebinarJam to YouTube

Important: Your YouTube channel must be approved for live streaming before continuing.

In your WebinarJam account, open a webinar for editing:

  1. In the Configuration step of a webinar setup, open the Streaming service module
  2. Choose YouTube Live and click Connect YouTube
  3. Login to Google from the pop-up window
    • If your browser is already logged in to an account, you will immediately see an access authorization from WebinarJam Live.
  4. When authorization is complete, a YouTube connected message appears with the connected account address below
    • Click Reset to remove the connection if needed.

YouTube connected


Test the Webinar

  1. Clone the webinar to test the YouTube Live streaming service
  2. Launch the WebinarJam live room as the webinar host presenter
  3. Go Live to start the broadcast
  4. In another browser, enter the room as an attendee
    • If you see the broadcast video from both user views, the configuration is correct

Note: The YouTube logo will display in the lower right corner of the webinar broadcast video. This cannot be removed.


Troubleshooting

Playback on other websites has been disabled by the video owner

If the live room shows the error, “Watch this video on YouTube. Playback on other websites has been disabled by the video owner,” your YouTube account is not properly configured.

Change channels

Confirm that you are using the same channel as you have your webinar content on. You may need to associate this channel with your main Google account.

Contact YouTube Support

If you perform all of the above steps and are still getting the video embed error, please contact the YouTube support team for more help.

YouTube misconfiguration

If you see the error, “YouTube misconfiguration” while accessing your WebinarJam live room, something in the YouTube connection is not correct.

YouTube misconfiguration error

Check your connection

Open the webinar wizard and go to the Streaming service setting. Make sure you are logged into the same YouTube account that is displayed on the Connect YouTube screen. Your account email will appear in small writing below the YouTube icon.

Check your settings

Review this article to ensure that the YouTube account settings are correct. After making any necessary updates, go back to your webinar presenter’s link and try to launch the live room again.

Facebook Live

This article is for WebinarJam only.

Important: Facebook Live has changed

As of Monday, April 22, 2024, Meta removed Facebook Group API support for all third-party services including WebinarJam. As of this date, WebinarJam events using Facebook Live as the broadcasting service will no longer stream to Facebook Groups.

Please take action immediately and update any events that are scheduled to broadcast to a Group using Facebook Live on or after April 22, 2024. You can change your streaming service to WebinarJam Live, YouTube Live, or update your Facebook Live connection to stream to a Page instead of a Group.

Configuration step of the setup wizard

Choose Facebook Live as the streaming service for a live webinar to broadcast directly to a Facebook page or profile.

Facebook Live selection for webinar streaming

Important:

  • Webinars set to stream through Facebook Live will be automatically posted on the chosen Facebook Page. Depending on your privacy settings, this could make the event publicly accessible.
  • Elements configured at the Live step of the webinar wizard are exclusive to the WebinarJam live room. Attendees who watch the webinar from your Facebook page will not see any deployed polls, offers, etc.

Connect to Facebook

  1. In the Configuration step of a webinar setup, open the Streaming service module
  2. Choose Facebook Live and click Connect Facebook
  3. Login to Facebook from the pop-up window. If your browser is already logged in to an account, you will immediately see an access authorization from WebinarJam Live

Authorize a WebinarJam Live connection with Facebook

  1. In the Facebook window, click Edit access to choose the pages where you want to broadcast webinar events
    • Important: Depending on page permissions your account may not be authorized to post videos!  If possible, check your permissions before continuing.
    • Click Continue as [Name]
  2. On the next screen, choose who can see WebinarJam live posts in your Facebook timeline

Choose the privacy and visibility for your posts in Facebook

    • If you are testing, choose Only me to restrict post visibility so only you can see broadcasted events
    • Change this to a larger public user selection before going live with your first event
  1. Click Continue as [Name] to complete the Facebook setup
  2. When the connection is complete, a green “Facebook connected” status appears in the webinar setup

Facebook connection successful

    • Click Reset to remove the connected Facebook account from the webinar settings
  1. Select the Stream destination for your broadcast from the drop-down

Edit Facebook visibility or connection

To update the WebinarJam Live connection and settings in Facebook, login to your Facebook account and go to Settings > Business Integrations.

Facebook business integrations controls

To revoke access permission between WebinarJam and Facebook, click Remove. Learn more about disconnecting a business integration from Facebook.

Important: Disconnecting the Facebook account may impact any other webinars that are configured to broadcast to the same account. Double check the configuration for all webinars configured with Facebook Live after resetting a connection to make sure there are no unintended interuptions.

To change the visibility of WebinarJam posts, click View and edit.

Change the visibility of WebinarJam posts

Test a Facebook Live webinar

  1. Launch an event from your WebinarJam account and use the go live button in the room to start broadcasting.
    • Check your privacy! Your test will appear in the destination page according to the visibility set in Facebook.
  2. Go to the page in Facebook where the event is configured to broadcast to confirm that the stream is active.
Important: Using Run a test to test an event with Facebook Live broadcasting may be visible to visitors on your Facebook page. To run a private test in any mode, change the post visibility in Facebook to a private setting before you start the test.

SMTP Integrations

This article is for WebinarJam and EverWebinar.

To integrate a third-party SMTP service, open your account Profile:

  1. Go to Integrations > SMTP Integrations
  2. Select your provider and enter the required credentials to create a connection

SMTP integration setup

Required credentials vary depending on the service, but most require an API key and a valid sender email address. Get the API key from your account with the SMTP service. Double-check the informationthe values must match exactly.

Learn more:

For help finding your API key, reach out to the support team that serves your SMTP. They will help you navigate your account!

Autoresponders and CRMs

The article is for WebinarJam and EverWebinar.

Connect an Autoresponder or CRM

To integrate third-party autoresponder services, open your account Profile:

  1. Go to Integrations > Autoresponder Integrations
  2. Select your provider and enter the required credentials to create a connection

Integrate a third-party autoresponder or CRM

Learn more

Twilio

This article is for WebinarJam and EverWebinar.

Integrate with Twilio to send SMS and phone call reminders for your webinars.

For example, you can send a reminder for your webinar to your participants: a “Last minute” reminder which will be sent out 15 minutes before your webinar starts.

You Will Need:

  • A Twilio account
  • The Twilio Account SID and Auth Token
  • A Twilio phone number

Set Up Twilio

  1. Go to Twilio and log in or create a new account.
    • Trial accounts allow message sending to verified numbers in specific countries only.
  2. In the account Console, click Get a phone number or go to Phone Numbers > Manage to create one.
    • Important: Verify the phone number if required. Unverified phone numbers cannot be used to send notifications.

In the account Console, get the information you need to integrate with your webinars:

  • Account SID
  • Auth Token
  • Twilio phone number appears in this module when the number is created

Twilio account SID and auth token


Integrate Twilio

Connect Twilio with your account to enable SMS and voice messaging reminders for your webinars.

  1. Go to Profile > Integrations
  2. Click SMS Gateways
  3. Enter your Twilio account credentials:
    • Account SID
    • Auth Token
    • Twilio Phone Number (do not include dashes in the phone number)
  4. Click Connect to add the account

Send a test SMS to verify that the credentials are correct. Enter a valid phone number and press Send Test SMS.

To remove the integration or link to a different Twilio account, click the reset link below the Connected status indicator.

Learn how to use Twilio with WebinarJam and EverWebinar


Troubleshoot Twilio Sending

Countries outside of the United States

If you are in a country outside of the United States, you may need to enable global permissions and the country or number range to which you want to send SMS messages. Twilio has global permissions to protect your account from abuse.

  • In your Twilio account, look for SMS Geo Permissions

My registrants don’t receive messages

If the Twilio message log says your messages were sent, the delivery failure may be due to the phone provider. Providers may block certain types of messages or numbers to protect their customers from spam.

If you just created your Twilio account, you may need to confirm your account. If you need help, contact the Twilio support team.

Integration automation rules

This article is for WebinarJam and EverWebinar.

How do integration rules work?

Integration rules create automated processes that execute an action in your integrated autoresponder when a registrant interacts with your webinar.

For example:

  • Send the registrant’s contact information to your autoresponder when they sign up
  • Assign a tag to the registrant, subscribe them to a newsletter, add them to a list, etc.
  • Automate actions if a registrant leaves early or arrives late
  • Assign a tag if a registrant buys any product from the live event or replay
  • And lots more!

Add as many of these rules as you want and they will run automatically every time a triggering condition is met.

Important: Integration rules send information from WebinarJam to the integrated autoresponder, but not in reverse. Your autoresponder cannot send information to your WebinarJam account.

Create integration rules

In WebinarJam or EverWebinar:

  1. Open a webinar for editing
  2. Go to Integrations > Email autoresponder integration
  3. Click the autoresponder tile to add or edit integration rules
  4. Select a trigger and action for the rule
    • Example: IF they register, THEN add to list

Autoresponder integration rules

Add as many rules as needed to record the actions and engagement of your registrants.

Note: The “tag” and “list” terminology used in the integration rules configuration may not be an exact match for the name of the corresponding function in your integrated autoresponder. When in doubt, test a few rules to understand how they are interpreted by your autoresponder.

Automation Timing

Some rules are executed instantly and others are not. The difference can be thought of in terms of the positive or negative impact of the triggering action.

  • Positive rules (if they register to the webinar, if they buy your product, if they make it to the live room, etc) are triggered as soon as the positive event happens.
  • Negative rules (if they miss the webinar, if they leave early, etc) wait until the webinar session is over. After the webinar, the system analyzes attendee behavior to confirm that the negative event happened before sending the information to your autoresponder.

© 2024 WebinarJam All Rights Reserved