
Charge a fee for registration
This article is for WebinarJam and EverWebinar.
Important: A third-party payment checkout is needed to collect payments from registrants. The paid registration function of your webinar configuration redirects registrants to the third-party checkout to complete their payment. WebinarJam and EverWebinar do not process payments.
Enable Paid Registration
In your webinar configuration, go to the Registration step:
- Open the Free registration vs Paid registration module
- Click Charge a registration fee
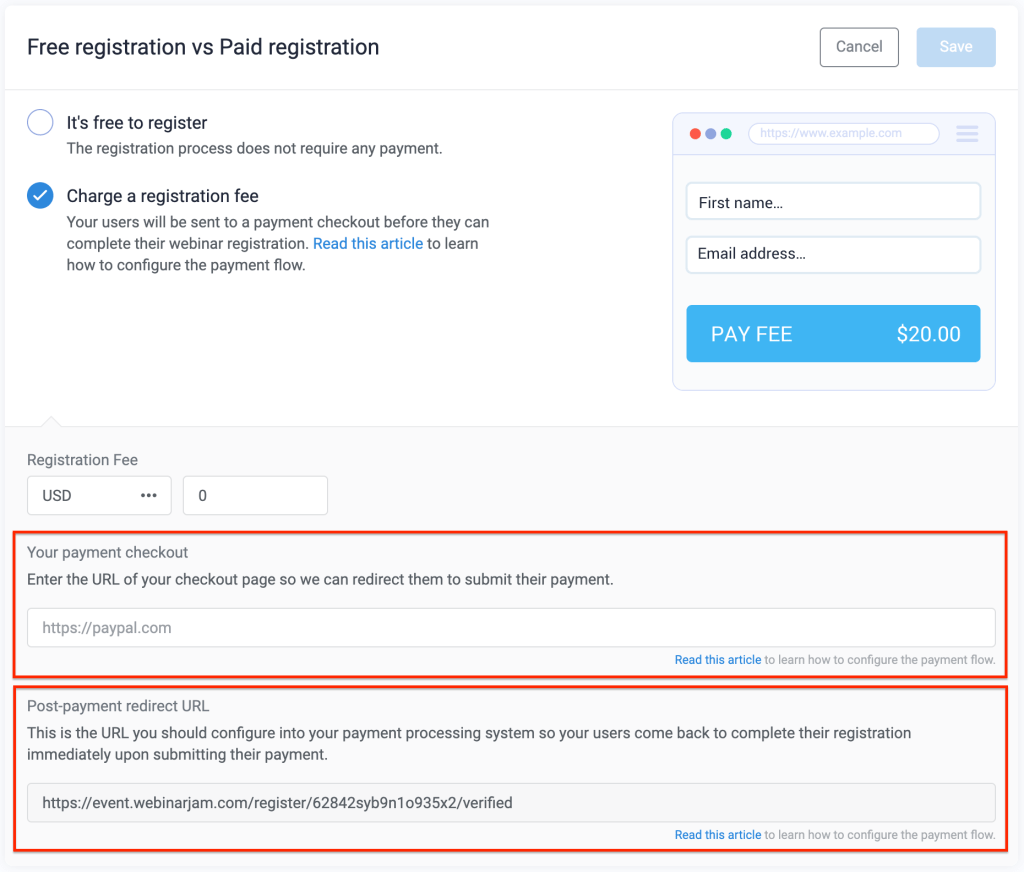
- Enter the amount of the fee (for analytics tracking) and the URL of a third-party checkout page where the customer can complete a payment.
- Copy the Post-Payment Redirect URL and set it as the payment success or “thank you” page in your third-party checkout configuration. With the post-payment URL in place, your third-party payment processor will redirect customers to the post-payment registration page to complete their registration for the webinar.
- A “register” button appears on the post-payment registration page. The registrant must click the button and submit the registration form that pops up to complete their sign-up.
Troubleshooting and Tips
Incomplete Registration
If you receive payment for a webinar but no new registrant, the customer did not complete their registration. To resolve this, copy and send the Post-Payment Redirect URL to the customer. This will take them straight to the registration page without having to complete the checkout again.
Skip the Registration Payment
To allow free registration to one specific user, copy and share the Post-Payment Redirect URL with the user. Anyone with this URL will go straight to the registration page without completing a payment, so share it carefully.
Charging with PayPal
- Learn more about Charging for registration with PayPal
Was this article helpful?
YesNo