
Mailing through your autoresponder
This article is for WebinarJam and EverWebinar.
Send webinar notifications and reminders with an integrated autoresponder platform for additional control over email branding, styling, and scheduling. This is an alternative to using the built-in WebinarJam email builder.
- Required: Connect a third-party Autoresponder
- Note: Due to limitations in their APIs, Maropost and Constant Contact do not support this feature.
Create Custom Fields
In the webinar configuration, you will need to match values from the webinar with custom fields in your autoresponder. This step is required so your autoresponder can include custom information in the emails sent for your event.
In your autoresponder, create six custom contact fields:
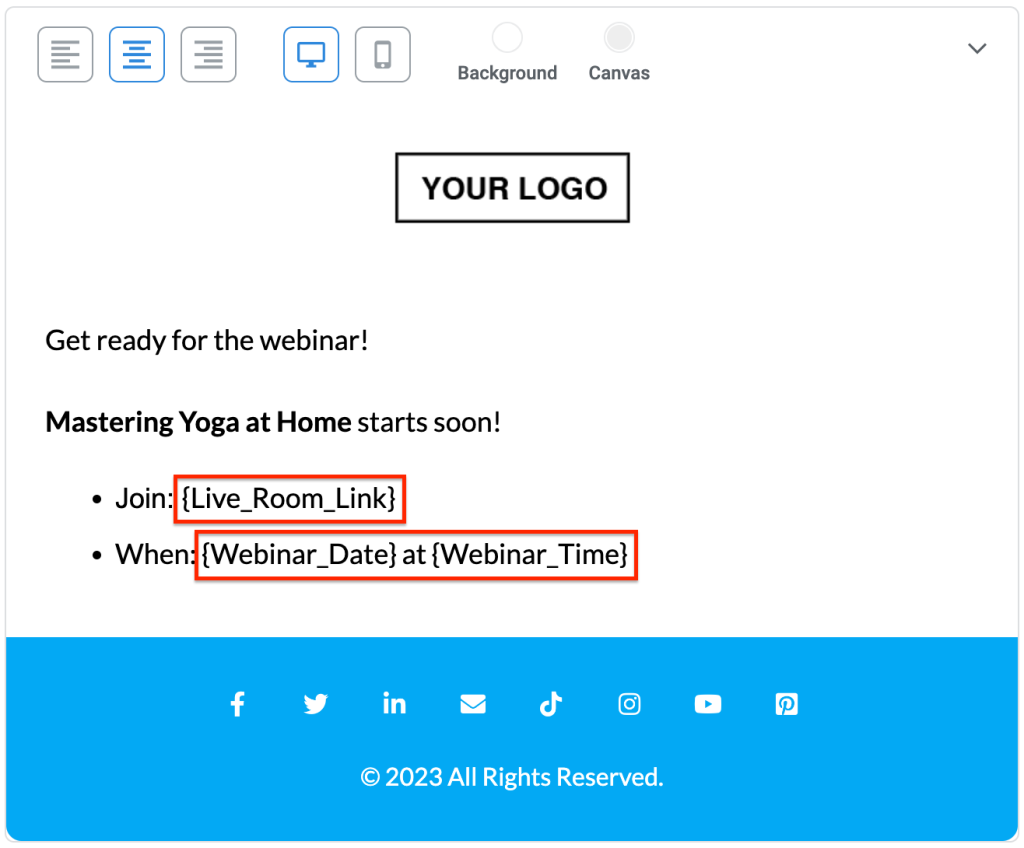
- Live_Room_Link
- Replay_Room_Link
- Webinar_Date
- Webinar_Time
- User_Timezone (Required if registered time shows in User’s own time zone)
- Room_Password (Required if the webinar room is password protected)
NOTE: Select text input as the custom field type for all values. Alternate types like drop-down, multi-select, or date-validated fields will not work.
What are custom fields?
Every autoresponder or CRM comes with standard contact data fields: first name, email address, phone number, etc.
Custom fields let you collect additional data that is specific to your market or usage. These fields are often used to personalize email marketing by injecting data into a message that is specific to an individual recipient. This is the function that your autoresponder will use to send unique details about a webinar to your registrants.
Pro tip:
If you run multiple events that are closely scheduled, consider creating unique custom fields for each event:
- Live_Room_Link_1
- Live_Room_Link_2
- Replay_Room_Link_1
- Replay_Room_Link_2
If an previous attendee registers for another webinar, the custom field values are overwritten in your autoresponder with the details from the most recent registration. If there is no overlap in the webinars’ email notification scheduling, multiple sets of custom fields are not needed.
Configure Your Webinar
To enable the integrated autoresponder or CRM:
- In WebinarJam
- Open a webinar and go to Notifications > Your Email Gateway
- Select Your own autoresponder
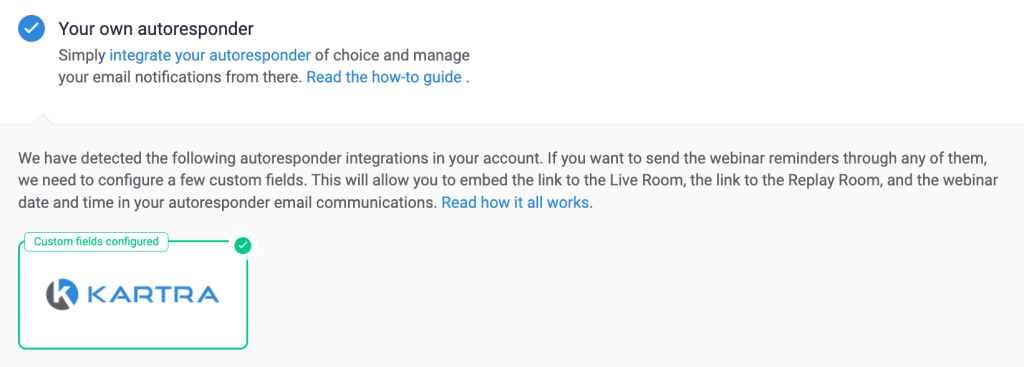
- All integrated autoresponders will appear below. Hover over your preferred application and click Custom Fields.
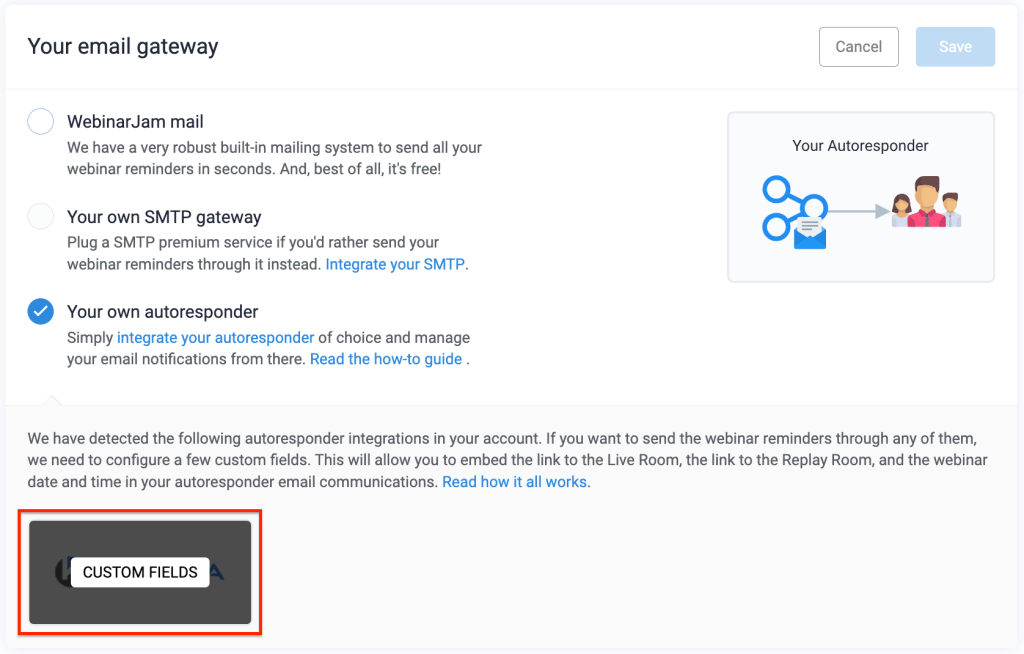
IMPORTANT: Due to limitations in their APIs, Maropost and Constant Contact are not supported for this feature.
Match Custom Fields
Match the details of your webinar to the custom fields created in your autoresponder.
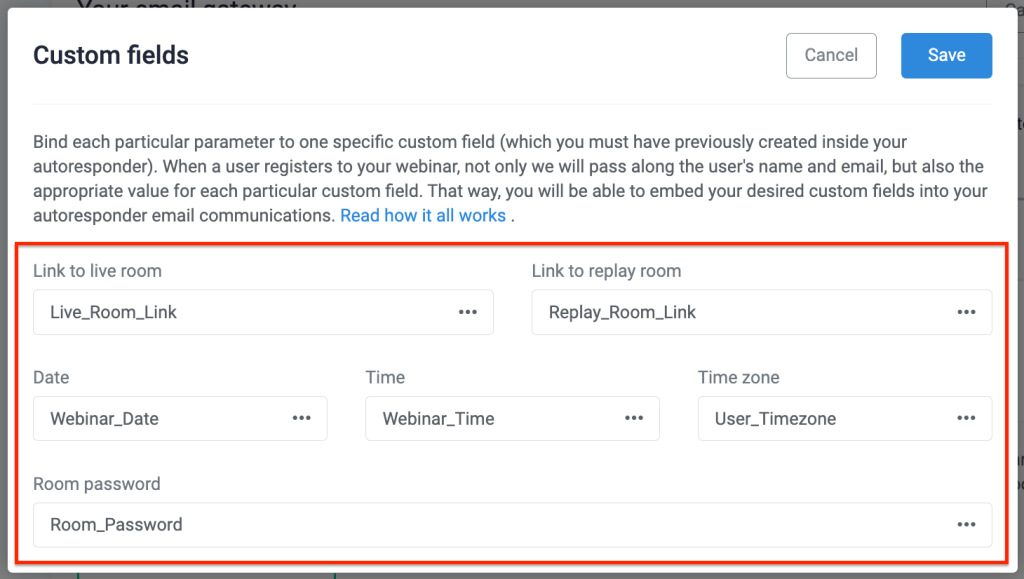
In the Custom fields pop-up:
- Click each field in the window to access a list of custom fields from your autoresponder
- Select the option from the drop-down that corresponds with each field value
- Save Custom fields and the Email Gateway module to complete the webinar setup
CRITICAL: Custom fields linked in a webinar configuration must remain active to work. If a field is deleted or changed, go back to the webinar configuration and update the custom fields portion of the integration.
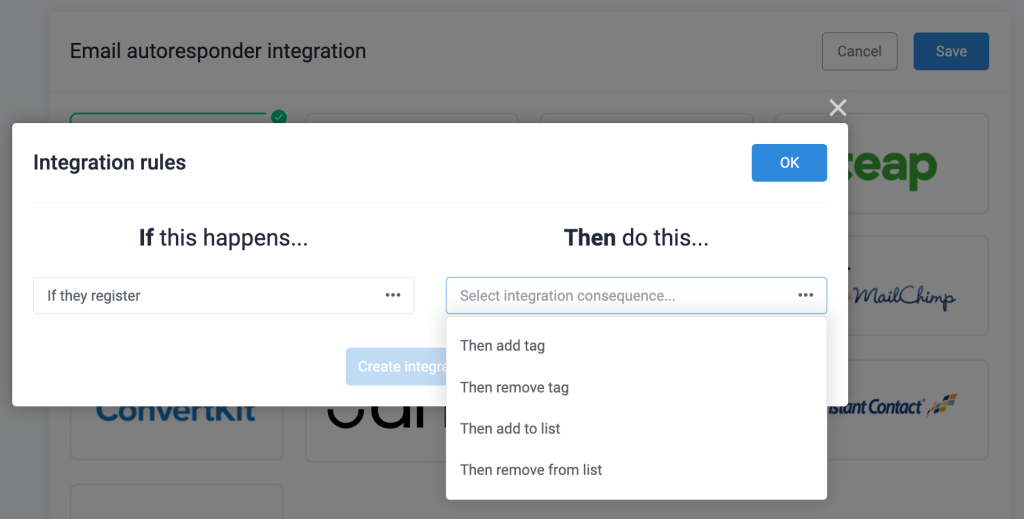
Test the Integration
Test the autoresponder integration with an automation rule triggered by registration.
In the webinar configuration
- Go to Integrations > Email autoresponder integration
- Click the autoresponder tile to add or edit integration rules
- Select a trigger and action for the rule
- Example: IF they register, THEN add to list
In your autoresponder
- Create an email for webinar registrants that will send in response to the automation action configured at the previous step
- Example: An email that sends when a contact is added to the list specified in the rule
- In the email body, use the webinar custom fields to insert information about the event (example in the following image)

Test the registration flow
- Use the registration page link for the webinar to register with a valid email address
- If all previous steps were completed correctly, this should trigger the integration rule and send you an email with the details of the webinar.
- Check your autoresponder:
- Do the custom fields appear in your test contact with webinar details in them?
- Is the contact subscribed to the list specified in your automation rule?
- Check your email inbox:
- Did you receive the webinar notification?
- Are the correct webinar details displayed?
If the details are correct in your autoresponder and the email, the setup is complete. Use the custom field variables with the webinar information to create more notifications, a replay follow-up, and any custom funnel designs that are possible in your autoresponder.