Control Panel
This article is for WebinarJam and EverWebinar.
WebinarJam Control Panel
The Control Panel is the center of operations for your moderators in a live event. The dashboard contains all the information and controls available in the live room but in a format designed for easier viewing and management.
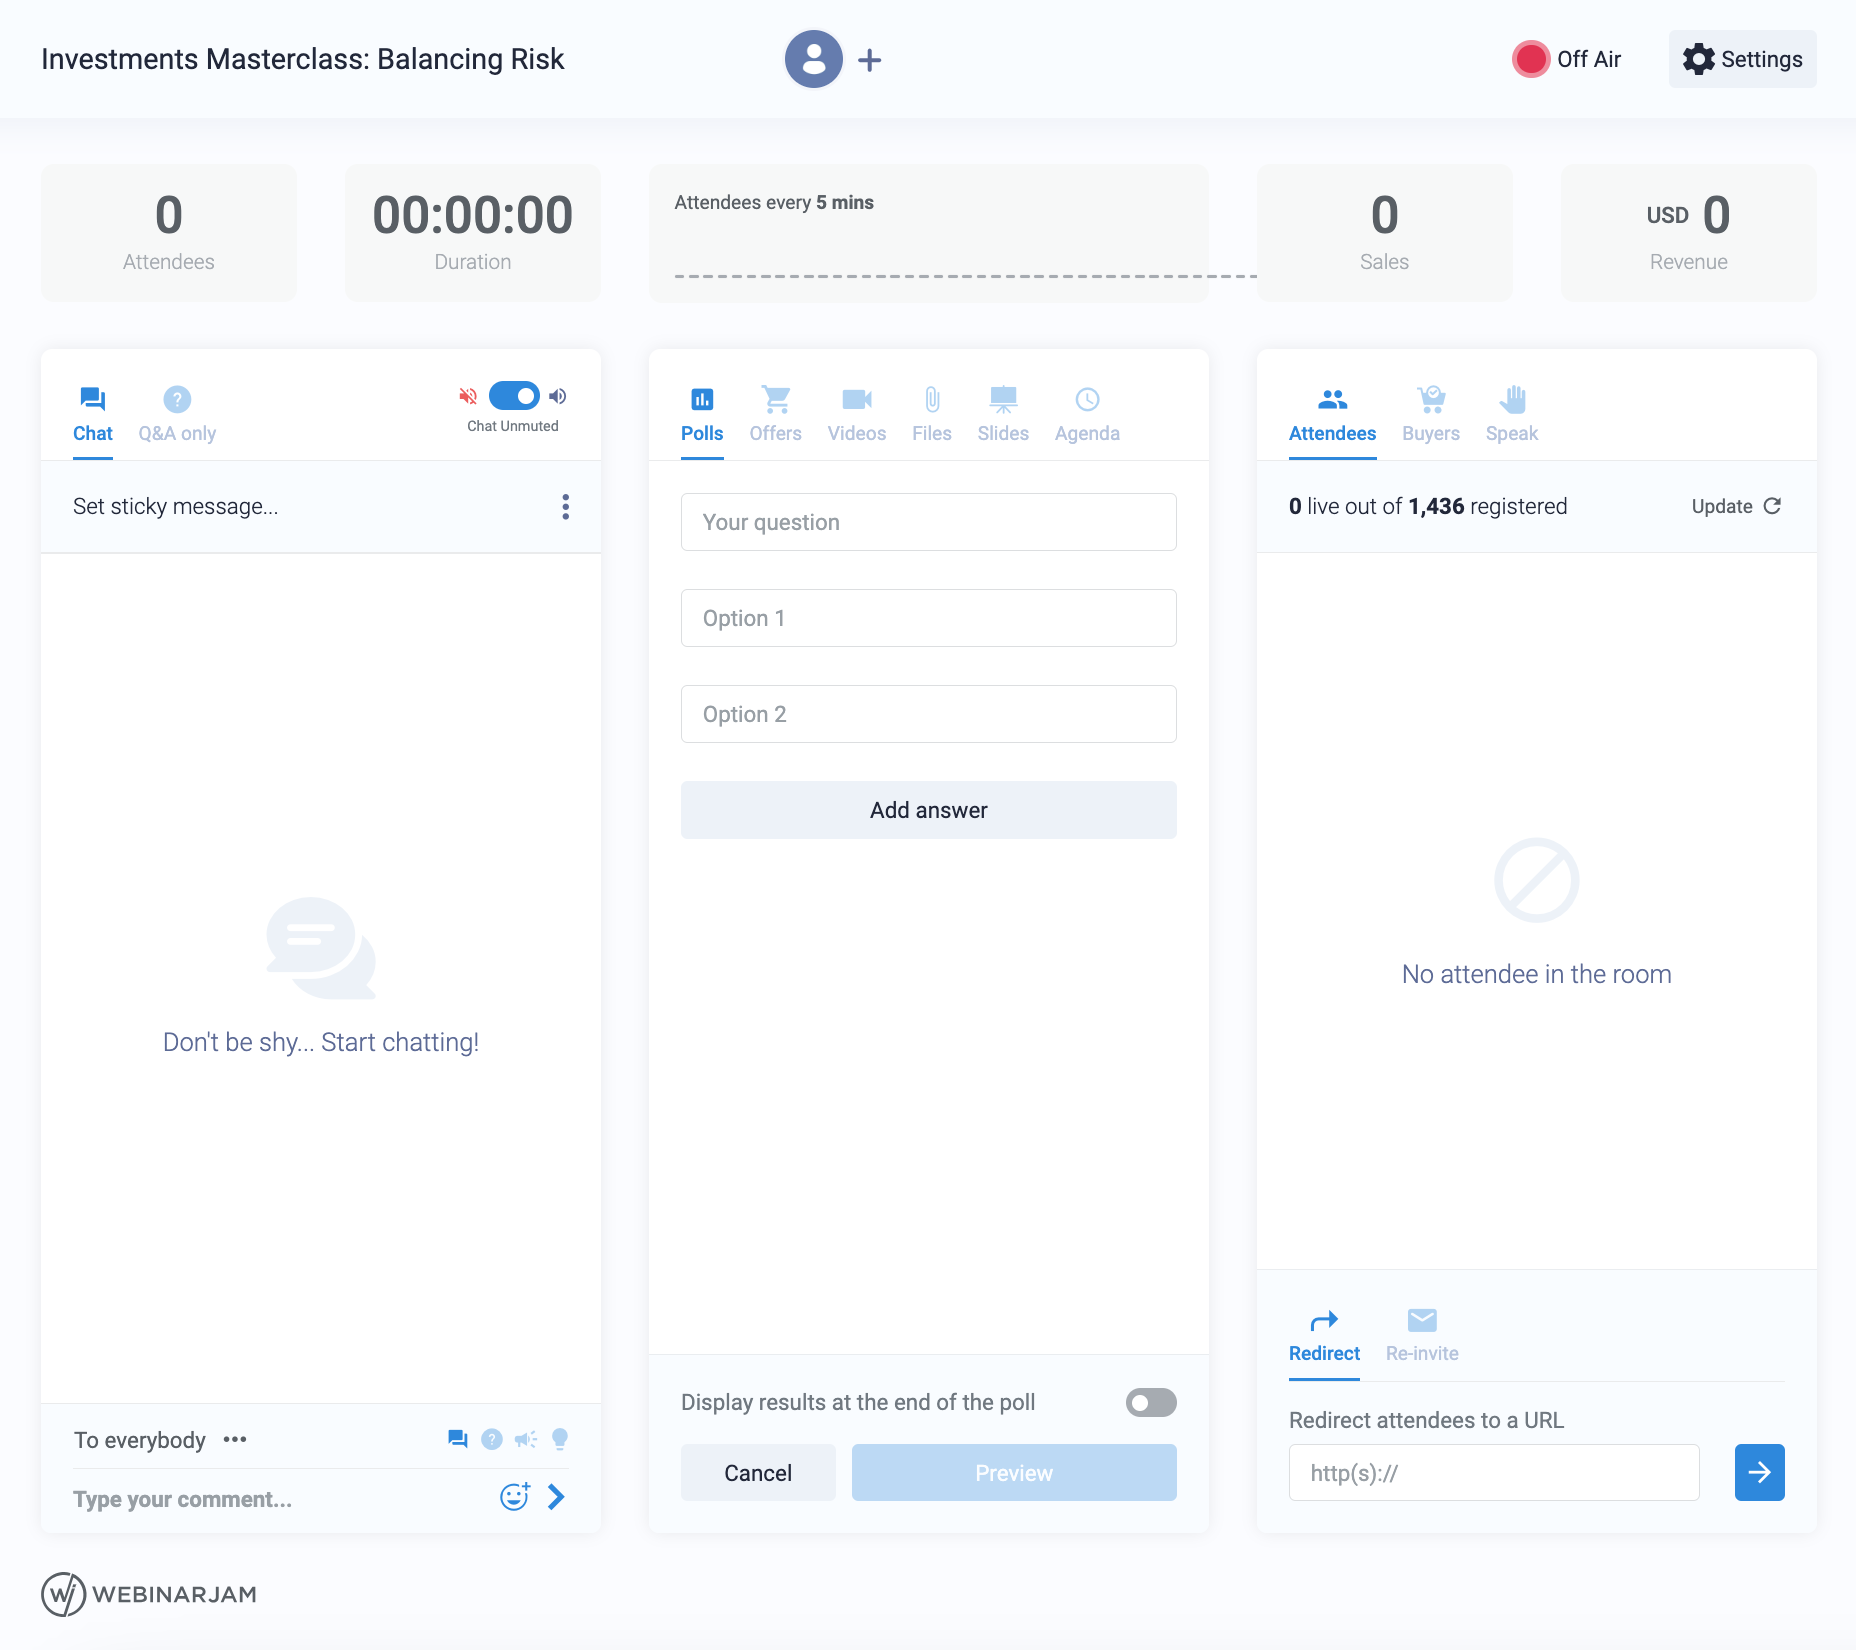
Chat Control
The first of the three panels shows the live chat feed. From the first tab (Chat) you can chat with attendees, and edit/delete their messages if needed. The second tab (Q&A only) shows only the messages marked as questions. A response there will be marked as an Answer.
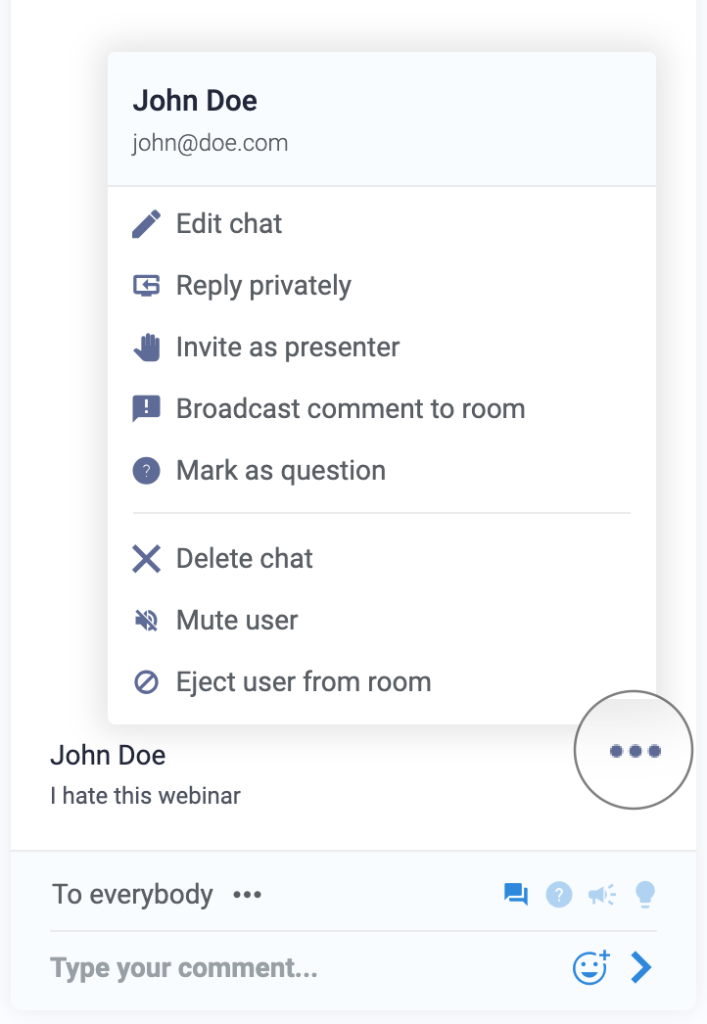
Click the three dots next to a message to see a user’s name, email, and management options:
- Edit their comment
- Reply to them in private
- Invite them to join the live room as a presenter
- Broadcast their comment to everyone
- Mark the comment as a Question
- Delete their comment
- Mute user (click again to unmute)
- Eject user from room (ban)
Mute vs Eject
Ejecting a user from the room immediately removes them and blocks them from entering again from the same browser session. If the user comes back through a different device or browser, eject them again or Mute them to prevent them from adding messages to the chat.
Muting a user prevents any messages they enter in the chat from appearing to the rest of the attendees in the room. The muted user can continue to send messages and will not see any indication that they have been muted, but the messages will not be displayed in the room.
Live Injections
The next panel contains live injections like polls, offers, videos, files, and slides. Preconfigured live injections can be deployed or used here, or new ones can be created during the live webinar.

Attendee Control
The final panel shows current attendees. The tabs on top filter the lists into all Attendees, only those who purchased, and only those requesting to speak live as a presenter.
At the bottom of the panel, you can redirect all attendees to a URL of your choice and resend email notifications to registrants.

Room Statistics
The top bar in white (shown below) displays, from left to right:
- The current number of attendees
- How long the webinar has been live
- How many attendees have been in the room for each 5 minutes (shown as a graph)
- The current attendees compared to the peak number of attendees
- The number of sales made
- The total revenue earned

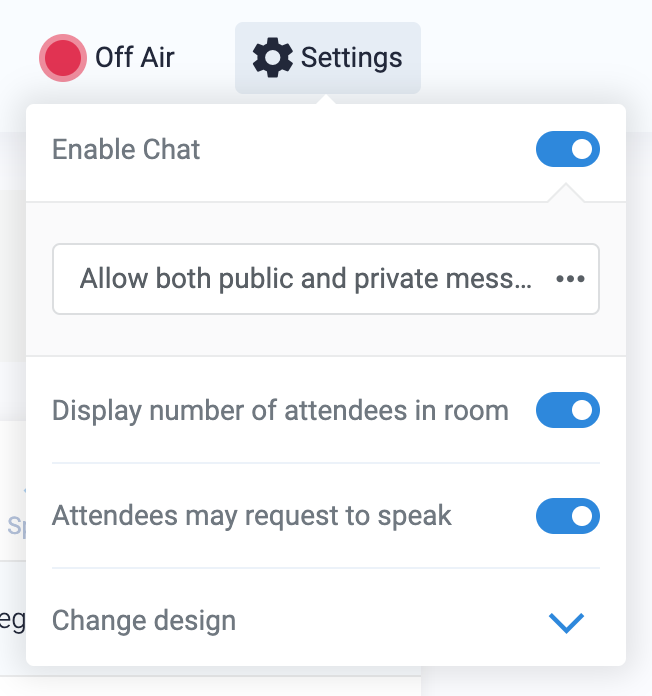
Event Status and Settings
In the upper right of the Control Panel are two icons. One shows if you are on or off the air (live streaming or not), while the other is for additional settings. Clicking that icon, you can:
- Restrict chat messages to public, private, or both
- Display or hide the number of attendees
- Allow or block attendees from requesting to speak live
- Change the design of the live room
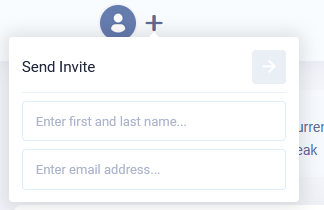
Add New Presenter
Presenters in the room are shown at the top of the screen as avatar images. Click the + icon to add a new presenter with their name and email. An email invite is sent to the new presenter with a unique access link to join the live room.
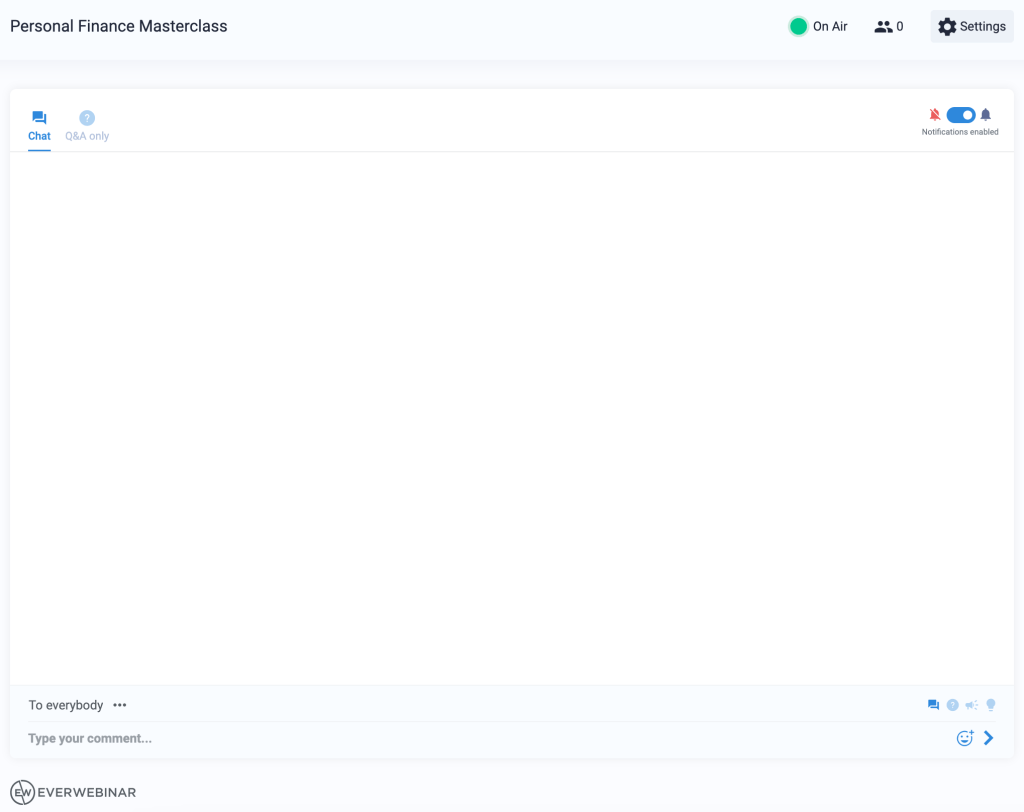
EverWebinar Control Panel
Because automated events are fully pre-configured, chat is the only moderation tool in the EverWebinar control panel.
- Attendee chat messages appear only to themselves and webinar moderators (in the attendee’s unique access session)
- Moderator chat messages appear to any attendee currently watching the webinar (in any session)
Since each attendee is in their own room (separate from anyone else watching), they will not see the chat from other attendees. However, if a moderator chats in the lower field, that message will appear to anyone watching.
To prevent confusion, it is best to reply privately to any chat message as an EverWebinar moderator.