WebinarJam and EverWebinar User Documentation Webinars for everyone!

Live Room

This article is for WebinarJam.

Launch the Live Room

Use your unique presenter link to access the live room.

Important: You can launch the live room early to make sure everything is prepared. The live broadcast will not begin until the host clicks the “Go Live” button inside the room. The room will stay off air for up to 60 minutes.

Last-minute Checklist

Follow the last-minute checklist to make sure you are ready for a successful webinar:

  • Free up resources: Close all computer functions with a high resource load, such as applications and browser tabs.
  • Wear headphones: Minimize audio feedback between your speakers and your microphone to make sure your attendees can hear you.
  • Dedicate your internet connection: Make sure your internet connection is committed to your webinar. Another person streaming media or video games on the same connection can reduce the quality of your broadcast.
  • Avoid distractions: Mute your phone, turn off notifications on your computer, and close your door!

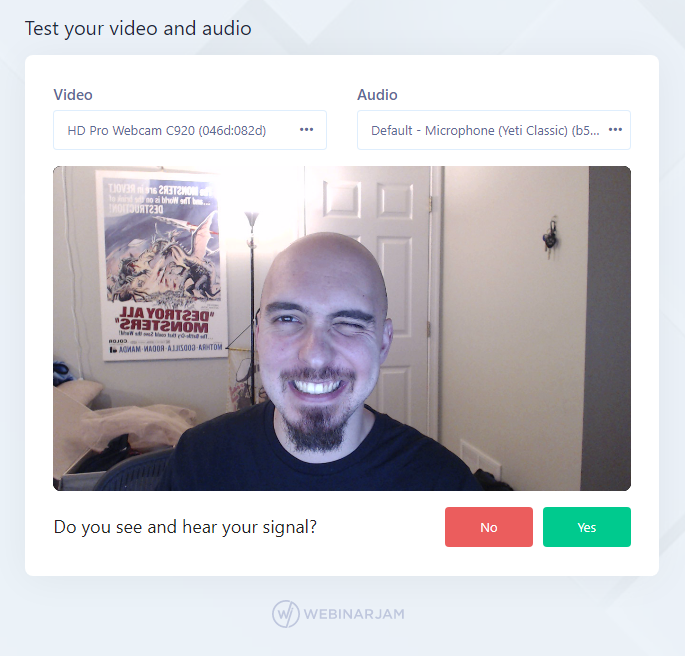
Test Your Video and Audio

You will be prompted to start an audio and video test to check your settings. You can turn your camera and microphone ON or OFF at any time in the webinar room.

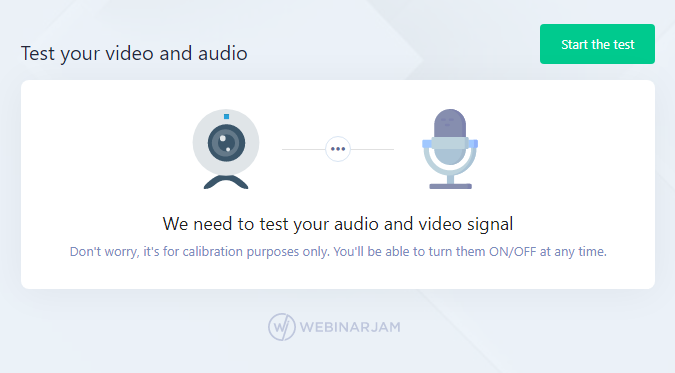
Click Start The Test to begin.

Important: Your browser may ask you to authorize your camera and microphone. Allow access to continue. (Required)

WebinarJam will auto-detect your camera and microphone. Use the drop-down menus to change the device selection if needed.

  • If the video feed shows your webcam and you can hear sound, click yes to confirm that everything is working.
  • If you do not see or hear yourself, click no and the system will attempt the test again again.

If the test is not working, click the camera icon in your browser’s address bar. The drop-down menu will show you whether the camera and microphone are blocked in your browser, or if the wrong camera or microphone is being used.

If you do not hear any sound, check the volume control on your computer and headset.

Reload the page if you change any of these settings.
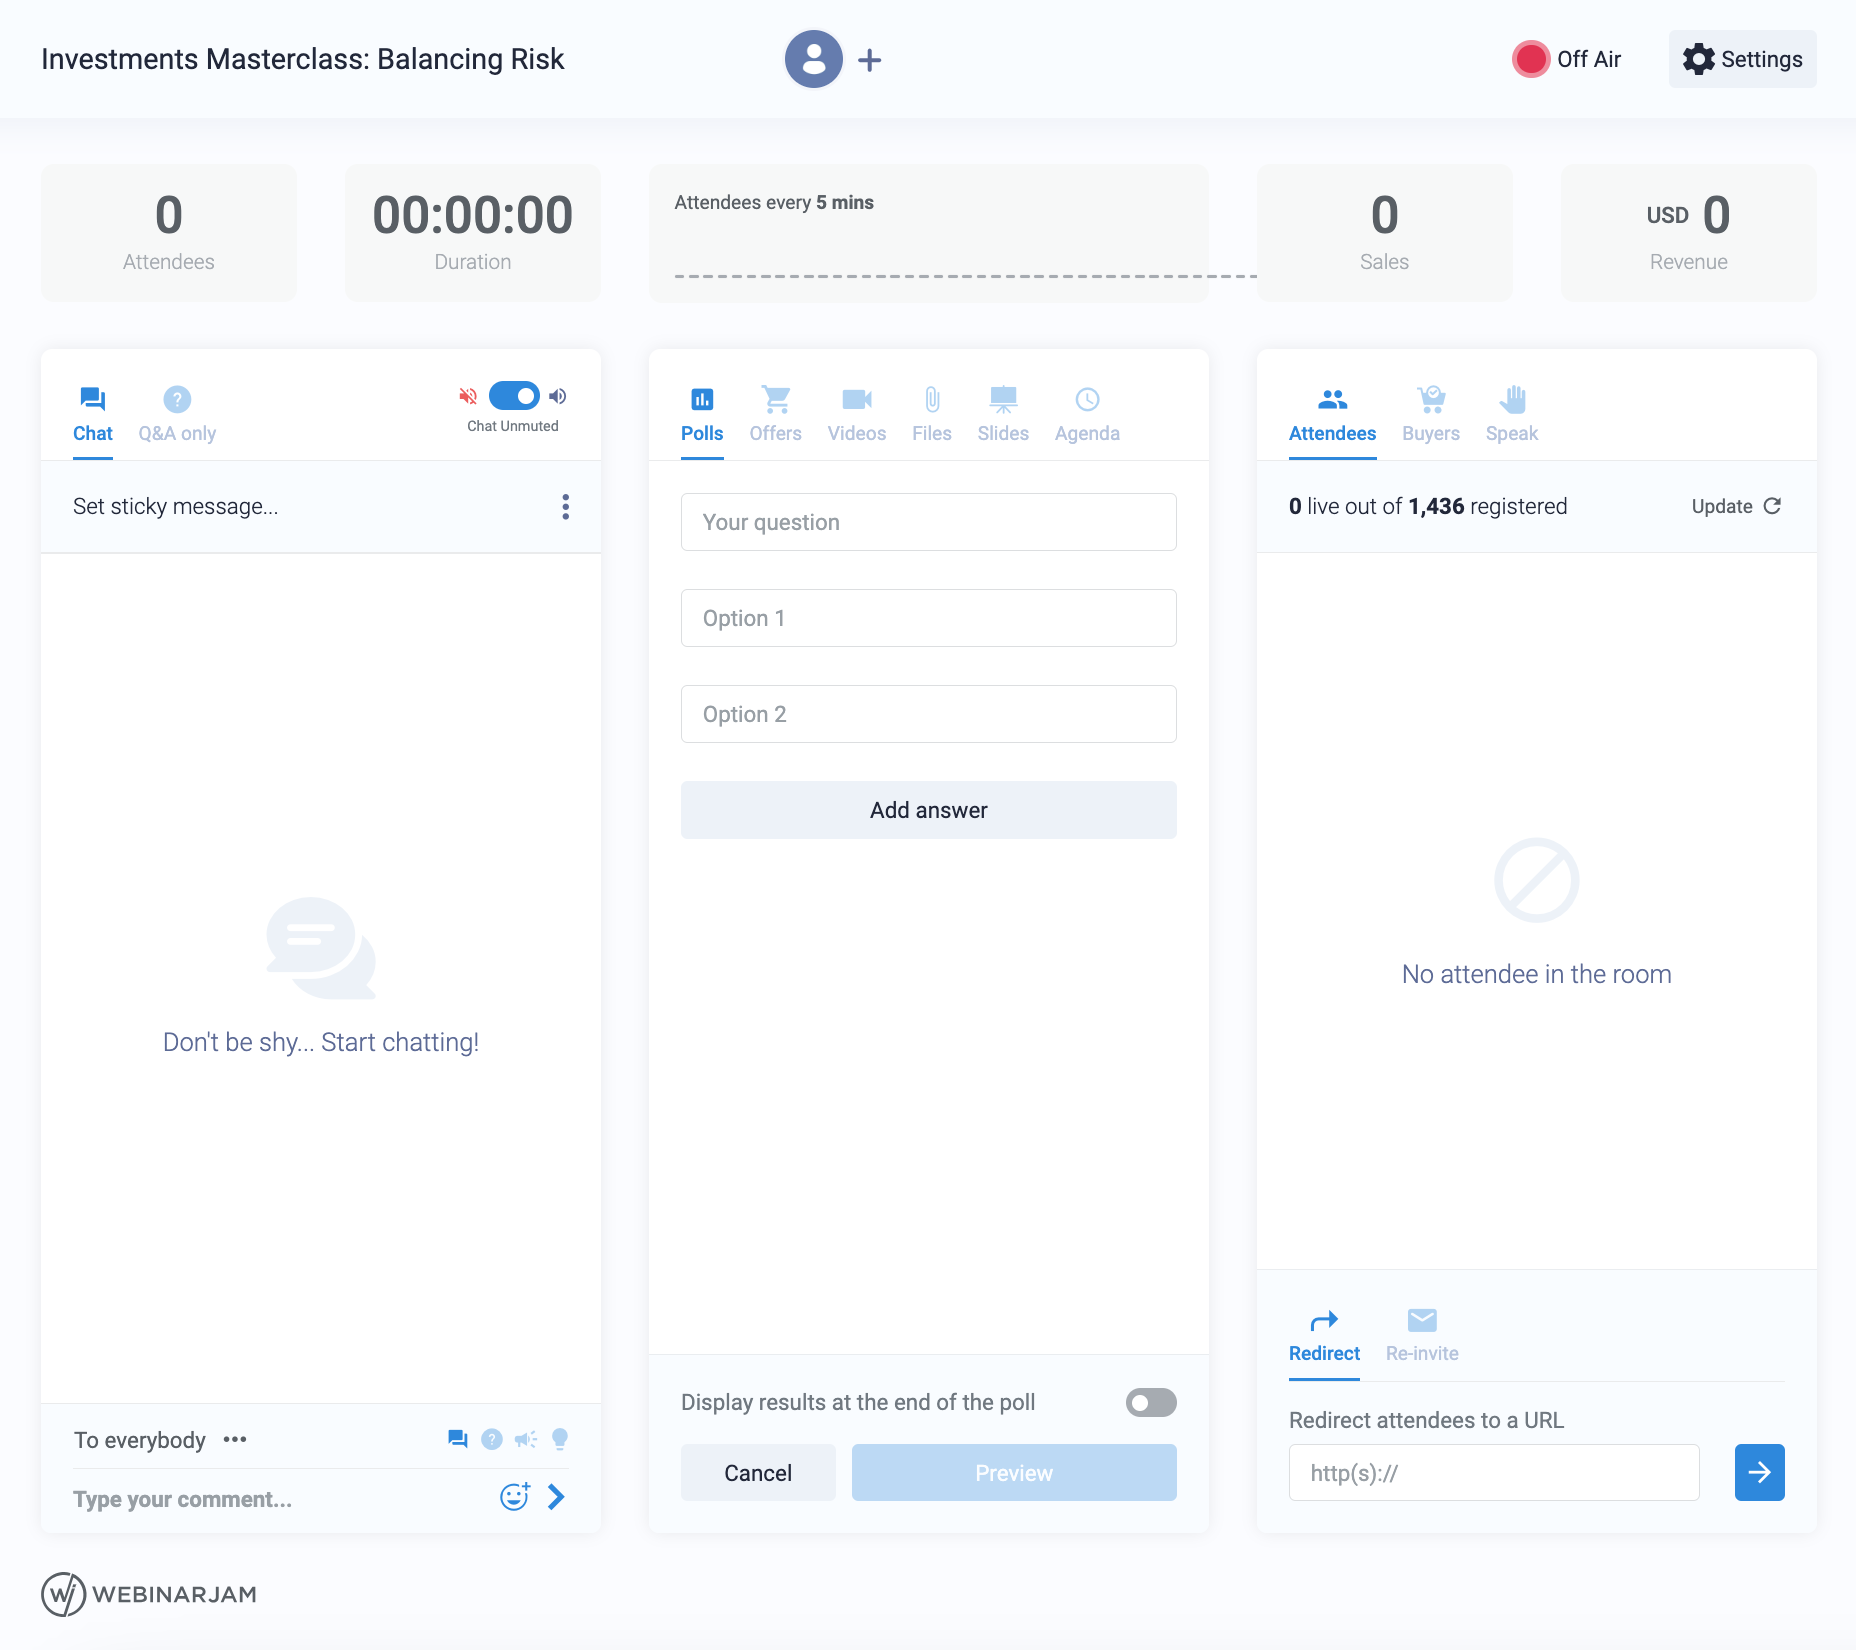

In the Live Room

WebinarJam live room environment
Presenter view of the WebinarJam live room

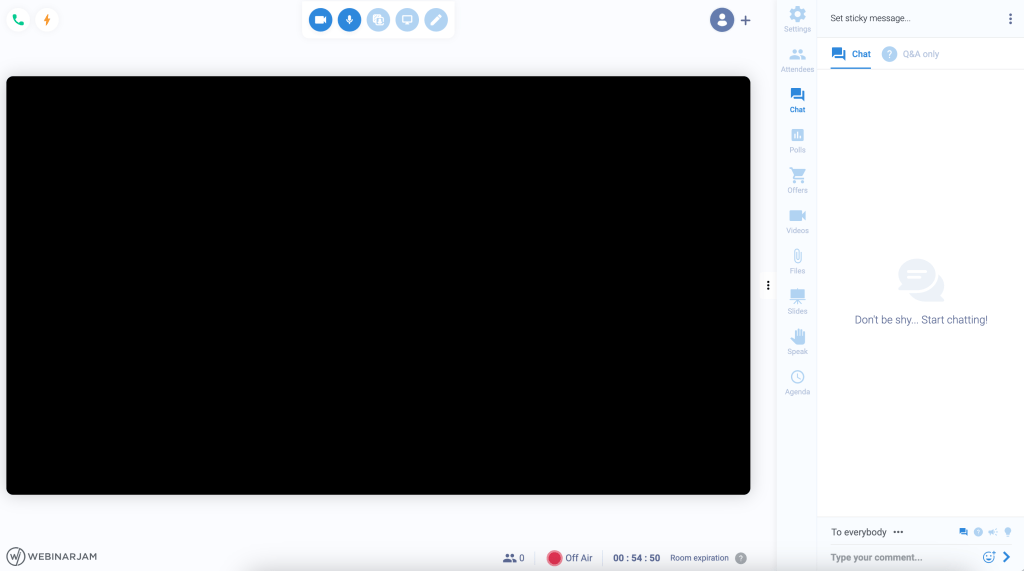
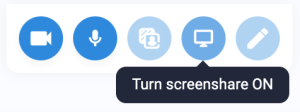
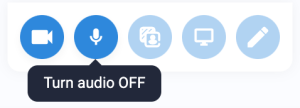
When you enter the room, your camera and microphone are ON by default. The options to turn these OFF are at the top of the page next to the screensharing feature, and whiteboard tool.

Presenter controls

The live room is offline when launched. This lets you test and set up the room before going live.

The “Off Air” indicator at the bottom of the live room shows that the broadcast has not started. The light turns green when the live broadcast begins.

Live room Off-air indicator

Note: The room shows a 60-minute timer before you go live. This is to give you time to prepare for the broadcast and does not count toward the live session duration. When you go live, the timer at the bottom of the screen updates to show the maximum webinar duration included with your WebinarJam subscription tier.

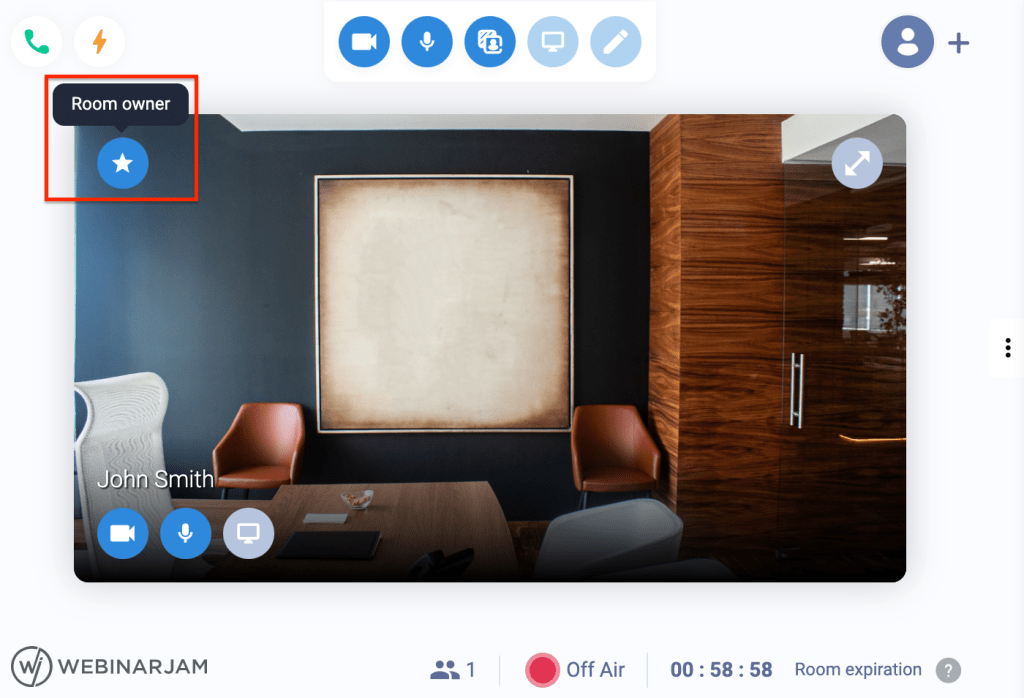
Presenter Video Feed

The live room generates a unique panel for each presenter that shows their video feed or profile image, their name, and individual audio and video controls (lower left corner of the panel).

In the upper left of the presenter feed is a star icon indicating the presenter’s permissions. Hover over each presenter’s feed to see it.

  • Dark blue star: Webinar host (all access admin)
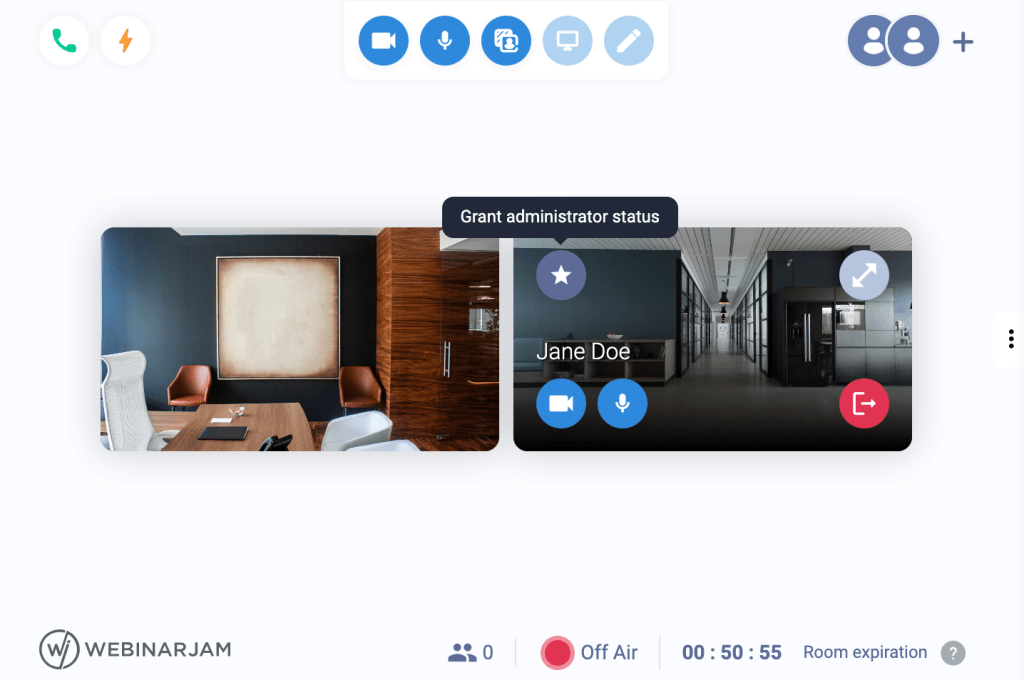
  • Light blue star: Co-presenters (access to speak, chat, and use live injections)

If you are an administrator, click the light blue star to promote a co-presenter to an administrator.

In the bottom left of the presenter feed are video, audio, and screen share buttons for each presenter.

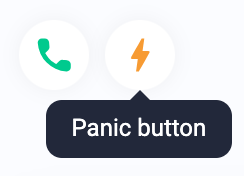
Go Live and Panic Button

Click the Go Live button in the top left corner to start the webinar broadcast.

Click Go Live to start the broadcast

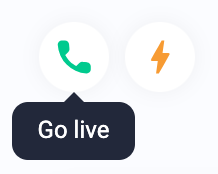
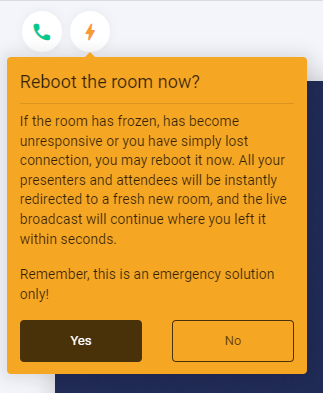
If the live broadcast stops working, click the lightning bolt icon (Panic Button) to reboot the room in an emergency.

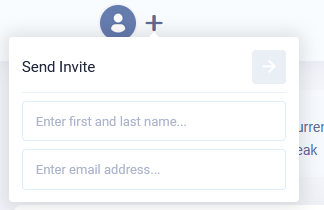
Additional Presenters

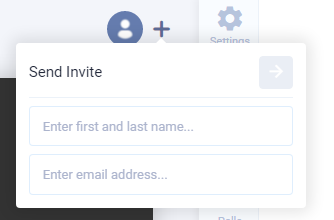
At the top of the window, invite additional presenters by clicking the plus icon and entering their name and email. The presenter will be emailed a unique link to enter the webinar (your link will not work for them).

Minimize Sidebar

Minimize the sidebar by clicking the three dots tab on the side of the panel.

Room Expiration

A 60-minute timer appears in the lower portion of the frame showing how long the room will stay active while you are Off Air. If you do not go live in one hour, the room will expire. Click the button on the expiration screen to immediately reload the room or visit the live room link again.

Live Room Off Air Timer


Customize the Live Room

Virtual Background & Blur

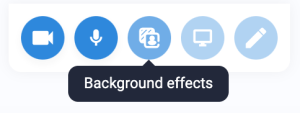
Change the background effect or image by clicking the center button in the menu at the top of the room.

Change the webinar background

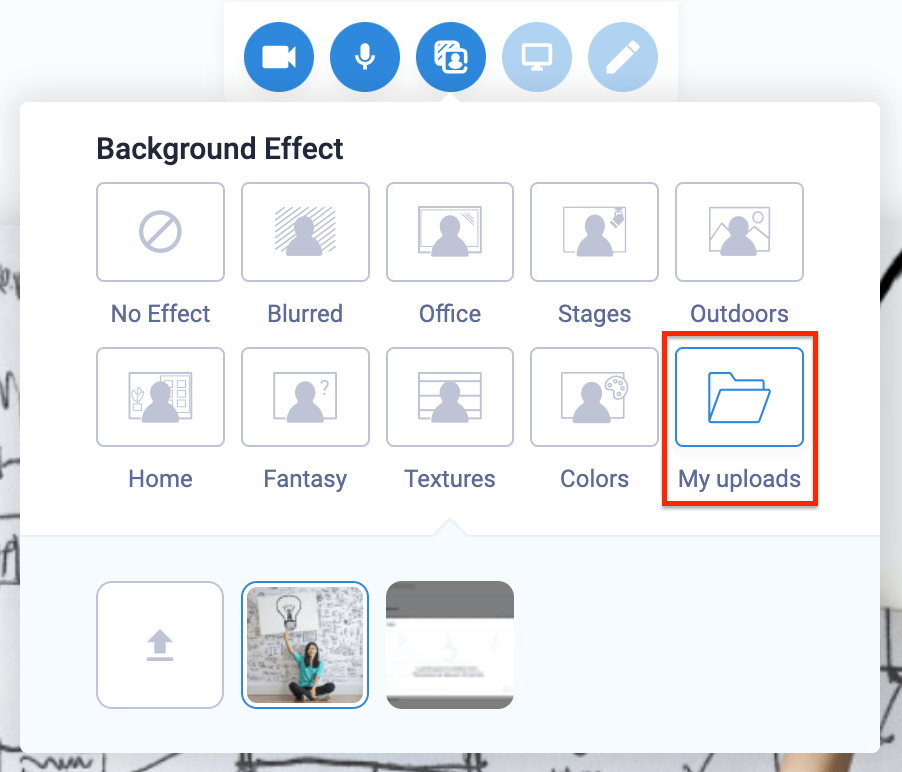
Select a preset or click My uploads to add a custom background. Background effects and images appear “behind” the presenter with a green screen effect.

Supported files: JPG, PNG, up to 4MB.
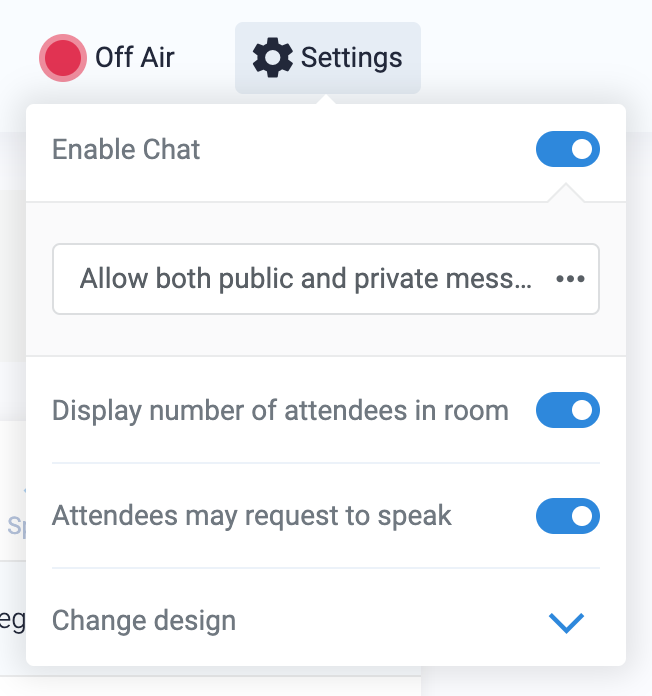
Upload custom background

Live Room Settings

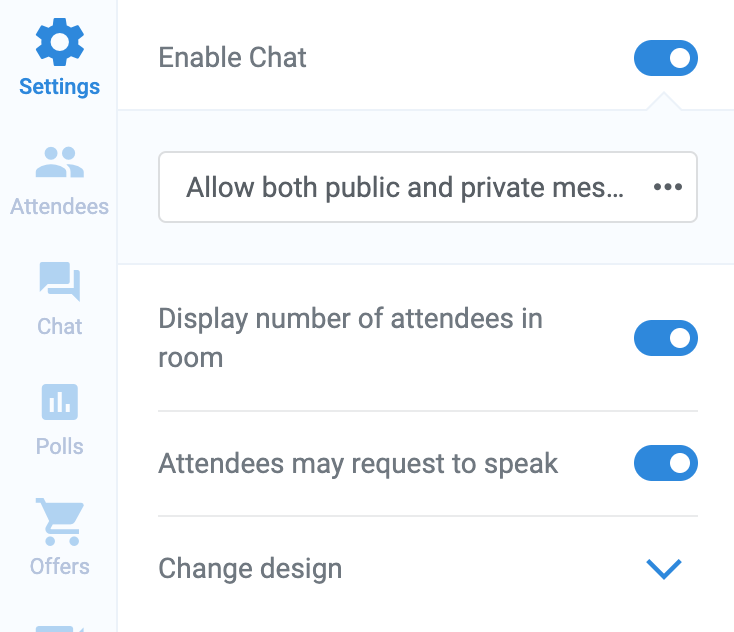
In the sidebar, configure the live room Settings.

  • Disable or enable chat
  • Allow public or private chat messaging or both
  • Show or hide the number of attendees in the room (this appears for everyone, presenters AND attendees)
  • Disable or enable the attendee Request to Speak feature
  • Change the design of the live room

Choose live room settings


Manage the Room: Attendees & Chat
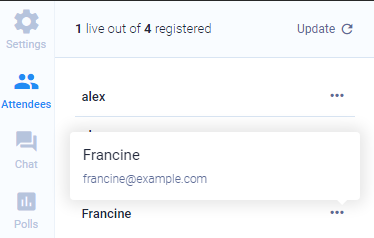
Attendee Redirect

The Attendees tab in the sidebar displays a list of all attendees in the live room.

Redirect attendees to a URL of your choice by entering a web address in the URL field and clicking the arrow icon.
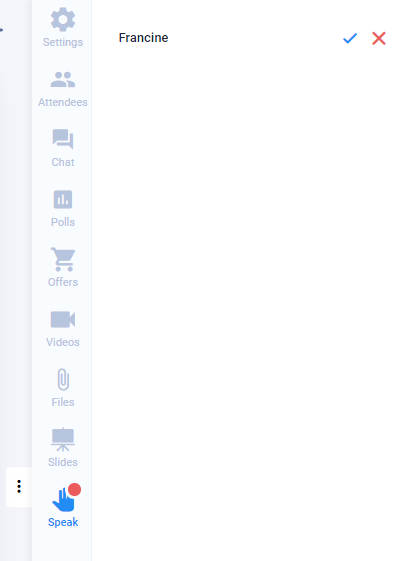
Attendees Speak

If you enable attendees’ ability to speak, you will find their requests in the bottom tab (shown below, labeled “Speak”) where you can accept or deny the request. If you accept, they will be brought in as presenters with video!
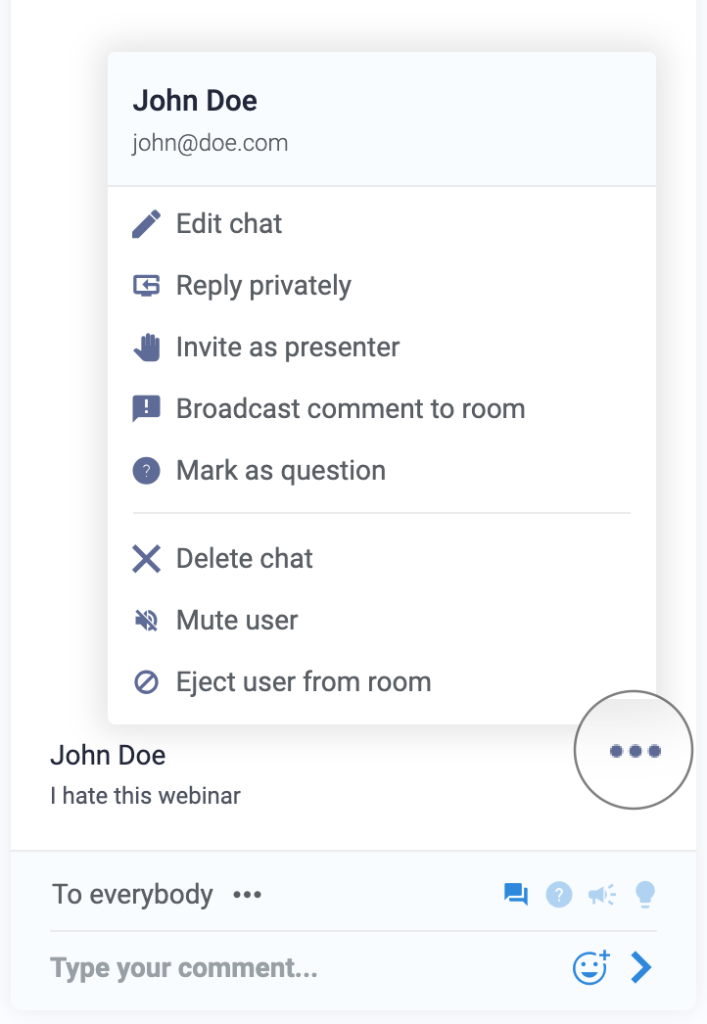
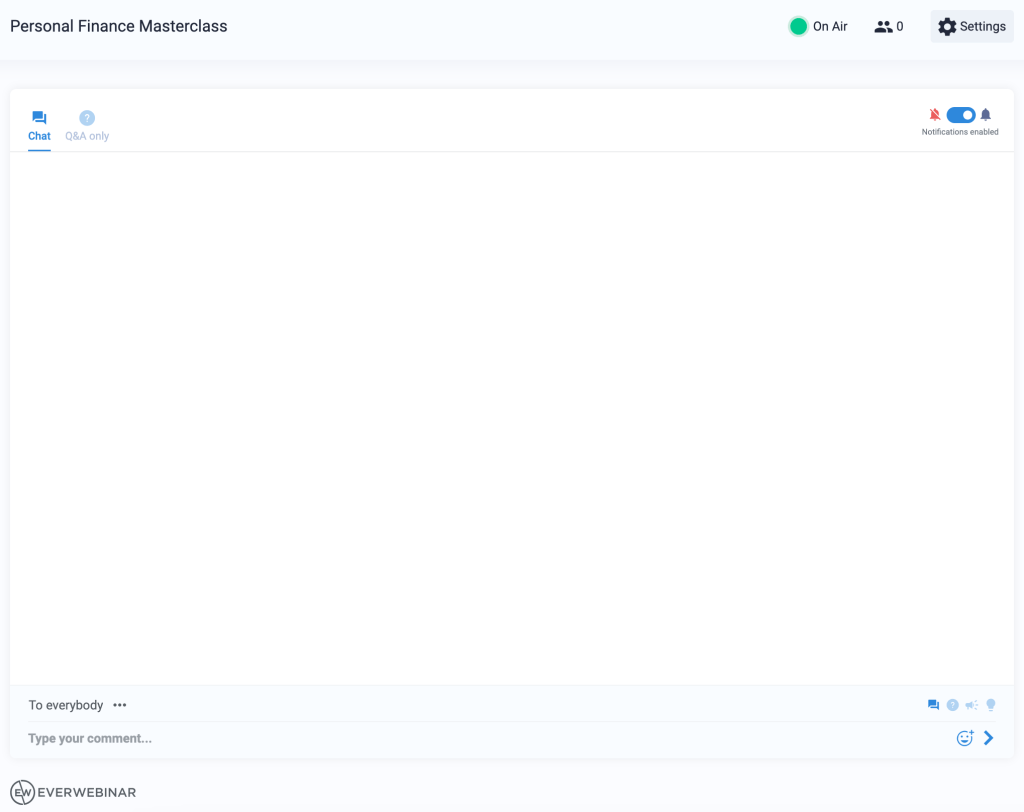
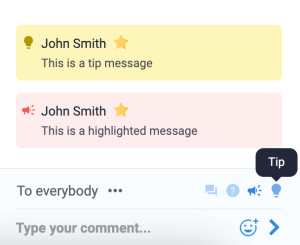
Chat

The chat tab contains the message feed from the webinar.

In the chat:

  • Send messages to the public room and join the conversation
  • Send highlighted messages (red in-line callout)
  • Send tip messages (yellow in-line callout)
  • Post sticky messages that remain on the screen
  • Chat privately with administrators
  • Chat privately with individual attendees
  • Presenters are identified in the chat by a star next to their name

Change the chat mode into Q&A mode and attendee messages will be marked as questions while your messages will be Answers. You can change any message by clicking the bubble next to a message.

Highlight and tip chat message styles


Manage the Room: Injections

Deploy and use the injections configured at the Live step of the webinar configuration wizard.

All presenters can access and use the live injections. Deploy pre-configured content to the live room or create new injections as needed during the live webinar.

Important: Live content created inside the webinar room is not saved for future sessions if the webinar has a multi-event schedule. Injections created during the broadcast are unique to that session. Pre-configuring live content is recommended.

Click the tabs in the sidebar to access each type:

  • Polls
  • Offers
  • Video
  • Slide Presentations
  • Agenda and notes

Click Preview to save a new injection. Click Publish to deploy it to the webinar room.

Learn more about Live Injections

Control Panel

This article is for WebinarJam and EverWebinar.
Check Your Plan: The Control Panel is available in EverWebinar and with WebinarJam Enterprise plans.

WebinarJam Control Panel

The Control Panel is the center of operations for your moderators in a live event. The dashboard contains all the information and controls available in the live room but in a format designed for easier viewing and management.

Control panel dashboard

Chat Control

The first of the three panels shows the live chat feed. From the first tab (Chat) you can chat with attendees, and edit/delete their messages if needed. The second tab (Q&A only) shows only the messages marked as questions. A response there will be marked as an Answer.

Click the three dots next to a message to see a user’s name, email, and management options:

  • Edit their comment
  • Reply to them in private
  • Invite them to join the live room as a presenter
  • Broadcast their comment to everyone
  • Mark the comment as a Question
  • Delete their comment
  • Mute user (click again to unmute)
  • Eject user from room (ban)

Manage chat and attendees with user menu

Mute vs Eject

Ejecting a user from the room immediately removes them and blocks them from entering again from the same browser session. If the user comes back through a different device or browser, eject them again or Mute them to prevent them from adding messages to the chat.

Muting a user prevents any messages they enter in the chat from appearing to the rest of the attendees in the room. The muted user can continue to send messages and will not see any indication that they have been muted, but the messages will not be displayed in the room.

Live Injections

The next panel contains live injections like polls, offers, videos, files, and slides. Preconfigured live injections can be deployed or used here, or new ones can be created during the live webinar.

Add or edit live elements in the Control Panel

Attendee Control

The final panel shows current attendees. The tabs on top filter the lists into all Attendees, only those who purchased, and only those requesting to speak live as a presenter.

At the bottom of the panel, you can redirect all attendees to a URL of your choice and resend email notifications to registrants.

Attendees pane in the Control Panel

Room Statistics

The top bar in white (shown below) displays, from left to right:

  • The current number of attendees
  • How long the webinar has been live
  • How many attendees have been in the room for each 5 minutes (shown as a graph)
  • The current attendees compared to the peak number of attendees
  • The number of sales made
  • The total revenue earned

Event Status and Settings

In the upper right of the Control Panel are two icons. One shows if you are on or off the air (live streaming or not), while the other is for additional settings. Clicking that icon, you can:

  • Restrict chat messages to public, private, or both
  • Display or hide the number of attendees
  • Allow or block attendees from requesting to speak live
  • Change the design of the live room

Update the event settings from the Control Panel menu

Add New Presenter

Presenters in the room are shown at the top of the screen as avatar images. Click the + icon to add a new presenter with their name and email. An email invite is sent to the new presenter with a unique access link to join the live room.


EverWebinar Control Panel

Because automated events are fully pre-configured, chat is the only moderation tool in the EverWebinar control panel.

  • Attendee chat messages appear only to themselves and webinar moderators (in the attendee’s unique access session)
  • Moderator chat messages appear to any attendee currently watching the webinar (in any session)

Since each attendee is in their own room (separate from anyone else watching), they will not see the chat from other attendees. However, if a moderator chats in the lower field, that message will appear to anyone watching.

To prevent confusion, it is best to reply privately to any chat message as an EverWebinar moderator.

EverWebinar control panel interface
EverWebinar Control Panel

Equipment and Connectivity

This article is for WebinarJam.

For the best webinar experience, optimized hardware and internet connections are recommended for the webinar host and all presenters.

Equipment

  • Use a computer with a modern quad-core processor with 8Gb RAM (minimum) to broadcast a webinar as the host.
  • Use internal camera and microphone devices or connect external hardware with a USB connection.
  • Set camera resolution to a minimum of 720p (high-definition display, 1280×720 pixels).
    • WebinarJam supports up to 1080p (full HD display, 1920×1080 pixels).
  • Headphones are recommended to reduce audio feedback and keep sound input and output separate

Advanced hardware setupConnecting external cameras

Internet Connection

  • Run your webinars from a hardwired internet connection instead of WiFi, if possible.
  • Check the connection quality for the host and co-presenters with a speedtest: https://www.waveform.com/tools/bufferbloat
    • Upload and download speeds should be at least 5mbps, but higher is better.
    • Bufferbloat (latency) should be at least “B” or higher (less than 100 milliseconds).
  • Keep your internet connection clear of any other activity during the live broadcast.
    • Example: Family members watching streaming media or playing video games on the same connection may negatively impact your broadcast quality.
  • Close all applications, windows, tabs, music, and anything not necessary for the webinar to improve resource allocation for the broadcast.
  • Avoid hosting a webinar (uploading the stream) and watching as an attendee (downloading the stream) on the same internet connection. WebinarJam will prioritize the upload stream, which may negatively impact the quality of the attendee stream.

Browser Best Practices

  • Google Chrome is the recommended browser to run and attend a live WebinarJam event.
    • Firefox is a good secondary option. For iOS devices use Safari.
  • Before every event:
    • Update your browser to the latest version
    • Clear your cache and cookies for “all time”
    • Restart your computer

Analytics

This article is for WebinarJam and EverWebinar.

View analytics for each webinar you present, so you can understand how well your message is performing.

Launch WebinarJam or EverWebinar to see analytics for each type of webinar.

  • Click Analytics in the left-side menu
  • Select a Webinar, Session(s), and Event(s) from the drop-down fields

Traffic

Webinar traffic analytics

Traffic analytics show:

  • Total visitors to your registration page (WebinarJam-hosted or custom)
  • Percentage of visitors who became registrants (sign-up rate)
  • Total registrants for the webinar
  • Total registrants who attended the broadcast during its scheduled time
  • Total registrants who attended the replay
  • Percentage of registrants who attended each viewing (show-up rate)

Pro Tips:

  • Hover over each statistic in the traffic graph to see the analytics divided by device type: computer, phone, tablet, or unknown.
  • The number of registrants may be higher than the number of visitors to the registration page if some people are registered through one-click registration or auto-subscription.

Engagement

Webinar engagement analytics chart

Engagement analytics show Live Webinar and Replay statistics separately:

  • Total number of attendees who entered the webinar room
  • Total length of the webinar session
  • Average length of time any one attendee stayed in the room
  • Percentage of attendees who watched the whole webinar
  • Average user rating and number of ratings given for the webinar

No. of attendees graph: Number of attendees in the room at a given time during the webinar (shown at 5-minute intervals).


Monetization

Monetization analytics show:

  • Registration fees (if the event was a paid webinar)
  • Sales from the live room (if a product offer was shown)
  • Sales from the replay room (if a product offer was shown)

Sales conversion is the percentage of attendees who made a product purchase. People who registered but did not attend are excluded from the conversion percentage.

Earnings per attendee is the total revenue generated during the broadcast divided by the total number of attendees. For example: $100 earned divided by 50 attendees would equal $2 earned per attendee.

Pro Tips: To track revenue for an event, some advanced configurations are required. Learn more:


Notifications

Notification email click and open rates

Notification analytics show:

  • How many times a message was sent
  • How many recipients opened each email
  • How many times a link in each message was clicked

The blue reset icon resets all email statistics to zero. Be careful: This cannot be undone.

Enable presenter third-party cookies

This article is for WebinarJam.

Important: Cookie tracking is part of your browser’s privacy settings because cookies are used to store information about your browser sessions and activity and can impact how data about you and your behavior are shared online. Enabling third-party cookies will allow WebinarJam to gather analytics about activity in your event, so it is helpful to turn them on for the duration of the webinar. Revert your cookie settings to the browser default after the event to restore the security settings for your normal browsing activity.

It is recommended that webinar presenters and moderators enable cookies and third-party cookies in the browser used to broadcast a WebinarJam event to ensure that all functions of the webinar operate correctly.

Webinar attendees are not subject to any cookie requirements and can view an event regardless of their cookie preferences.

Learn how to find your cookie settings in:

  • Google Chrome
  • Firefox
  • Apple Safari
  • Microsoft Edge

Note: Internet Explorer is no longer supported by Microsoft. Please update to Microsoft Edge instead of using an old version of Internet Explorer in order to ensure support for your webinar.


Google Chrome (Windows and MacOS)

In Google Chrome:

  1. Go to Settings > Privacy and security
  2. Click Cookies and other site data in the privacy menu

Safari (MacOS only)

In Safari:

  1. Go to Preferences > Privacy

Note: Apple no longer updates or supports their Safari browser for non-macOS platforms. Use of the Safari browser on a Windows-based PC is not recommended for WebinarJam events.


Firefox (Windows and MacOS)

In Firefox:

  1. Click Settings in the main menu
  2. Go to Privacy & Security and adjust your privacy settings to enable third-party cookies

Microsoft Edge (Windows and MacOS)

In Edge:

  1. Go to Settings > Cookies and site permissions
  2. Under Cookies and data stored, click Manage and delete cookies and site data

Presenter permissions in the live room

This article is for WebinarJam.

Presenters in the WebinarJam live room have different permissions depending on their role. The presenter’s role is indicated by a star icon in the top left corner of their video feed pane.

  • Hover over the star to see the role.
  • Click the star to change permissions.

Live room owner

Grant administrator access

Spotlight Presenter

Invited to be a presenter from the live room interface. Status: Light blue star icon

  • Appear in the video feed
  • Chat and post special messages (sticky, highlighted, etc.)

Presenter

Added as a presenter in the webinar configuration wizard. Status: Light blue star icon

  • Appear in the video feed
  • Chat and post special messages (sticky, highlighted, etc.)
  • Change room settings
  • View, create, and deploy live injections (polls, offers, etc.)

Administrator

Granted administrator status from the live room interface. Status: Blue star icon

  • Appear in the video feed
  • Chat and post special messages (sticky, highlighted, etc.)
  • Change room settings
  • View, create, and deploy live injections (polls, offers, etc.)
  • Start and end live broadcast
  • Use panic button
  • View all presenters
  • Grant or revoke administrator permissions
  • Eject spotlight presenters
  • Turn OFF a presenter’s camera or microphone

Room Owner

The default owner of the room is the webinar host (the first presenter in the webinar configuration). Status: Blue star icon

  • All administrator controls
  • Revoke permissions and eject any other administrator or presenter
  • Only one user can be the room owner at a time
  • Room ownership cannot be revoked by any other user

If the host does not enter the room or is disconnected, ownership passes to the second presenter configured in the webinar configuration.

Using the panic button

This article is for WebinarJam.
Check Your Plan: The panic button is available in WebinarJam Professional and Enterprise.

The panic button is a feature of the WebinarJam Live Room. It is an emergency switch that lets you manually reboot your webinar room without losing any logged-in users or ending the live broadcast.

Only the room owner and administrators have access to use the panic button. The button is located in the top left corner of the webinar room.

WebinarJam Live panic button

When to Reboot

If the webinar room is frozen and unresponsive or you lose your connection, use the panic button to move the active webinar session into a new live room.

  • All active users are transferred, including presenters, moderators, and attendees
  • The active broadcast is transferred and will continue to stream in the new room without requiring a restart
  • Live injections (polls, offers) that were pre-configured in the webinar wizard will be available in the new room

Content specific to the original session will not appear in the new room, including:

  • Existing attendee chat messages
  • Special chat messages, such as sticky posts or announcements
  • Injections (polls, offers, etc.) that were configured inside the live room
  • Changes to the agenda
Important: Although some content cannot be regenerated to display in the new live room, no data is lost during a panic transfer. The analytics and replay for the event will show all data from before and after the panic button is used.

Attendee Experience

If the webinar room is rebooted, presenters and attendees will see a series of status screens while the new room is being prepared.

Panic status 1

Panic status 2

Panic status 3

When the new room has been generated and the broadcast is restored, all participants in the webinar will see the video stream continue with no further interruption.

Attendees on some devices or browsers may need to press the play button on the video screen to start playback again.

Live chat will be functional, but no messages added in the previous room will be displayed.

Live injections that were deployed and active in the previous room will have to be redeployed.

Using screenshare

This article is for WebinarJam.

Presenters in the WebinarJam live room can appear on camera, use a virtual whiteboard, and share their local computer screen with the room.

Screenshare Best Practices

Before running a live webinar, test the screen share tool to make sure you are familiar with the settings and your device has the necessary permissions enabled.

Grant device or browser permissions to allow screen share. The exact steps will vary depending on your device and operating system.

Click the screenshare icon at the top of your presenter video feed in the live room to start sharing.

Turn screenshare on

  1. Select a single window for sharing. Do not share the entire screen.
  2. Keep the shared window maximized. Minimizing the window will hide the content from the room.

If your browser or operating system has been updated since your last webinar, check permissions again before running a new live webinar.

As a matter of best practice, always include a screenshare test when testing a new webinar.

Broadcasting from a mobile device

The screenshare and whiteboard tools are not available in the live room for presenters logged in on a mobile device. For the best experience using WebinarJam, a desktop or laptop computer is recommended for all presenters.

Test EverWebinar

This article is for EverWebinar.

Testing an automated EverWebinar event involves checking the registration process and all pre-configured elements to make sure everything works correctly. There is no live broadcast element in EverWebinar, so no camera, audio, or connection checks are needed.

Test Registration and Emails

Check the registration page, confirmation page, survey (if configured), and notification emails.

  1. Use the attendee registration link for your event to go to the registration page
    • Find the registration link in Your Links > Attendees
    • Review the format and messaging on the page
  2. Register for the event using a valid email address
  3. You will be automatically redirected to the confirmation page
    • Review the format and messaging on the page
    • If a survey is configured, open it and submit a test
  4. Check your email to see the pre-webinar confirmation email with your unique webinar access link

Test Webinar Room

Log in to the webinar room and test the video playback, messaging, and any configured injections.

  1. When the webinar is scheduled to begin, use the access link in the confirmation email to go to the countdown page
  2. Enter the room and click to start watching the broadcast
  3. Enter messages in the chat to test the live chat or question box (if enabled)
  4. Watch the entire webinar and check any injections that are configured to appear (polls, offers, etc.)
    • Make sure the timing is correct for all injections
    • Interact with the injections. If an offer is configured, test the complete purchase process.

Test Replay

If a replay is enabled for the webinar, test the post-webinar follow-up email and the direct access link to the replay room.

  1. Check your email for the post-webinar email containing a link to the replay (if enabled)
  2. Enter messages in the chat to test the question box (if enabled)

Testing Tips

Every function of your webinar should be tested before you launch it to your prospects. This article covers many scenarios, but it is recommended that you create your own custom testing checklist to ensure that every aspect of the setup works exactly as designed.

For example:

  • If you have Zapier automation configured for your webinar, test every trigger event for your Zaps.
  • If you are using a custom SMTP or autoresponder and automation rules, test all related scenarios to ensure your automation rules fire correctly and email notifications contain the correct information.
  • If you are using one-click registration, test the sign-up flow by registering through an email sent from your auto-responder.
  • If a product offer is configured to appear in the webinar, test the purchase flow and successful sales goal tracking
  • Check the event analytics after your test to see how your activity as an attendee was recorded

The ultimate goal of testing is to make sure that everyone engaging with your content has an excellent experience. Put on your customer glasses and take a close look at every detail!

© 2024 WebinarJam All Rights Reserved