Zapier
This article is for WebinarJam and EverWebinar.
Before Getting Started
- An API key is required to allow Zapier to communicate with your account. If you are not already approved to use the WebinarJam / EverWebinar API, apply for a key.
- Access to the API is not available for trial accounts. To access an API key for use with Zapier, upgrade to a paid plan if needed.
Overview
Zapier is a tool that lets you automate workflows between web applications that are otherwise unrelated. This article describes the process of creating automation between WebinarJam or EverWebinar and many third-party applications using Zapier.
Popular automations to try:
- Send registrants to an autoresponder not in our integration list
- Tag registrants in an autoresponder not in our integration list
- Add new registrants to a Google Sheets Spreadsheet
- Send yourself a notification when someone registers
- Send registrants a survey or form for additional information
- Add registrants to an SMS service for additional messaging
- Create Trello boards for follow-up services
- Create tasks with Project Management Programs
- Create a purchase (for sending a free follow-up file)
Zapier Resources
Zapier is a third-party program and cannot be supported in-depth by the WebinarJam team. For detailed information about Zapier and how to set up your Zaps, refer to the Zapier knowledge base:
Start a Zap and Connect WebinarJam / EverWebinar
Before starting, review some basic concepts:
ONE TIME: Zapier does not have a mechanism to keep items in sync after the first time they run through a Zap. Think of Zapier like a one-way, one-time pipeline.
ONE TRIGGER: Zaps are triggered by a single event. If you want the same action to happen based on multiple triggers, create a separate Zap for each unique trigger.
NEW DATA ONLY: Zaps cannot see data that was created before your Zap was turned on. Zaps are triggered by events that happen after the Zap is turned on – in other words, by data that is newly added. To force Zapier to process data that existed before your Zap, refer to this article on bulk importing existing data into zaps.
Create a Zap
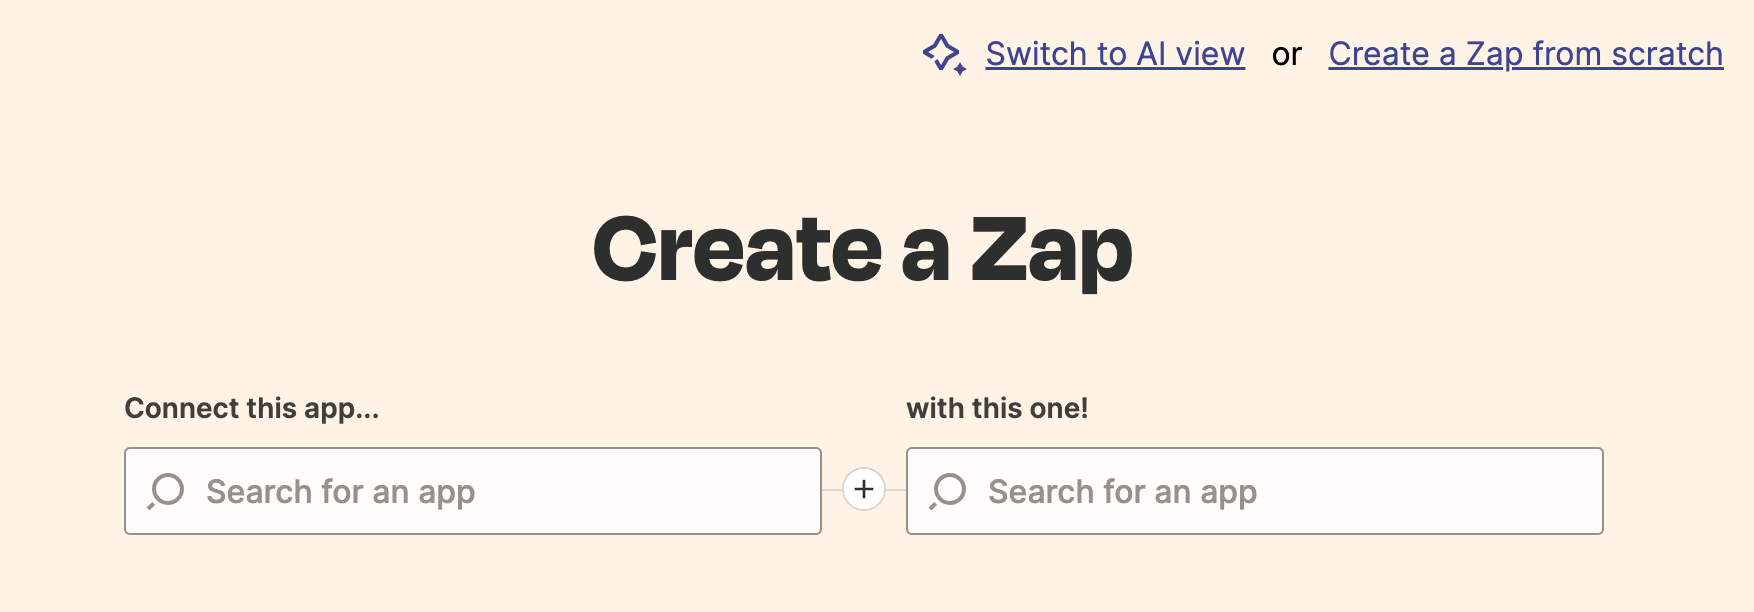
Log in to the Zapier dashboard and select your preferred creation method. This article describes the Classic process.
If not already selected, click Classic view in the dashboard to follow this article.

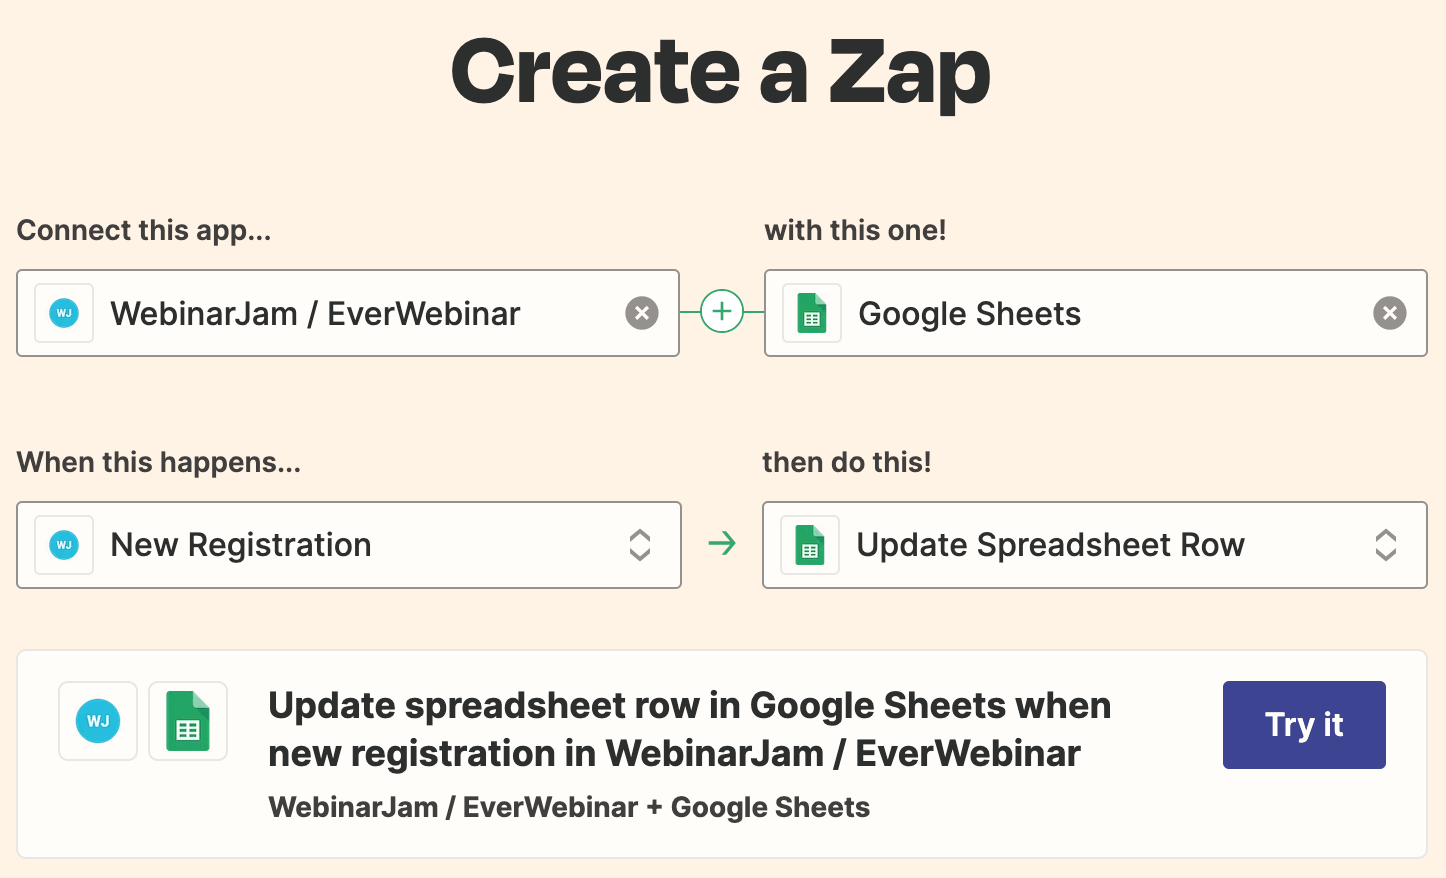
To set up a Zap, four parameters are defined:
1) Connect this app → 2) with this one!
3) When this happens → 4) then do this!
Zaps are IF/THEN automation rules. They create automatic processes that trigger when one event happens (IF) and initiate a follow-up action in response (THEN)
- Under Connect this app… search for WebinarJam / EverWebinar
- Under with this one! Search for the app where you want to send information
- Under When this happens… select a WebinarJam or EverWebinar event to trigger the Zap
- Under then do this! Select an action to occur in the destination app you selected
WebinarJam / EverWebinar Triggers
Available WebinarJam / EverWebinar triggers include:
| Trigger | Timing | Description |
| New Live Attendee | Immediate | Triggers when a registrant joins a live webinar. |
| Registrant Joins Webinar After | After session | Triggers if a registrant was late for a live webinar. |
| Registrant Misses Webinar | After session | Triggers if a registrant missed the live webinar. |
| New Registration | Immediate | Triggers when a user registers for a webinar. |
| Registrant Attends Replay | Immediate | Triggers when a registrant joins the webinar replay. |
| Registrant Leaves Before | After session | Triggers if a registrant left the live webinar before a specific timestamp. |
| Registrant Purchases | Immediate | Triggers when a registrant buys a product during the live webinar. Dependent on active sales goal tracking. |
| Registrants Stays Until | After session | Triggers if a registrant stayed in a live webinar past a specific timestamp. |
Go to Zapier’s app catalog for the most up-to-date list of available WebinarJam / EverWebinar triggers.
Important:
- Certain triggers fire when the webinar session is over. If you want to trigger a zap before or during the event, use triggers that fire immediately instead.
- Zaps are triggered by a single event. If you want the same follow-up action to happen based on multiple triggers, create a separate Zap for each unique trigger.

After defining the trigger and action for your new Zap, click Try It to enter the editor and complete the configuration.
Connect with WebinarJam
WebinarJam API key
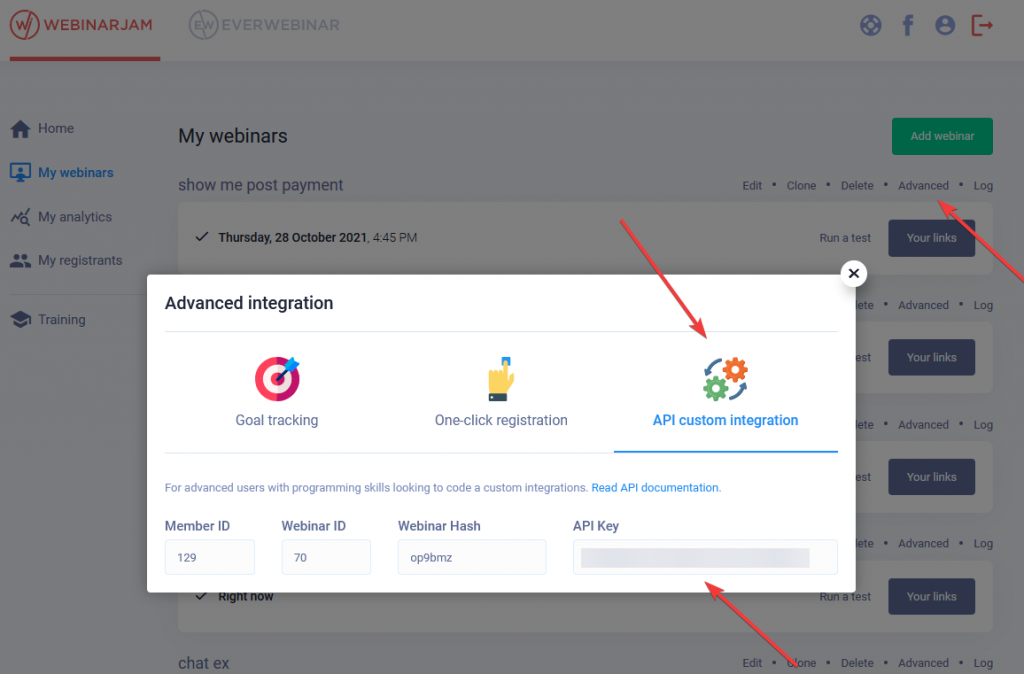
A WebinarJam API key is required to connect your WebinarJam and Zapier accounts. If you are not already approved to use the WebinarJam / EverWebinar API, apply for a key. The key is found in your main webinar dashboard, under the Advanced link for any webinar. The API key is a global value, so it is the same for every event in your account.
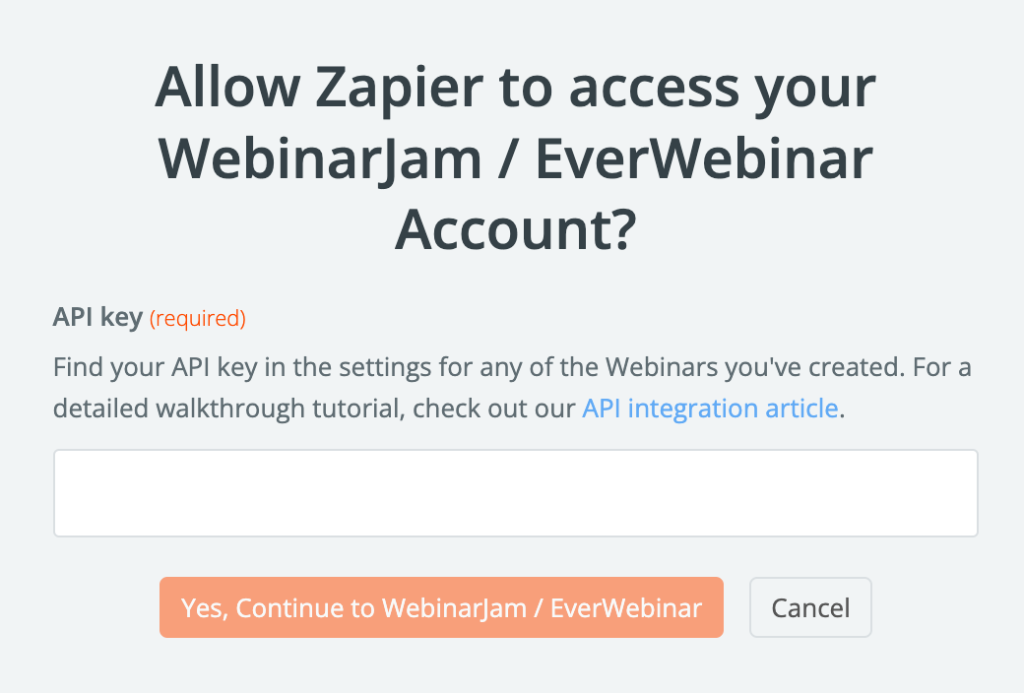
The editor will prompt you to sign in to connect a WebinarJam / EverWebinar account, or select one that is already connected.
If you select Sign In, a popup appears to authorize the access request. Enter your WebinarJam API key in the field to authorize access.

Complete the Zap
Use Zapier’s editor to finish setting up and testing the Zap.
The API connection gives Zapier access to your WebinarJam / EverWebinar account so the editor can display your webinars in the configuration process. Choose the webinar you want the Zap to trigger from and configure the actions for the destination application as desired.
When the setup is complete, turn the Zap ON by using the toggle in the editor or your Zapier dashboard.

Test the Integration
As with any complex configuration, it is best to test your Zap with a demo webinar to make sure it works as expected before a live event.

