WebinarJam and EverWebinar User Documentation Webinars for everyone!

Webinar notifications

This article is for WebinarJam and EverWebinar.

Webinar notification emails are sent automatically to the people who register for your events. Add up to 10 notifications before and 10 notifications after the webinar.

Send a confirmation message immediately after registration

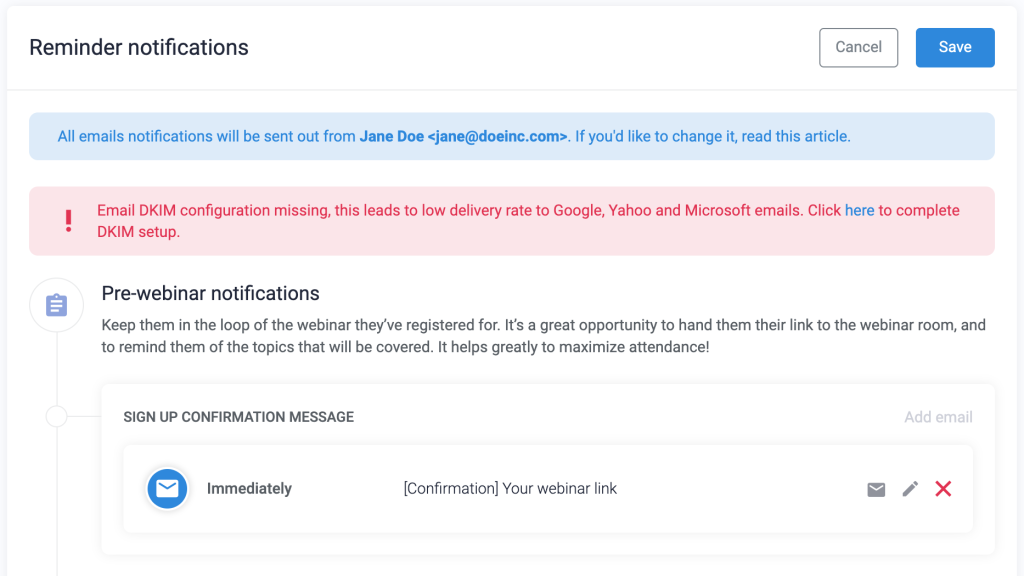
Pre-webinar notifications:

  • Signup Confirmation Message: Sent when a person registers. ON by default.
  • Pre-webinar reminders: Sent before the webinar (configure timing in the settings).
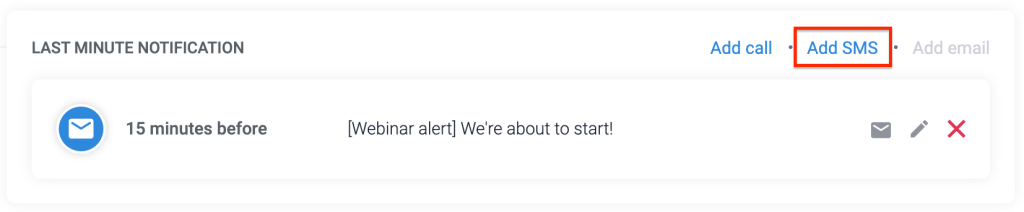
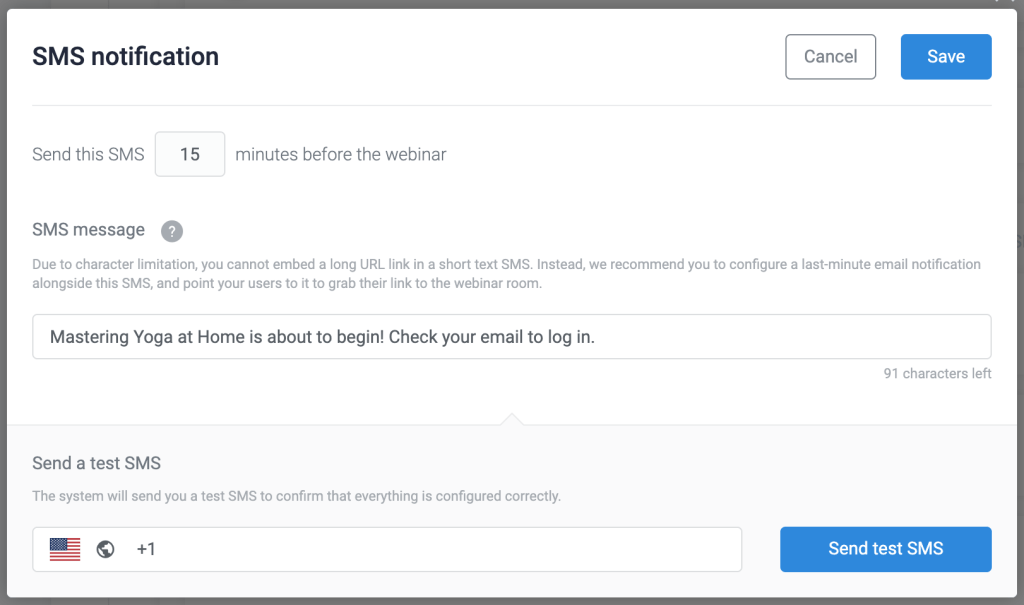
  • Last-minute reminder: Sent 15 minutes before the webinar. ON by default.

Post-webinar notifications:

  • Post-webinar follow-ups: Turn on to automatically send a replay to all registrants after the event. Configure recipient conditions and timing in the settings.

Add or Edit Notifications

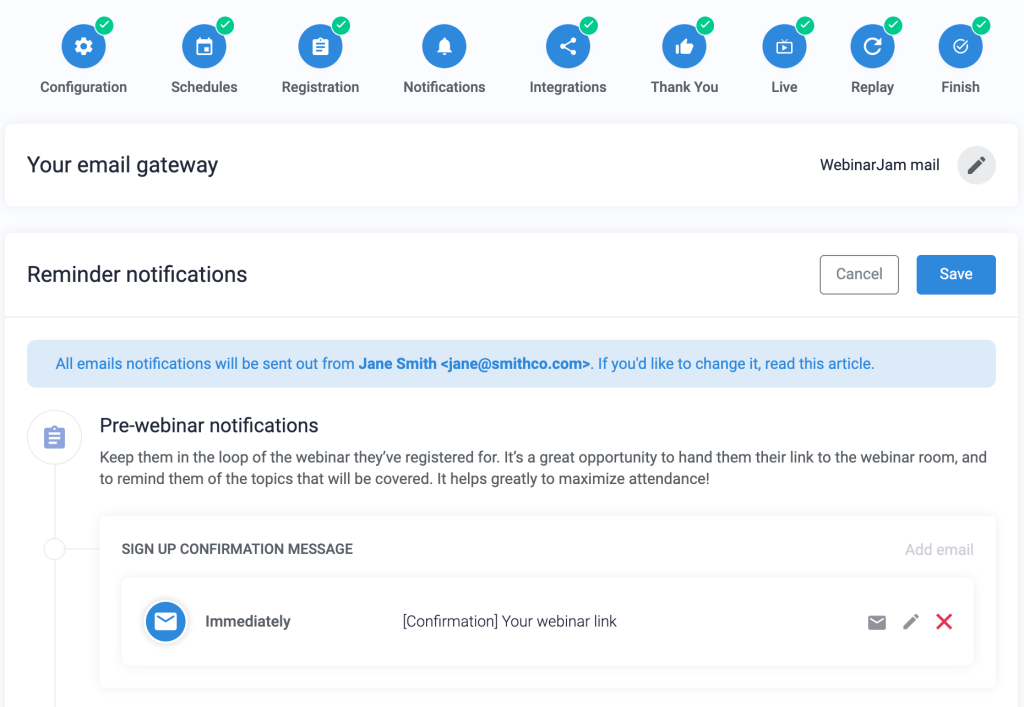
  1. Open a webinar and go to Notifications > Reminder notifications
  2. To edit an existing email: Click the pencil icon on any email module to edit it
    • Click the envelope icon to send yourself a test copy of the email
    • Click the X to delete the email (Warning: This cannot be reversed)
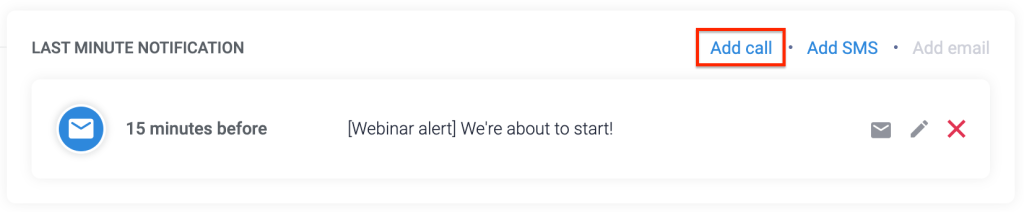
  3. To add a new email: Click Add email to add a pre-webinar reminder or post-webinar follow-up email
    • Use the post-reminder follow-up to automatically send registrants a replay of the webinar
  4. Customize the email in the pop-up editor window
  5. Save the email editor and complete the Notification step of the wizard

Customize Notifications

  • Pre-webinar notifications are sent to ALL registrants.
  • Post-webinar notifications can be segmented to send to all or some registrants based on behavior conditions.

Shortcodes

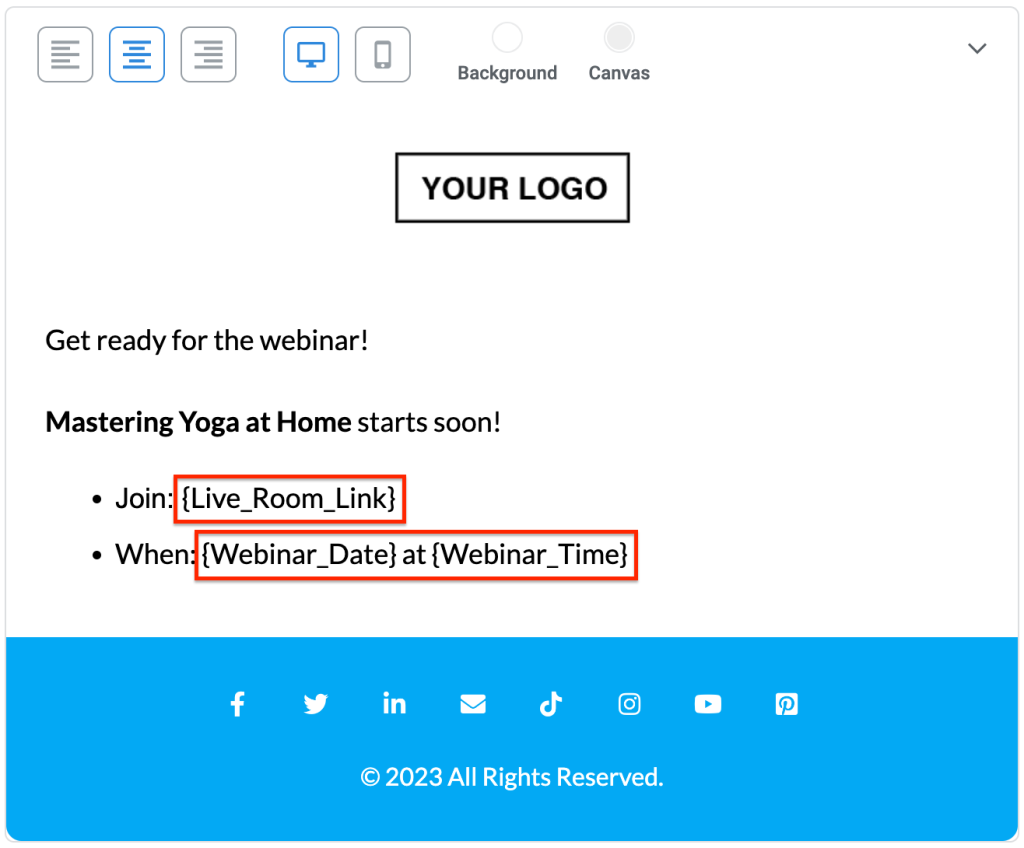
Add unique information about your webinar to the email using shortcodes. These dynamic content codes are contained in {curly_brackets}.

Notification email editor

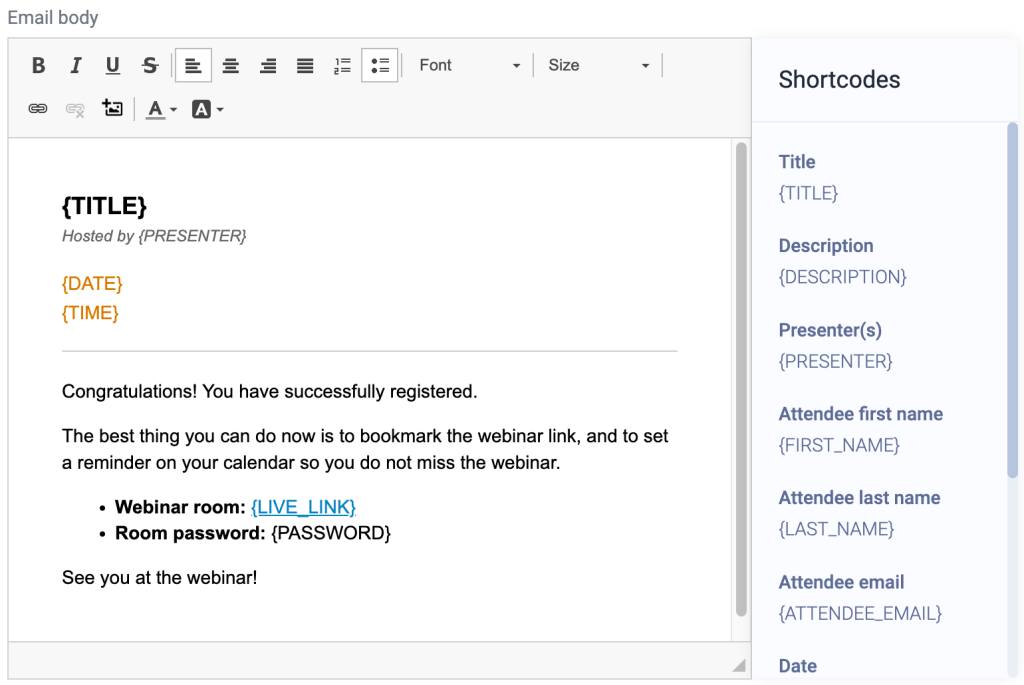
Shortcodes are automatically replaced with the code’s corresponding value when the email is sent. For example, {first_name} might become John in the recipient’s inbox.

Notification shortcodes:

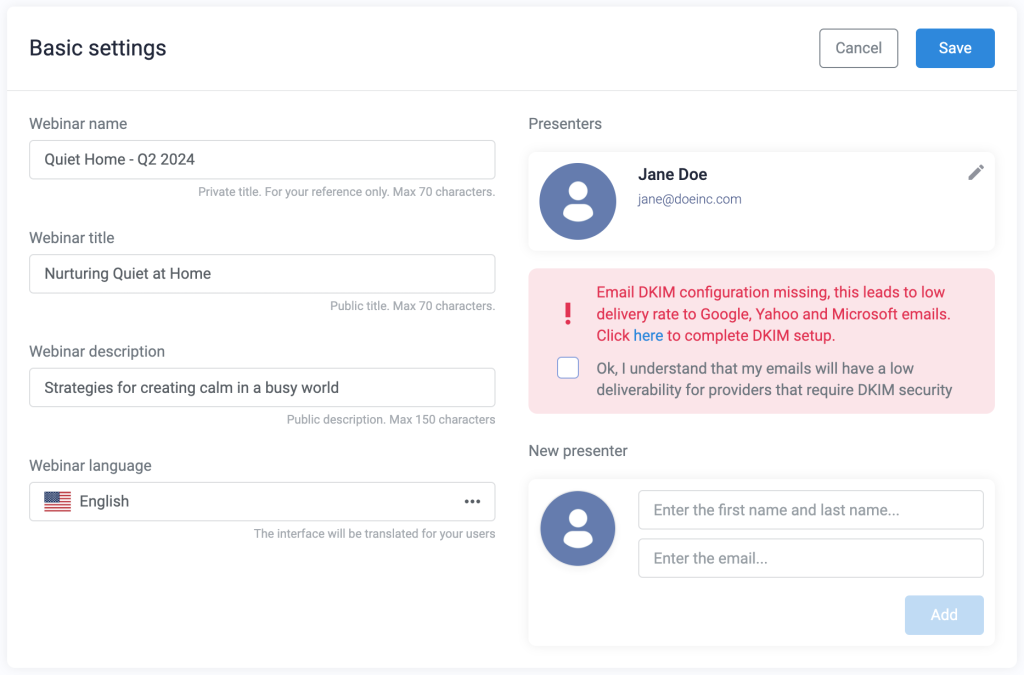
  • {TITLE} – Title of your webinar
  • {DESCRIPTION} – Description of your webinar
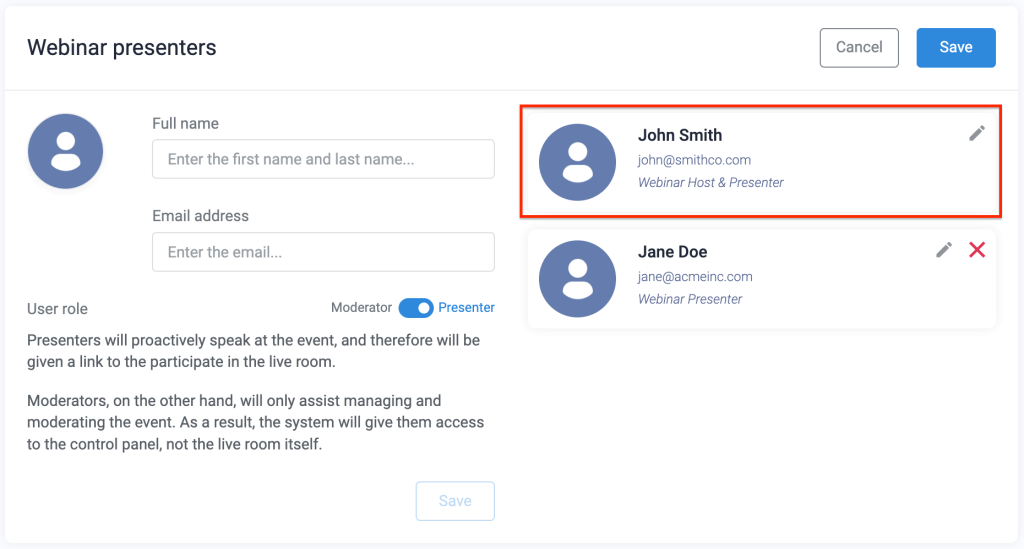
  • {PRESENTER} – List of the host and presenters for the webinar
  • {FIRST_NAME} – Email recipient’s first name
  • {LAST_NAME} – Email recipient’s last name
  • {ATTENDEE_EMAIL} – Email recipient’s email address
  • {DATE} – Date of the upcoming webinar
  • {TIME} – Broadcast time of the upcoming session
  • {LIVE_LINK} – Unique live room URL for the registrant to attend the webinar
  • {PASSWORD} – Password to enter the room (if password protection is enabled in the webinar settings)

Important: Shortcodes are a type of web code. They must be used exactly as provided in the interface, or the system cannot read them and display the correct information.

Adding a Link

To create a link with the {LIVE_LINK} shortcode:

  1. Highlight the text you want to turn into a link
  2. Click the hyperlink icon in the editor menu
  3. In the window that pops up, you will find the text you highlighted
    • Choose the protocol <other>
    • Enter the shortcode {LIVE_LINK} in the URL field
  4. Click OK to save the link

Pre-webinar reminder timing

Set reminder timing

Define the timing for a pre-webinar reminder in the email editor. The send time is relative to the scheduled start time of the webinar (set in the Schedules step of the webinar wizard).

NOTE: If someone registers for your webinar after a notification is scheduled to be sent, the new registrant will not receive that email. For example, if an email is configured to be sent 24 hours before the webinar and someone registers 3 hours before, they will not receive that email.

Post-webinar follow-ups

Important:

  • Always add at least one post-webinar follow-up for each webinar if you want to automatically send a replay after the event.
  • Post-webinar follow-up send time is relative to the scheduled start time of the webinar, NOT the time the webinar ends.

Use a recipient filter in post-webinar follow-ups to send messages at a particular time based on each attendee’s behavior.
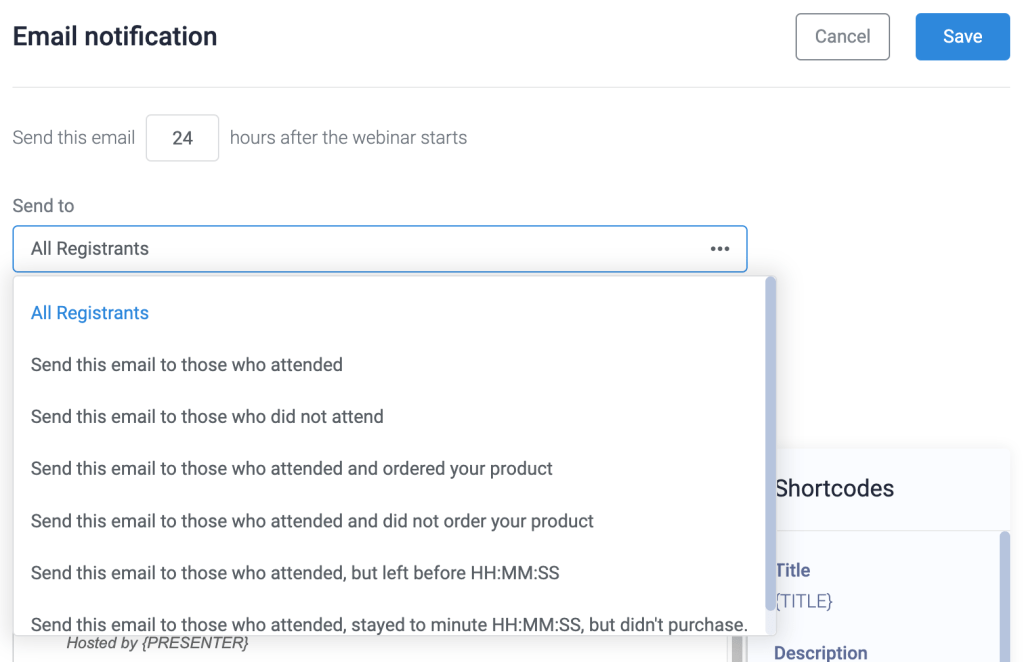
Follow-up email recipient filters

Send to:

  • All registrants
  • Those who did or did not attend
  • Those who attended and did or did not order your product
  • Those who attended but left before a particular time
  • Those who attended, stayed to a particular time, and did not purchase

Important: If you choose to send only to those who did or did not purchase your product, the sales goal tracking code must be embedded in the sales funnel. Without the tracking code, WebinarJam cannot determine who purchased a product.

Test Email

At the bottom of the email editor window, send yourself a test email to ensure the formatting and message look good in your email inbox. Test emails can only be sent to the account email address.

Note: Shortcodes do not work in test emails because there needs to be registrant data for a given shortcode to use, and a test only collects the email address. If you send yourself a test email, the shortcodes will not be replaced.

To test the shortcodes, register for your webinar as an attendee to view live versions of the email notifications. Register through the “Run a test” registration page link to keep your live event analytics clean.

Mailing through your autoresponder

This article is for WebinarJam and EverWebinar.

Send webinar notifications and reminders with an integrated autoresponder platform for additional control over email branding, styling, and scheduling. This is an alternative to using the built-in WebinarJam email builder.


Create Custom Fields

In the webinar configuration, you will need to match values from the webinar with custom fields in your autoresponder. This step is required so your autoresponder can include custom information in the emails sent for your event.

In your autoresponder, create six custom contact fields:

  • Live_Room_Link
  • Replay_Room_Link
  • Webinar_Date
  • Webinar_Time
  • User_Timezone (Required if registered time shows in User’s own time zone)
  • Room_Password (Required if the webinar room is password protected)

NOTE: Select text input as the custom field type for all values. Alternate types like drop-down, multi-select, or date-validated fields will not work.

What are custom fields?

Every autoresponder or CRM comes with standard contact data fields: first name, email address, phone number, etc.

Custom fields let you collect additional data that is specific to your market or usage. These fields are often used to personalize email marketing by injecting data into a message that is specific to an individual recipient. This is the function that your autoresponder will use to send unique details about a webinar to your registrants.

Pro tip:

If you run multiple events that are closely scheduled, consider creating unique custom fields for each event:

  • Live_Room_Link_1
  • Live_Room_Link_2
  • Replay_Room_Link_1
  • Replay_Room_Link_2

If an previous attendee registers for another webinar, the custom field values are overwritten in your autoresponder with the details from the most recent registration. If there is no overlap in the webinars’ email notification scheduling, multiple sets of custom fields are not needed.


Configure Your Webinar

To enable the integrated autoresponder or CRM:

  1. In WebinarJam
  2. Open a webinar and go to Notifications > Your Email Gateway
  3. Select Your own autoresponder
  4. All integrated autoresponders will appear below. Hover over your preferred application and click Custom Fields.

Select autoresponder in the email gateway settings

IMPORTANT: Due to limitations in their APIs, Maropost and Constant Contact are not supported for this feature.

Match Custom Fields

Match the details of your webinar to the custom fields created in your autoresponder.

Custom field matching

In the Custom fields pop-up:

  1. Click each field in the window to access a list of custom fields from your autoresponder
  2. Select the option from the drop-down that corresponds with each field value
  3. Save Custom fields and the Email Gateway module to complete the webinar setup

Custom field configuration successful

CRITICAL: Custom fields linked in a webinar configuration must remain active to work. If a field is deleted or changed, go back to the webinar configuration and update the custom fields portion of the integration.


Test the Integration

Test the autoresponder integration with an automation rule triggered by registration.

In the webinar configuration

  1. Go to Integrations > Email autoresponder integration
  2. Click the autoresponder tile to add or edit integration rules
  3. Select a trigger and action for the rule
    • Example: IF they register, THEN add to list

Autoresponder integration rules

In your autoresponder

  1. Create an email for webinar registrants that will send in response to the automation action configured at the previous step
    • Example: An email that sends when a contact is added to the list specified in the rule
  2. In the email body, use the webinar custom fields to insert information about the event (example in the following image)Kartra email builder with custom field variables

Test the registration flow

  1. Use the registration page link for the webinar to register with a valid email address
    • If all previous steps were completed correctly, this should trigger the integration rule and send you an email with the details of the webinar.
  2. Check your autoresponder:
    • Do the custom fields appear in your test contact with webinar details in them?
    • Is the contact subscribed to the list specified in your automation rule?
  3. Check your email inbox:
    • Did you receive the webinar notification?
    • Are the correct webinar details displayed?

If the details are correct in your autoresponder and the email, the setup is complete. Use the custom field variables with the webinar information to create more notifications, a replay follow-up, and any custom funnel designs that are possible in your autoresponder.

Customize notification sender details

This article is for both WebinarJam and EverWebinar.

Send notification emails before and after a webinar so registrants automatically receive reminders and a copy of the replay.

By default, notifications are sent from the webinar host’s full name and email address. When a registrant receives a notification, the message in their inbox will be “from” the host.

To edit the notification sender details:

Configuration step of the setup wizard

  1. Open a webinar and go to Configuration > Webinar presenters
  2. Click the pencil icon on the host module
  3. Update the full name and email address in the contact fields
  4. Click Save and Save again to close the module

The webinar host and presenters

Emails from the preceding example will be sent from John Smith <[email protected]>

DKIM not configured warning

A warning message appears if the Webinar Host & Presenter’s email address uses a custom domain that has not been authenticated with DKIM records in the domain settings. Learn how to authenticate your sender domains.

Do not check the box to bypass DKIM security without understanding the impact. Learn more about the DKIM missing error.

IMPORTANT: If the webinar host has a free email address (such as Gmail, Hotmail, Yahoo, etc), the sender email address is converted to [email protected]. For example, if the webinar host is Joe Smith <[email protected]>, email reminders will be sent out as Joe Smith <[email protected]>. This is done to improve deliverability and reduce the likelihood that your messages will end up in spam.

Your own SMTP gateway

This article is for WebinarJam and EverWebinar.

WebinarJam Mail is included with your subscription to deliver notifications and reminders configured for your webinars. If you prefer, integrate a third-party SMTP service to manage your mail.

Note: API-based connections are required to track email analytics such as email opens, clicks, bounces, etc.

Configure Your Webinar

To enable the integrated SMTP service:

  1. Open a webinar and go to Notifications > Your Email Gateway
  2. Select Your own SMTP gateway
  3. Save the module

Repeat this process for any additional webinars you want to update. Each time you create a new webinar, select the integrated SMTP service if preferred.

Email Send-from and Reply-to

Emails sent through the integrated SMTP will be sent from the “Sender Email” address specified in the integration connection settings. The sender address will be used as the send-from and reply-to address for all notifications.

Integration sender name

The name registrants will see as the sender for notifications is the webinar host’s full name. The host is set in the webinar configuration wizard, under Configuration > Webinar presenters.

Test the Integration

Note that WebinarJam/EverWebinar cannot check the status of your SMTP account or the validity of the API credentials provided.

To ensure the deliverability of your webinar notifications, provide a valid API key and keep the integrated SMTP account active. The WebinarJam server will send an outbound API request to your integrated provider using the API credentials provided and ask them to deliver an email notification at the appropriate time.

The WebinarJam server does not receive notice of any failure to reach your SMTP service or deliver the messages. In the event of delivery failure, the emails will not be resent, and you will not be notified. Always run a few tests to ensure your configuration is correctly set up.

Send an SMS reminder

This article is for WebinarJam and EverWebinar.

Send webinar reminders by text message or voice call with a Twilio SMS integration.


Add an SMS Reminder

Open a WebinarJam or EverWebinar event for editing:

  1. Go to Notifications > Reminder notificationsAdd SMS last minute reminder
  2. Under Last minute notification, click Add SMS
    • SMS is not available for any other reminder or notification type
    • A reminder email is configured by default. To send only an SMS reminder, delete the email.
  3. Compose the text message reminder in the pop-up window and Save

Compose an SMS reminder

Pro Tips

  • Last minute notifications are sent 15 minutes before the scheduled webinar session. The timing cannot be changed.
  • Only one SMS reminder can be configured per webinar.
  • In the message, remind your attendees to check their email for a webinar link and any last-minute instructions. Adding a link to the SMS reminder is not recommended.
  • Enter your cell phone number and click Send Test SMS to ensure that your integration is working correctly.

Learn more

Send a voice call reminder

This article is for WebinarJam and EverWebinar.

Send webinar reminders by text message or voice call with a Twilio SMS integration.

Important: Record an audio message with your reminder and upload it to the internet. To add the recording to your webinar reminders, you must be able to get a direct MP3 URL for the uploaded file.

Add a Voice Call Reminder

Open a WebinarJam or EverWebinar event for editing:

  1. Go to Notifications > Reminder notificationsAdd a voice call reminder
  2. Under Last minute notification, click Add call
    • Voice calls are not available for any other reminder or notification type
    • A reminder email is configured by default. To send only a voice call reminder, delete the email.
  3. Enter a direct URL to a hosted MP3 file with your voice reminder and Save

Add a voice recording URL

Pro Tips

  • Last minute notifications are sent 15 minutes before the scheduled webinar session. The timing cannot be changed.
  • Only one voice call reminder can be configured per webinar.
  • The audio file must be hosted on the internet and accessible via a direct MP3 URL.
  • Enter a phone number and click Test call to ensure that your integration is working correctly.

Learn more

Email DKIM warning

This article is for WebinarJam and EverWebinar.

WebinarJam Mail is the sending service for both WebinarJam and EverWebinar events. This article applies to all webinar event types.

The sender details for each notification or reminder email sent from your account reflect the name and email address of the primary host presenter for each event. These details appear in the “envelope” for your message in a recipient’s inbox so they can see who a message came from.

Take Note

  • Learn more about customizing the email sender details
  • Custom domain addresses must be authenticated to ensure deliverability and keep your messages out of the spam folder. If you use WebinarJam Mail as your sending gateway, you can start the authentication process in your WebinarJam account.
  • If you use an integrated SMTP to send your webinar notifications, start the DKIM setup in your SMTP account.

Sending domains that have not been authenticated will prompt a warning message in your webinar configuration when you save a host with a custom email domain.

Webinar host with unauthenticated sending domain
Example of an unauthenticated custom domain warning


Notifications step in the webinar wizard with a DKIM error
Example of the notifications step of a webinar setup with the DKIM warning


Authenticate Your Domains

  1. Go to the Integrations > DKIM settings in your account profile to add your sending domains and start the authentication process.
  2. Follow the Sender Authentication Checklist to complete each of the steps needed to secure and authenticate your domain. The process will take approximately 24 hours to set up, propagate, and test.

Warning: You can check the “Okay, I understand that my emails will have low deliverability” box to dismiss the DKIM warning and add your custom sender domain without authenticating it.

Doing this will significantly impact the delivery rates for your webinar notifications and reminders and may hurt your sender reputation. Bypassing authentication is not recommended.

© 2024 WebinarJam All Rights Reserved