
Install Google Tag Manager
In Google Tag Manager
Follow the instructions from Google Support documentation to create a Tag Manager account and a container for your webinar pages.
- Read: Set up and install Tag Manager (Google Support)
- Choose the container type Web and AMP
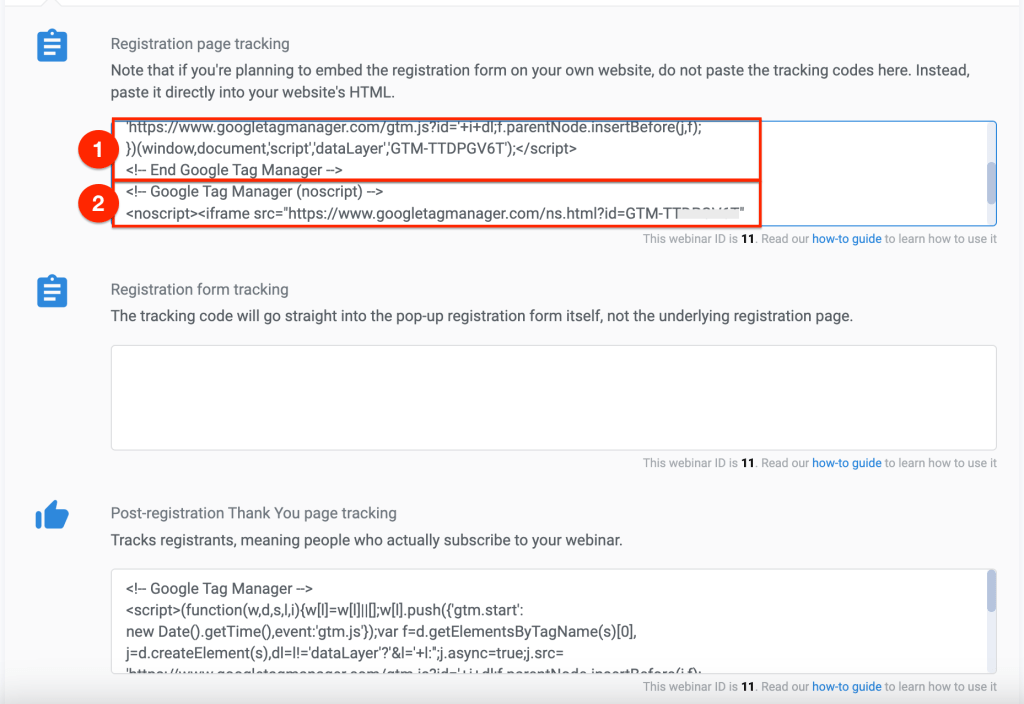
When the setup is complete, Tag Manager will provide you with two code snippets.
![]()
Resource: Learn more about Tags, Triggers, and how to install the Meta Pixel using Google Tag Manager
In WebinarJam or EverWebinar
- Find the event you want to track
- Click Edit to access the webinar configuration
- Go to the Integrations step and open the 3rd party tracking systems module
- Add both Tag Manager codes to the registration and thank you page fields
- Paste the code snippets one after the other in the same field. There is no accessible <head> or <body> section to place the codes in.
- Add the code snippets to any other fields you wish to track
Was this article helpful?
YesNo