Google & Yahoo Email Updates for 2024 – January 22, 2024
Watch the replay above to join the WebinarJam Team for an informative webinar guiding you through the upcoming changes for email services affecting WebinarJam users.
As of February 1, 2024, Google and Yahoo are implementing new rules to enhance email security and reduce spam. As a business, it will be crucial to stay informed and be prepared for these changes to ensure the seamless delivery of your client and prospect emails.
Testing a live WebinarJam event involves checking the registration process, the live room features, and your audio and video connections.
Two types of testing are recommended: a soft test and a cloned live test.
Run A Test
The Run a test tool lets you perform a soft test of your webinar configuration to make sure the setup is complete and presenters can access and understand the broadcast room.
Run a test launches a low-performance test of the webinar broadcast room and features. This method is intended to help you get familiar with how to enter the room and use the controls inside. Because it is only a test environment, WebinarJam does not allocate full database resources to run it. This mode should never be used to host a live audience, as it will result in poor streaming quality for attendees and will not provide you with analytics or engagement data.
In Webinars, click Run a test
Use the attendee or presenter links to launch the live room
Presenters will be prompted to check their audio and video settings
In the live room, check all settings you intend to use:
Browse the live room to see all the menu options and settings available.
Note: The test attendee and presenter links reset each time Run a test is launched. If you close the room and start a new test, distribute the new access links to any other users participating in the test. Links from a previous test will no longer function.
No data is saved from a test webinar. Complete a cloned test to test the chat history, poll results, attendee analytics, or replay playback.
If the soft test was successful and any necessary changes for the webinar configuration are complete, move on to a cloned test to check the full webinar experience.
Clone the Webinar
Cloning the webinar lets you run a live test of the exact event you intend to run for a live audience, with adjustments for the immediate access needed for your test.
In Webinars, Clone your event
Go to the clone and click Your Links to get presenter or attendee links for the live test
Test Registration and Emails
Check the registration page, confirmation page, survey (if configured), and notification emails.
Use the attendee registration link for your event to go to the registration page
Find the registration link in Your Links > Attendees
Review the format and messaging on the page
Register for the event using a valid email address
You will be automatically redirected to the confirmation page
Review the format and messaging on the page
If a survey is configured, open it and submit a test
Check your email to see the pre-webinar confirmation email with your unique webinar access link
Test as Presenter
Log in to the webinar room and test the video playback, messaging, configured injections, and any other controls.
Use your unique presenter link to launch the live room and complete the audio and video check
In the room, click Go Live to start the broadcast
Test all settings and controls in the room (refer to the Run a test checklist for tips)
Recommended: Interact with another person in the room as an attendee to test chat and Q&A interactions
Deploy each configured injection for attendee interaction (polls, offers, etc.)
Test the panic button
If you are using the Control Panel as a moderator, use the unique moderator link to access the Control Panel during the live test.
Test as Attendee
Log in to the webinar room and test chat, broadcast playback, and injection engagement as an attendee. If you do not have another person to collaborate on the test, you can be both the presenter and attendee yourself.
Enter the room as an attendee from a completely separate browser or private window to make sure each role has a unique access session.
When the webinar is scheduled to begin, use the access link in the confirmation email to go to the countdown page
Enter the room and click to start watching the broadcast
Enter messages in the chat to test the live chat and Q&A
Interact with all injections to see them from an attendee perspective
If an offer is configured, test the complete purchase process.
Test Replay
If a replay is enabled for the webinar, test the post-webinar follow-up email and the direct access link to the replay room.
Check your email for the post-webinar email containing a link to the replay (if enabled)
Enter messages in the chat to test the question box (if enabled)
Testing Tips
Every function of your webinar should be tested before you launch it to your prospects. This article covers many scenarios, but it is recommended that you create your own custom testing checklist to ensure that every aspect of the setup works exactly as designed.
For example:
If you have Zapier automation configured for your webinar, test every trigger event for your Zaps.
If you are using a custom SMTP or autoresponder and automation rules, test all related scenarios to ensure your automation rules fire correctly and email notifications contain the correct information.
If you are using one-click registration, test the sign-up flow by registering through an email sent from your auto-responder.
If a product offer is configured to appear in the webinar, test the purchase flow and successful sales goal tracking
Check the event analytics after your test to see how your activity as an attendee was recorded
The ultimate goal of testing is to make sure that everyone engaging with your content has an excellent experience. Put on your customer glasses and take a close look at every detail!
Check Your Plan: The Control Panel is available in EverWebinar and with WebinarJamEnterprise plans.
WebinarJam Control Panel
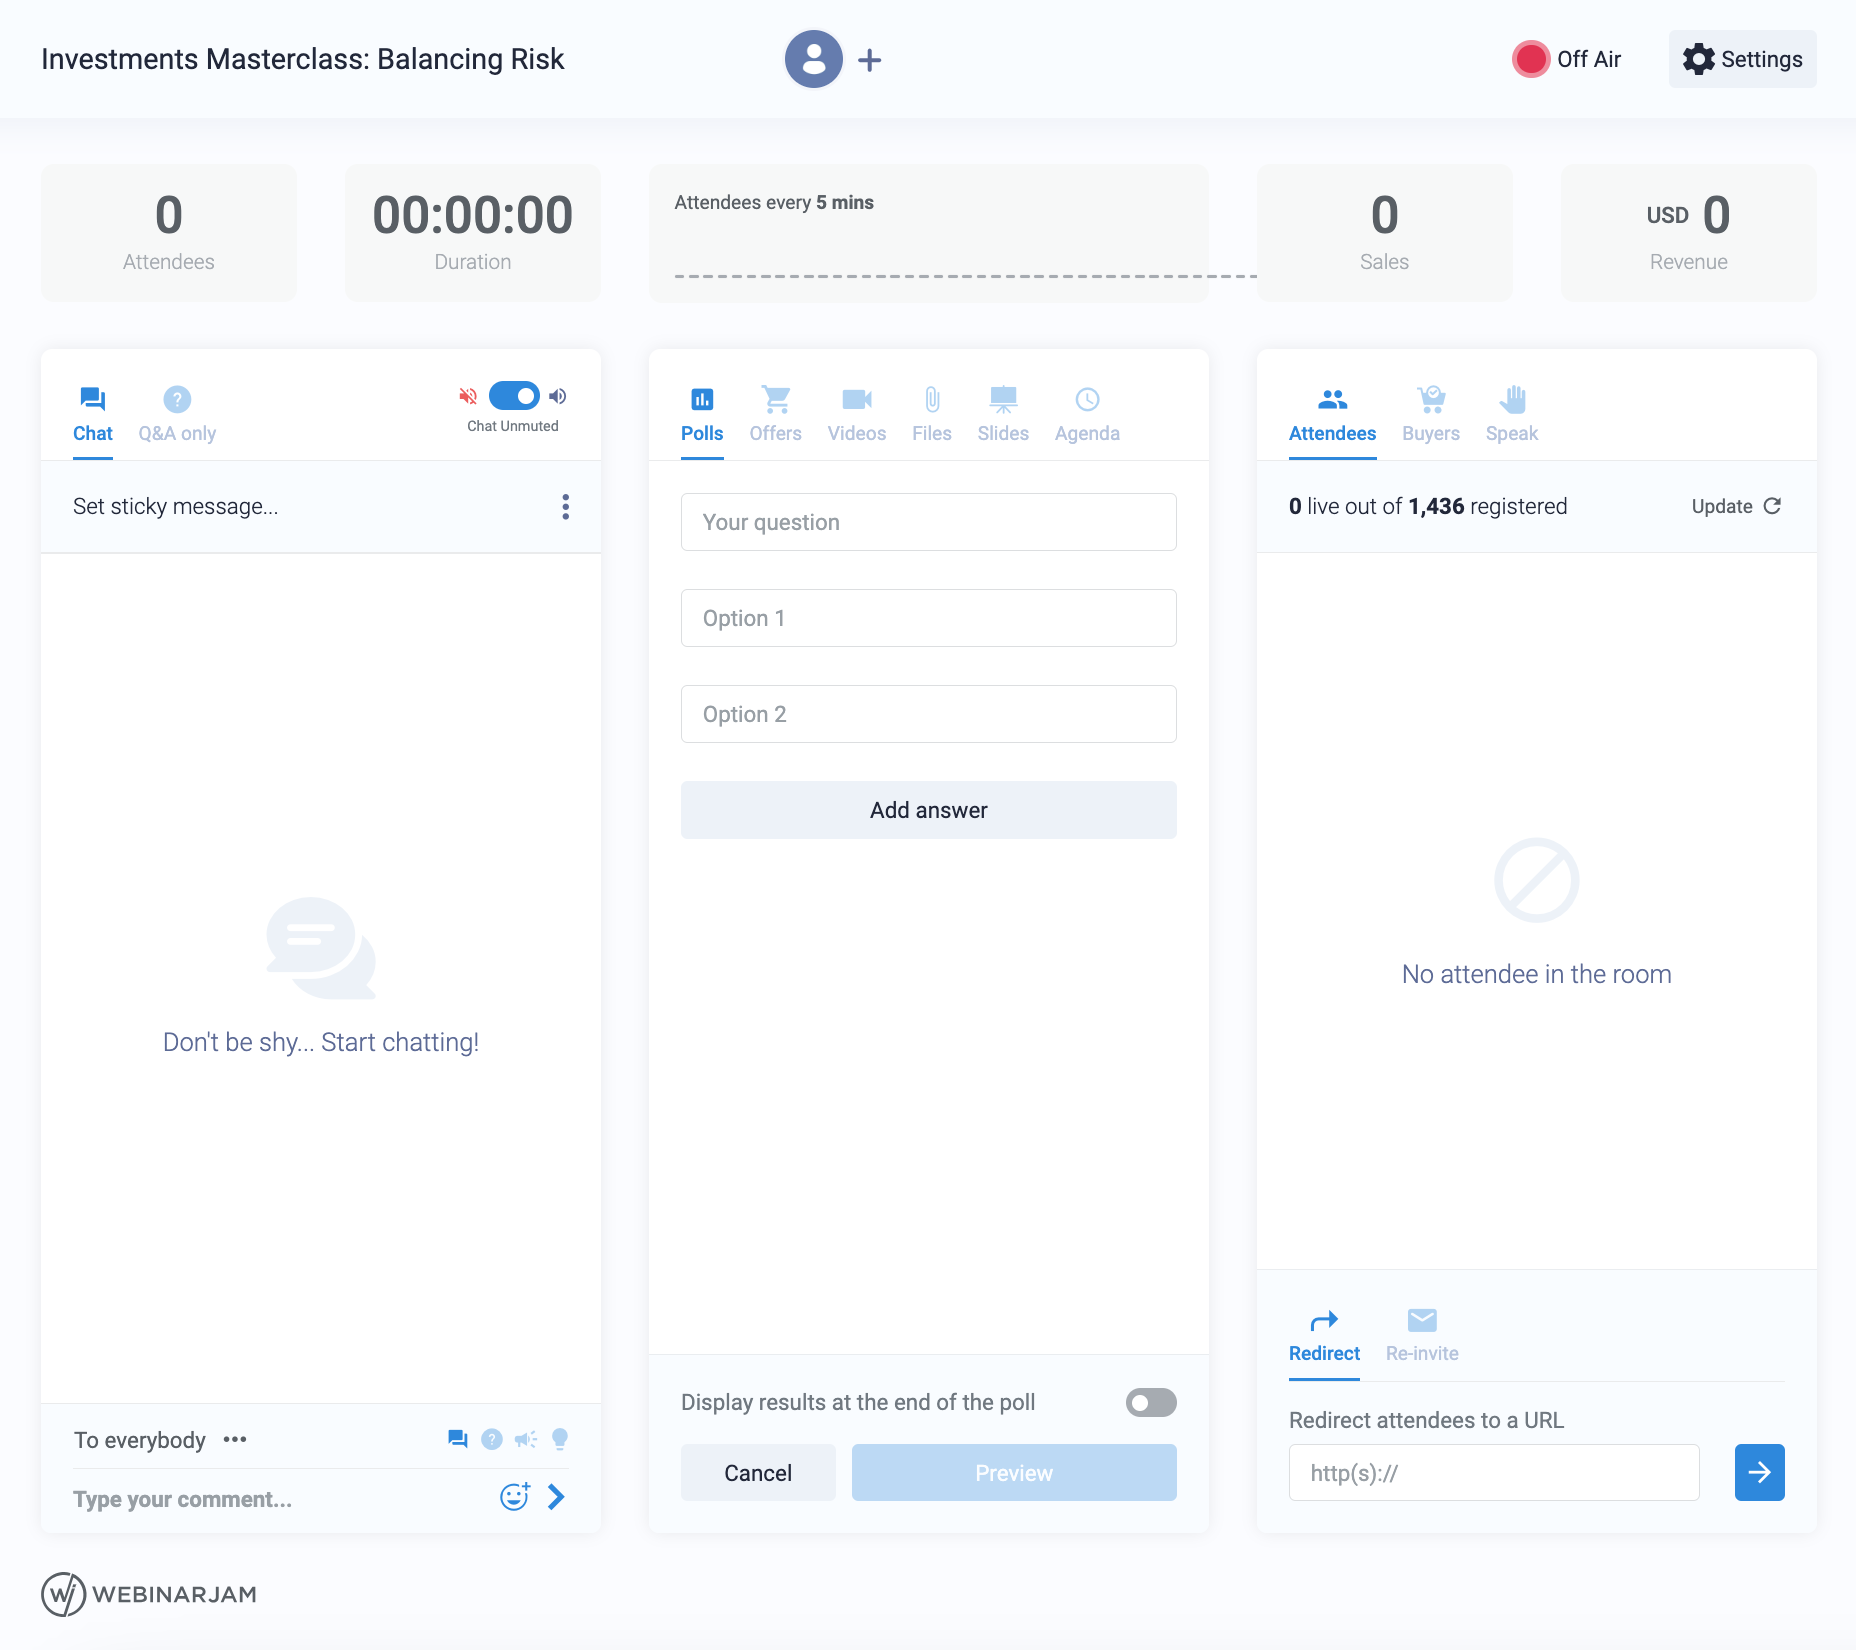
The Control Panel is the center of operations for your moderators in a live event. The dashboard contains all the information and controls available in the live room but in a format designed for easier viewing and management.
Chat Control
The first of the three panels shows the live chat feed. From the first tab (Chat) you can chat with attendees, and edit/delete their messages if needed. The second tab (Q&A only) shows only the messages marked as questions. A response there will be marked as an Answer.
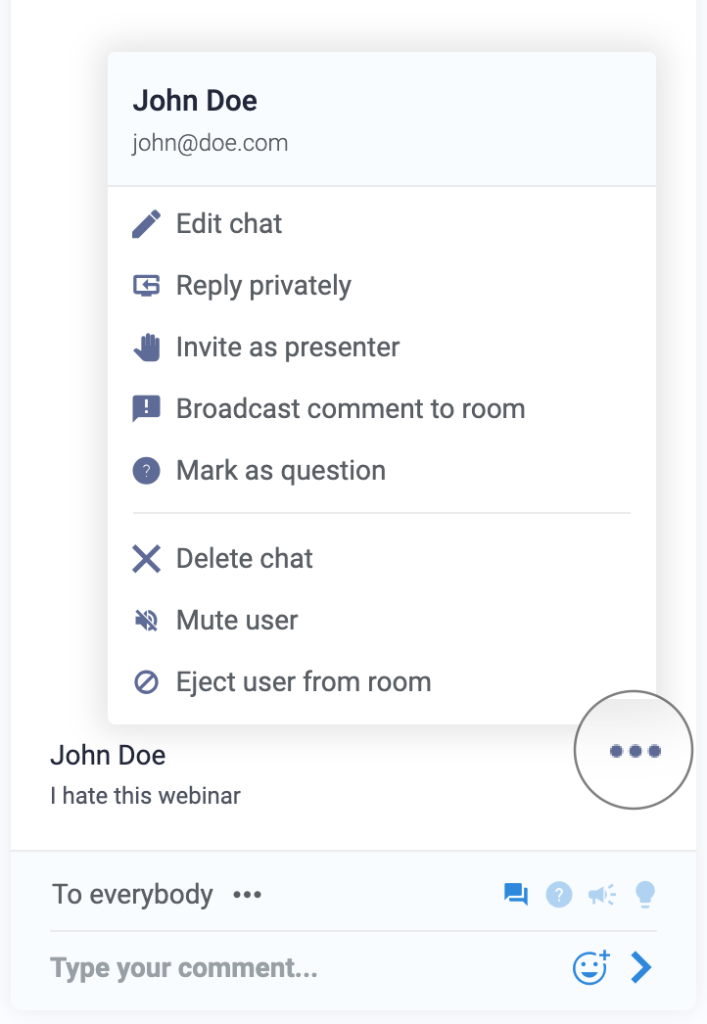
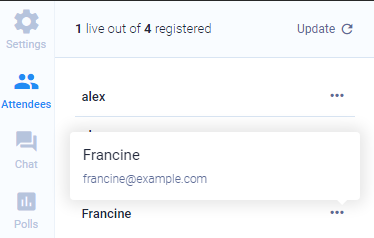
Click the three dots next to a message to see a user’s name, email, and management options:
Edit their comment
Reply to them in private
Invite them to join the live room as a presenter
Broadcast their comment to everyone
Mark the comment as a Question
Delete their comment
Mute user (click again to unmute)
Eject user from room (ban)
Mute vs Eject
Ejecting a user from the room immediately removes them and blocks them from entering again from the same browser session. If the user comes back through a different device or browser, eject them again or Mute them to prevent them from adding messages to the chat.
Muting a user prevents any messages they enter in the chat from appearing to the rest of the attendees in the room. The muted user can continue to send messages and will not see any indication that they have been muted, but the messages will not be displayed in the room.
Live Injections
The next panel contains live injections like polls, offers, videos, files, and slides. Preconfigured live injections can be deployed or used here, or new ones can be created during the live webinar.
Attendee Control
The final panel shows current attendees. The tabs on top filter the lists into all Attendees, only those who purchased, and only those requesting to speak live as a presenter.
At the bottom of the panel, you can redirect all attendees to a URL of your choice and resend email notifications to registrants.
Room Statistics
The top bar in white (shown below) displays, from left to right:
The current number of attendees
How long the webinar has been live
How many attendees have been in the room for each 5 minutes (shown as a graph)
The current attendees compared to the peak number of attendees
The number of sales made
The total revenue earned
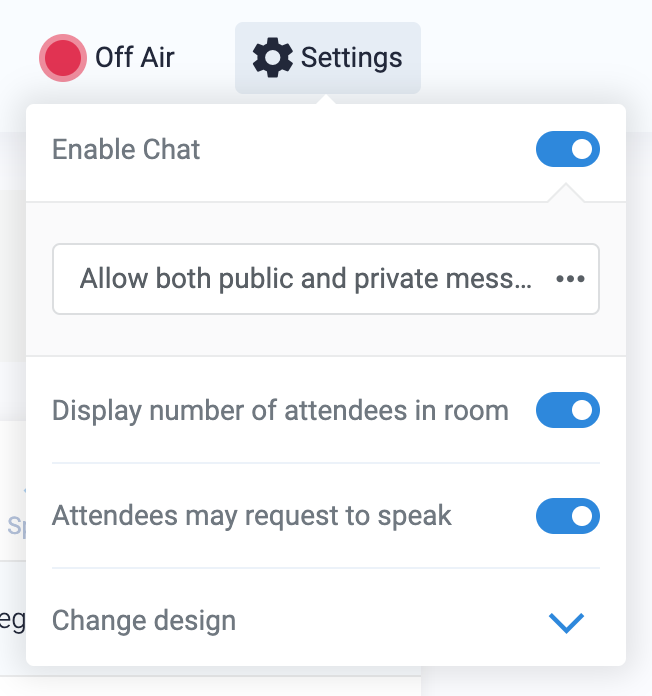
Event Status and Settings
In the upper right of the Control Panel are two icons. One shows if you are on or off the air (live streaming or not), while the other is for additional settings. Clicking that icon, you can:
Restrict chat messages to public, private, or both
Display or hide the number of attendees
Allow or block attendees from requesting to speak live
Change the design of the live room
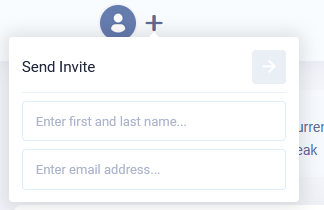
Add New Presenter
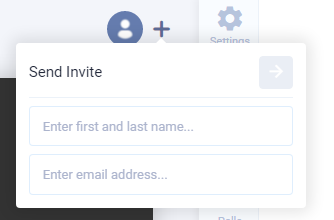
Presenters in the room are shown at the top of the screen as avatar images. Click the + icon to add a new presenter with their name and email. An email invite is sent to the new presenter with a unique access link to join the live room.
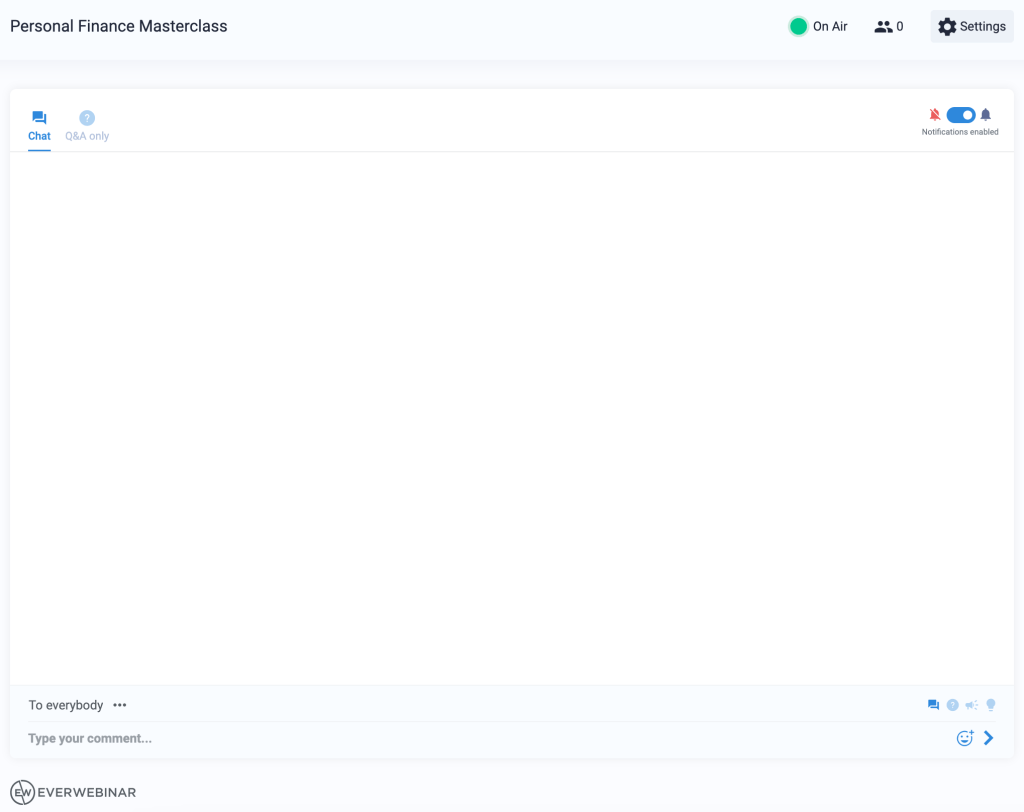
EverWebinar Control Panel
Because automated events are fully pre-configured, chat is the only moderation tool in the EverWebinar control panel.
Attendee chat messages appear only to themselves and webinar moderators (in the attendee’s unique access session)
Moderator chat messages appear to any attendee currently watching the webinar (in any session)
Since each attendee is in their own room (separate from anyone else watching), they will not see the chat from other attendees. However, if a moderator chats in the lower field, that message will appear to anyone watching.
To prevent confusion, it is best to reply privately to any chat message as an EverWebinar moderator.
Use your unique presenter link to access the live room.
Important: You can launch the live room early to make sure everything is prepared. The live broadcast will not begin until the host clicks the “Go Live” button inside the room. The room will stay off air for up to 60 minutes.
Last-minute Checklist
Follow the last-minute checklist to make sure you are ready for a successful webinar:
Free up resources: Close all computer functions with a high resource load, such as applications and browser tabs.
Wear headphones: Minimize audio feedback between your speakers and your microphone to make sure your attendees can hear you.
Dedicate your internet connection: Make sure your internet connection is committed to your webinar. Another person streaming media or video games on the same connection can reduce the quality of your broadcast.
Avoid distractions: Mute your phone, turn off notifications on your computer, and close your door!
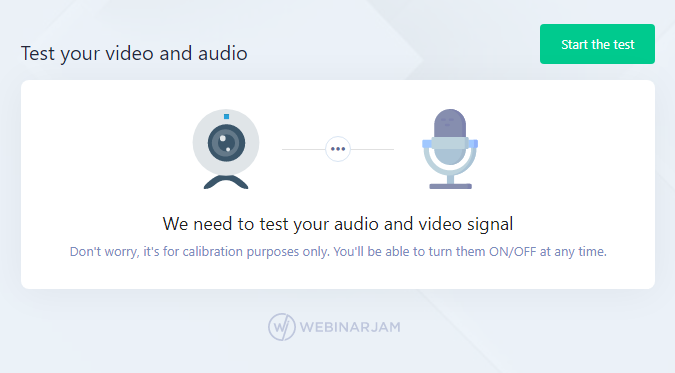
Test Your Video and Audio
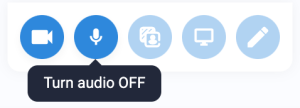
You will be prompted to start an audio and video test to check your settings. You can turn your camera and microphone ON or OFF at any time in the webinar room.
Click Start The Test to begin.
Important: Your browser may ask you to authorize your camera and microphone. Allow access to continue. (Required)
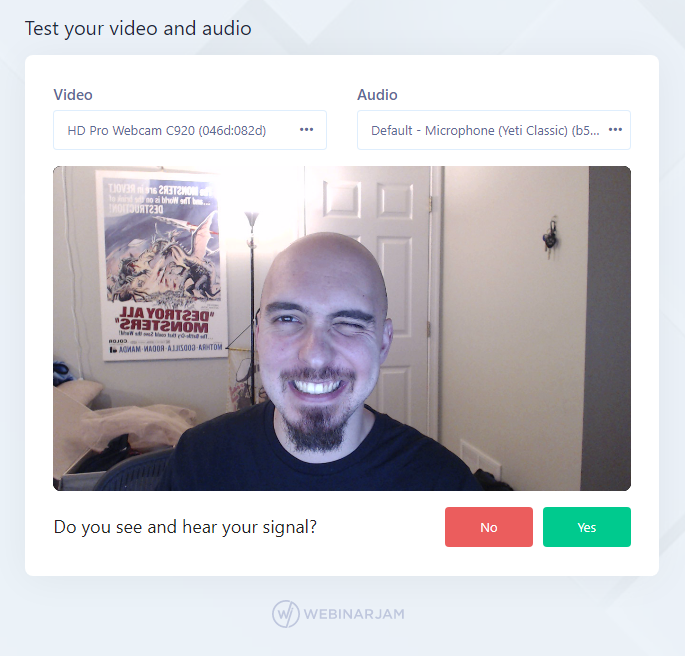
WebinarJam will auto-detect your camera and microphone. Use the drop-down menus to change the device selection if needed.
If the video feed shows your webcam and you can hear sound, click yes to confirm that everything is working.
If you do not see or hear yourself, click no and the system will attempt the test again again.
If the test is not working, click the camera icon in your browser’s address bar. The drop-down menu will show you whether the camera and microphone are blocked in your browser, or if the wrong camera or microphone is being used.
If you do not hear any sound, check the volume control on your computer and headset.
Reload the page if you change any of these settings.
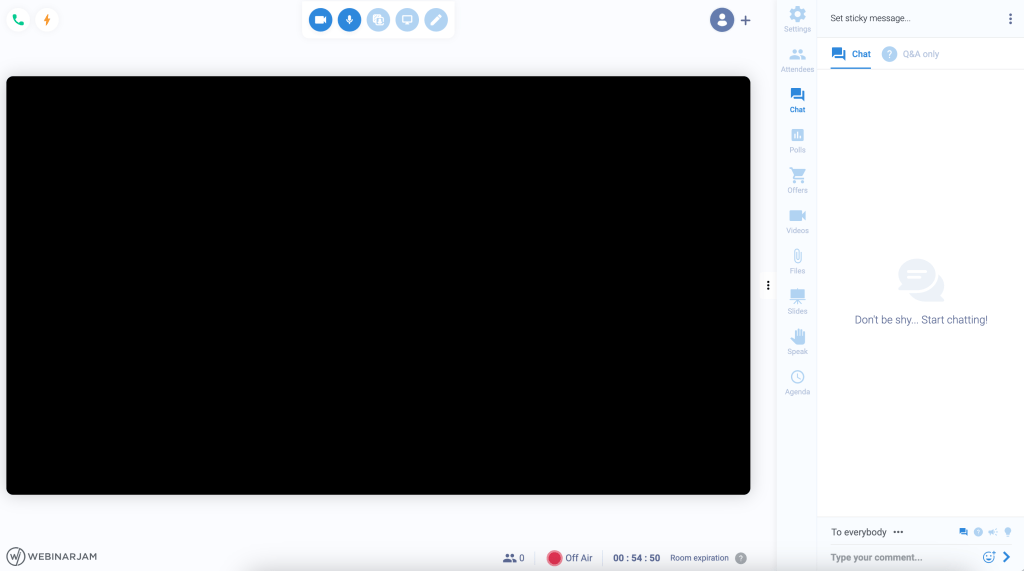
In the Live Room
Presenter view of the WebinarJam live room
When you enter the room, your camera and microphone are ON by default. The options to turn these OFF are at the top of the page next to the screensharing feature, and whiteboard tool.
The live room is offline when launched. This lets you test and set up the room before going live.
The “Off Air” indicator at the bottom of the live room shows that the broadcast has not started. The light turns green when the live broadcast begins.
Note: The room shows a 60-minute timer before you go live. This is to give you time to prepare for the broadcast and does not count toward the live session duration. When you go live, the timer at the bottom of the screen updates to show the maximum webinar duration included with your WebinarJam subscription tier.
Presenter Video Feed
The live room generates a unique panel for each presenter that shows their video feed or profile image, their name, and individual audio and video controls (lower left corner of the panel).
In the upper left of the presenter feed is a star icon indicating the presenter’s permissions. Hover over each presenter’s feed to see it.
Dark blue star: Webinar host (all access admin)
Light blue star: Co-presenters (access to speak, chat, and use live injections)
If you are an administrator, click the light blue star to promote a co-presenter to an administrator.
In the bottom left of the presenter feed are video, audio, and screen share buttons for each presenter.
Go Live and Panic Button
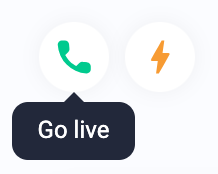
Click the Go Live button in the top left corner to start the webinar broadcast.
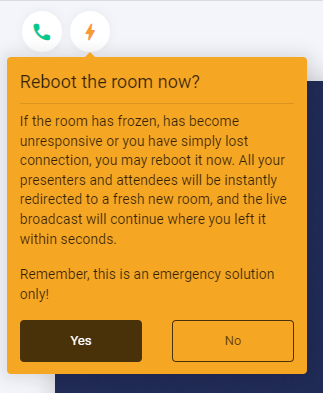
If the live broadcast stops working, click the lightning bolt icon (Panic Button) to reboot the room in an emergency.
Additional Presenters
At the top of the window, invite additional presenters by clicking the plus icon and entering their name and email. The presenter will be emailed a unique link to enter the webinar (your link will not work for them).
Minimize Sidebar
Minimize the sidebar by clicking the three dots tab on the side of the panel.
Room Expiration
A 60-minute timer appears in the lower portion of the frame showing how long the room will stay active while you are Off Air. If you do not go live in one hour, the room will expire. Click the button on the expiration screen to immediately reload the room or visit the live room link again.
Customize the Live Room
Virtual Background & Blur
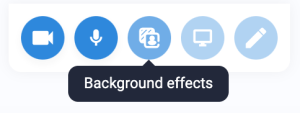
Change the background effect or image by clicking the center button in the menu at the top of the room.
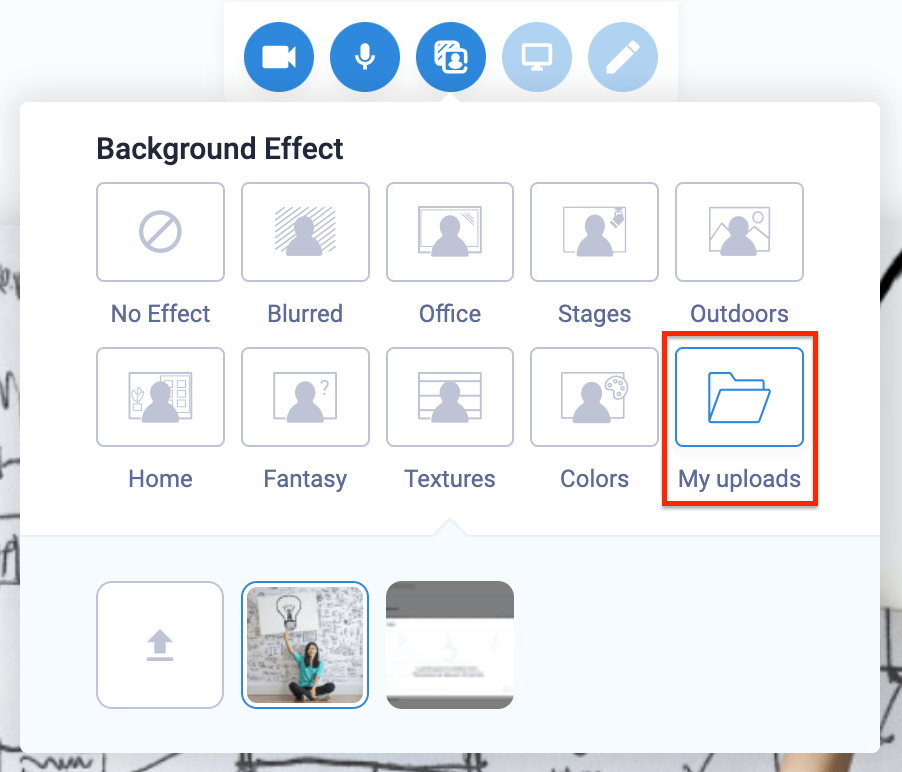
Select a preset or click My uploads to add a custom background. Background effects and images appear “behind” the presenter with a green screen effect.
Supported files: JPG, PNG, up to 4MB.
Live Room Settings
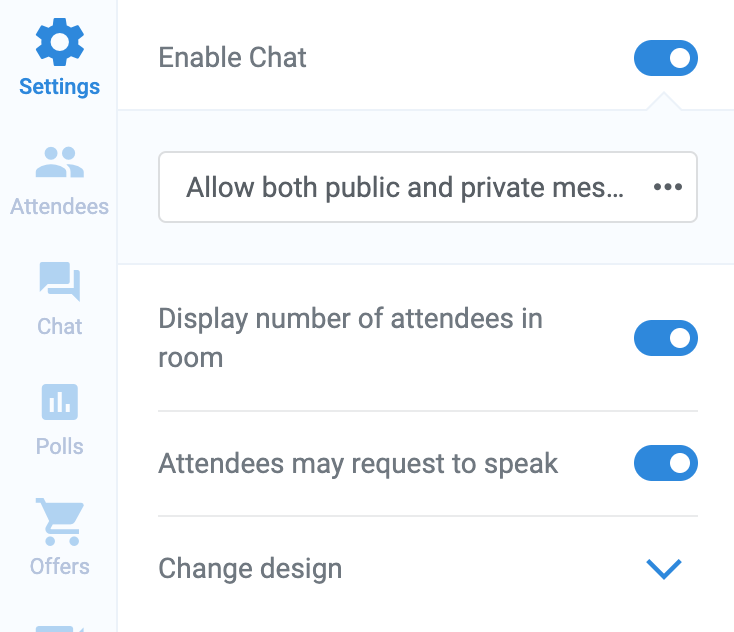
In the sidebar, configure the live room Settings.
Disable or enable chat
Allow public or private chat messaging or both
Show or hide the number of attendees in the room (this appears for everyone, presenters AND attendees)
Disable or enable the attendee Request to Speak feature
Change the design of the live room
Manage the Room: Attendees & Chat
Attendee Redirect
The Attendees tab in the sidebar displays a list of all attendees in the live room.
Redirect attendees to a URL of your choice by entering a web address in the URL field and clicking the arrow icon.
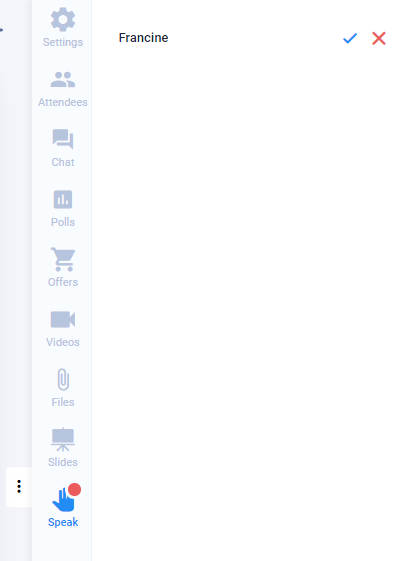
Attendees Speak
If you enable attendees’ ability to speak, you will find their requests in the bottom tab (shown below, labeled “Speak”) where you can accept or deny the request. If you accept, they will be brought in as presenters with video!
Chat
The chat tab contains the message feed from the webinar.
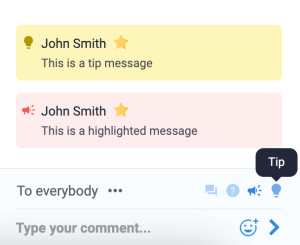
In the chat:
Send messages to the public room and join the conversation
Send highlighted messages (red in-line callout)
Send tip messages (yellow in-line callout)
Post sticky messages that remain on the screen
Chat privately with administrators
Chat privately with individual attendees
Presenters are identified in the chat by a star next to their name
Change the chat mode into Q&A mode and attendee messages will be marked as questions while your messages will be Answers. You can change any message by clicking the bubble next to a message.
Manage the Room: Injections
Deploy and use the injections configured at the Live step of the webinar configuration wizard.
All presenters can access and use the live injections. Deploy pre-configured content to the live room or create new injections as needed during the live webinar.
Important: Live content created inside the webinar room is not saved for future sessions if the webinar has a multi-event schedule. Injections created during the broadcast are unique to that session. Pre-configuring live content is recommended.
Click the tabs in the sidebar to access each type:
Polls
Offers
Video
Slide Presentations
Agenda and notes
Click Preview to save a new injection. Click Publish to deploy it to the webinar room.
Add video injections into a webinar to cut seamlessly from the presenters speaking to pre-recorded video playback. This is useful for inserting short video clips or to create a “hybrid” webinar experience.
Hybrid webinars combine a pre-recorded presentation with a live segment such as a custom introduction or a Q&A session at the end.
Go to the Live step of the webinar configuration:
Open Video injections and click Add new video
Add a name for your reference (you will see this in the live room)
Add the video source URL
Save the video injection window and click Confirm to continue the webinar setup
Saved video injections are available to deploy inside the live webinar room.
Note: Compatible video sources are hosted MP4 files, YouTube, or Vimeo. Hosts like Wistia or Dropbox that do not provide an MP4 file link will not work for this function.
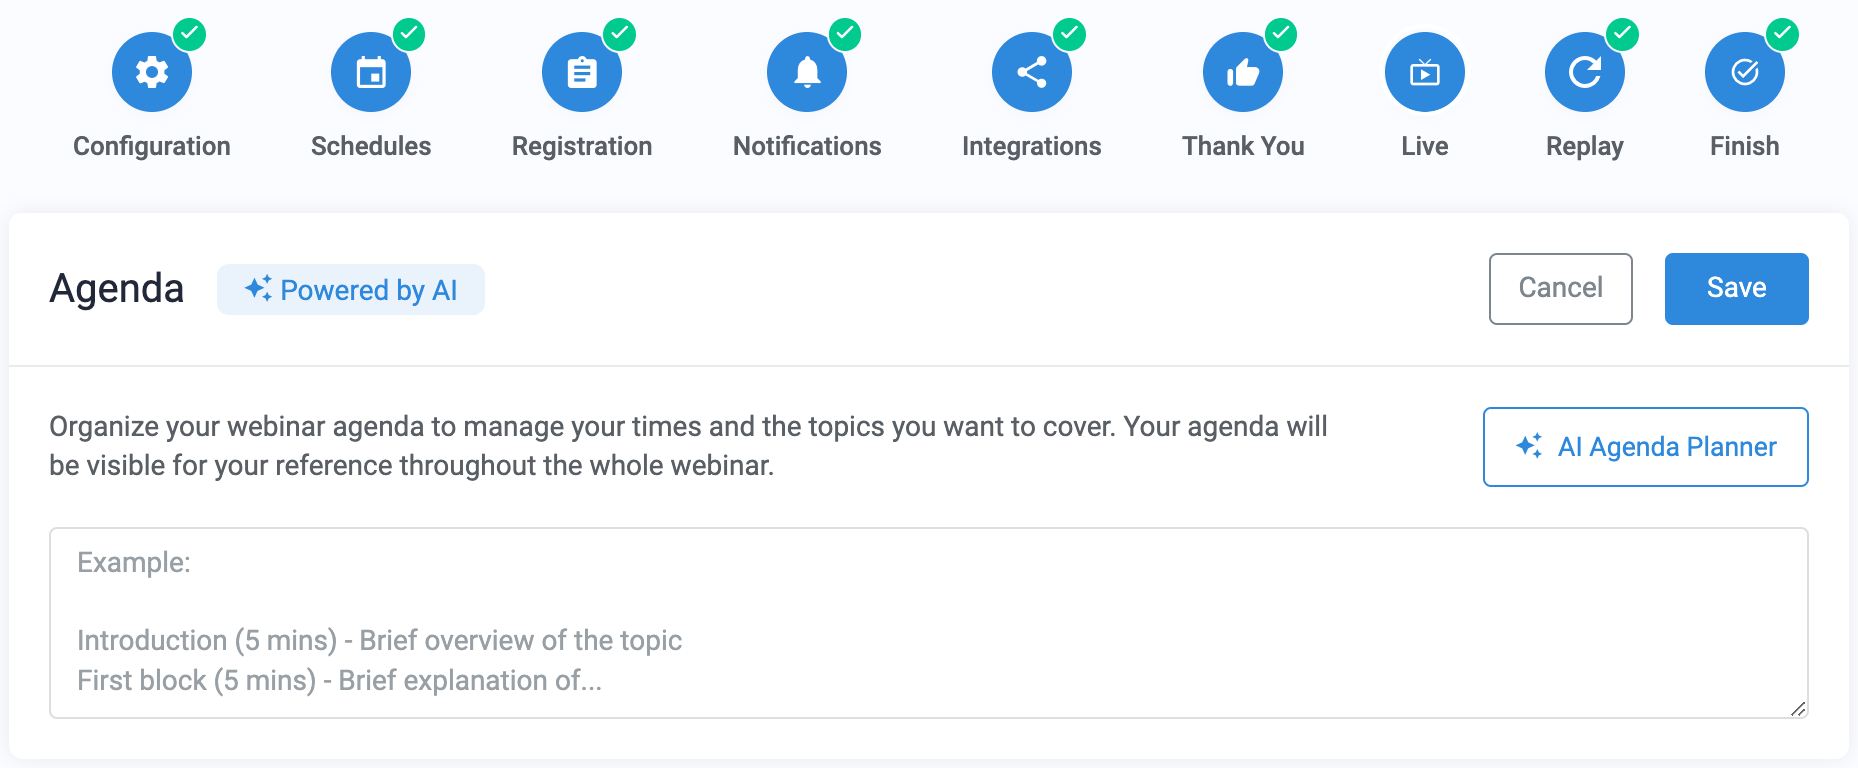
Keep your presentation organized and delivered on time with an agenda. Add a pre-written outline to the agenda module or use the AI Agenda Planner to generated one with AI. The agenda is visible to view and edit during the live event.
In the webinar configuration wizard, go to Live > Agenda
To create an AI-generated agenda:
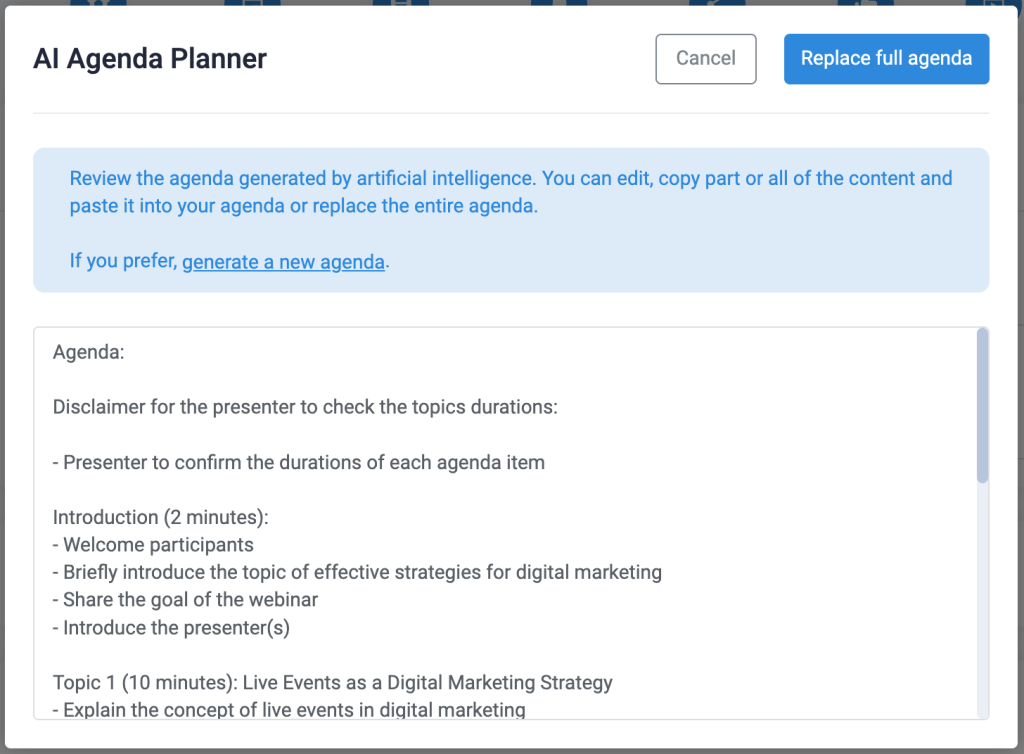
Click AI Agenda Planner to launch the AI creation tool
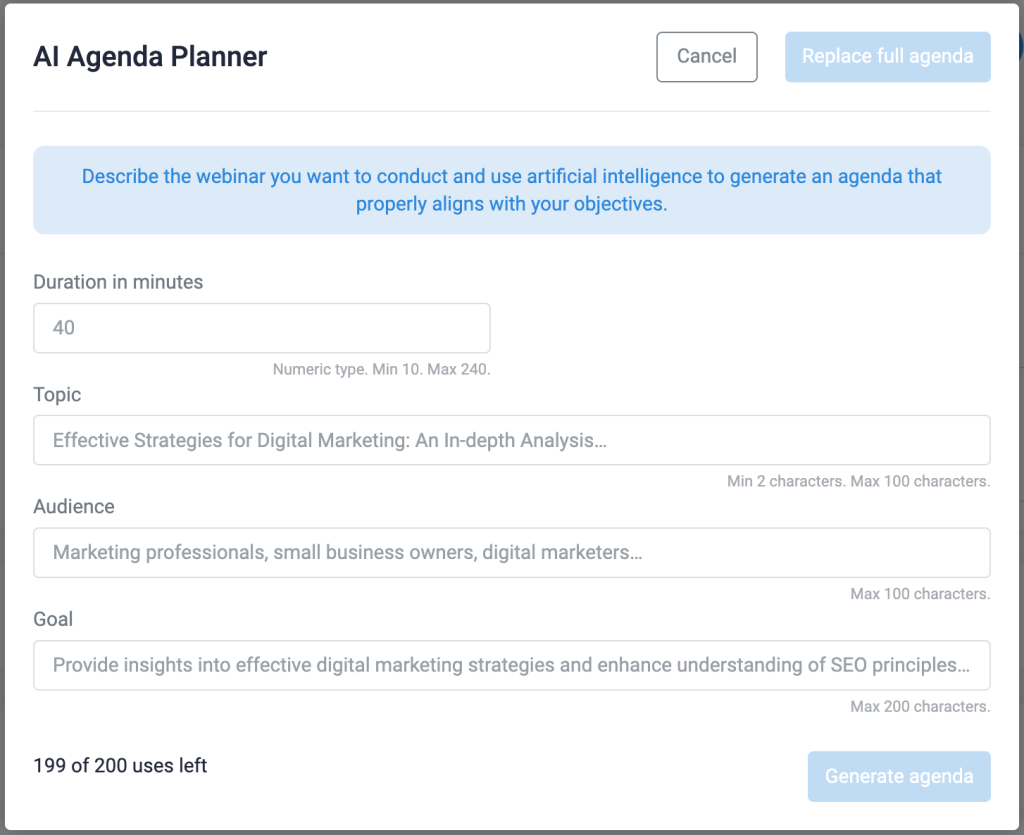
Add details about your webinar to the planner, defining the duration, topic, audience, and goal. Be specific! The AI uses the content in these fields as prompts to create your agenda, so add as much detail as you can.
Click Generate agenda
Wait for the AI to process your agenda and then it’s ready to review and edit! You will receive an outline broken down into sections that include an introduction, main points, a Q&A, and a conclusion, each with a suggested duration to fill the total time of your event.
Click Replace full agenda to save the content and close the AI Agenda Planner
Note: This will overwrite any content already saved in the Agenda module of the setup wizard
To start over with new prompts, click generate a new agenda in the tooltip instead
Save the Agenda module and complete the webinar setup wizard
Pro Tips
AI Agenda Planner will generate an agenda in the language selected under Configuration > Basic settings in the setup wizard.
Check the time estimates in the agenda and adjust them as needed to make sure they match the amount of time you want to spend on each section and overall.
Your agenda will appear in the Live Room and inthe Control Panel of your webinar and is visible to all presenters and moderators.
Add notes or edit the agenda during the event to adjust your plan.
If you don’t want to use the AI Agenda Planner, you can manually add an agenda or outline instead. Copy and paste the contents of your agenda into the text field in the Agenda module and save to add it to your webinar resources.
AI Best Practices
To get the best results out of any AI tool, keep a few things in mind:
Be specific about the topic you want the AI to address. This keeps the topic focused and helps prevent vague results. Instead of a generic prompt like, “Talk about personal coaching,” be specific. For example, “Explain three ways that personal coaching benefits small business owners” or “Provide tips for optimizing paid ad campaigns.”
Avoid entering private or personal details into an AI tool that you wouldn’t post publicly online. All AI engines “learn” from the queries they receive, which means that your entries may be stored by the tool.
AI content can be wrong. Always review and fact-check the content generated by an AI tool, especially when the facts are critical to your presentation or field of knowledge.
WebinarJam gives you the power of full-featured live events to nurture your audience, sell products and services, and grow your brand.
Get started fast with express or full configuration options and three unique broadcast options:
Right Now to set up and immediately launch a one-time live broadcast
Schedule for Later to plan a future event and registration funnel
Always On to create a room that is live and ready for multiple uses whenever you need it
Use WebinarJam when: You want a live, interactive connection with the audience. Live events are best for webinars where you anticipate high audience participation, those that end with a live Q&A, or if you want to promote audience members to join you as on-camera presenters.
Content Pre-check
Prepare your content before starting the webinar setup to streamline the process! You can also add these details later.
✓ Names and email addresses for all presenters (Required) ✓ Headshots or other profile images for presenters (Optional) ✓ Webinar topic and target audience for your agenda (Optional) ✓ Details of any product offer (Optional) ✓ Elements of a poll or quiz to display (Optional) ✓ Optimized slide deck to present (Optional) ✓ Optimized handouts to share (Optional) ✓ Optimized video clips (Optional)
1. Create a Webinar
Launch the WebinarJam app in your account:
Go to Webinars and click + Add webinar
Choose the preferred schedule and complete each step of the configuration wizard
Pro tip: To automatically send a replay to all registrants after the webinar, configure a Post webinar notification at the Notifications step of the wizard.
Test your event to ensure every element is in place, the host is familiar with the live room interface, and there are no unwanted surprises when it’s time to go live with a room full of attendees.
Recommended testing
Soft test:
Click Run a test for any configured event to test audio and video settings and get familiar with the WebinarJam live room.
Test audio and video
Test live room functions and the live elements added in the configuration
Tests do not capture analytics, chat history, or replay recordings
Important: “Run a test” should not be used to host a live event.
Clone test:
Clone the configured event, bring in some attendees and/or another presenter to help you test, and run the event live. Click Your links to copy links to the live room.
Test audio and video
Test live room functions and the live elements added in the configuration
Test broadcast streaming with standard server resource allocation
Test email notifications and reminders
Capture analytics, chat history, and a replay recording
Your event is configured, your presenters are ready, and you have a full list of excited registrants–it’s time to go live!
Pre-launch Checklist
✓ The webinar is fully configured with all live elements loaded ✓ Testing is complete ✓ All presenters have their own unique link to access the webinar room ✓ All moderators have their own unique link to access the Control Panel ✓ The webinar host has a hardwired internet connection (Recommended)
Start the Webinar
Log in to the live room using your Presenter access link
Complete the audio and video test (approximately 5 minutes)
When you are ready, click the phone icon in the top left corner of the live room to start the broadcast
Important: Allow the duration of the webinar for replay processing. For example, the replay for a two-hour webinar will be available approximately two hours after the host ends the broadcast.
Chat download, poll results, survey results, and pending questions in the replay room